
One Year EKKO Review

We have now owned Red Tail, our Winnebago EKKO, for one year. Seven and a half consecutive months of that year have been spent traveling and living in it. It is a good time to review what went well and what didn’t go so well. We’ll cover not only the EKKO itself, but also our mods, our organization, and the new gear we brought along with us this season. In other words, this is a review of our whole rig setup and how we live in it.
This is an in depth review, so we’ve organized it into the different areas of our RV. If you’re only interested in a particular area, feel free to just jump to that section.
Part 7: Heating and Air Conditioning
Our corresponding videos are split up into three. The first video covers mostly the interior items (Parts 1 through 6); Entry Door Front Cab Area, Dinette Area, Kitchen, Bathroom, and Bedroom (One Year EKKO Review: Interior). The second video covers mostly the exterior items (Parts 7 through 11): Hating and Air Conditioning, Outdoor Kitchen, Gear Garage, Roof, and Awning (One Year EKKO Review: Exterior). The third video covers mostly systems (Parts 12 through 16): Propane, Water Systems, Electrical Systems, Drivability, and Overall Impressions (One Year EKKO Review: Systems).
Part 1: Entry Door
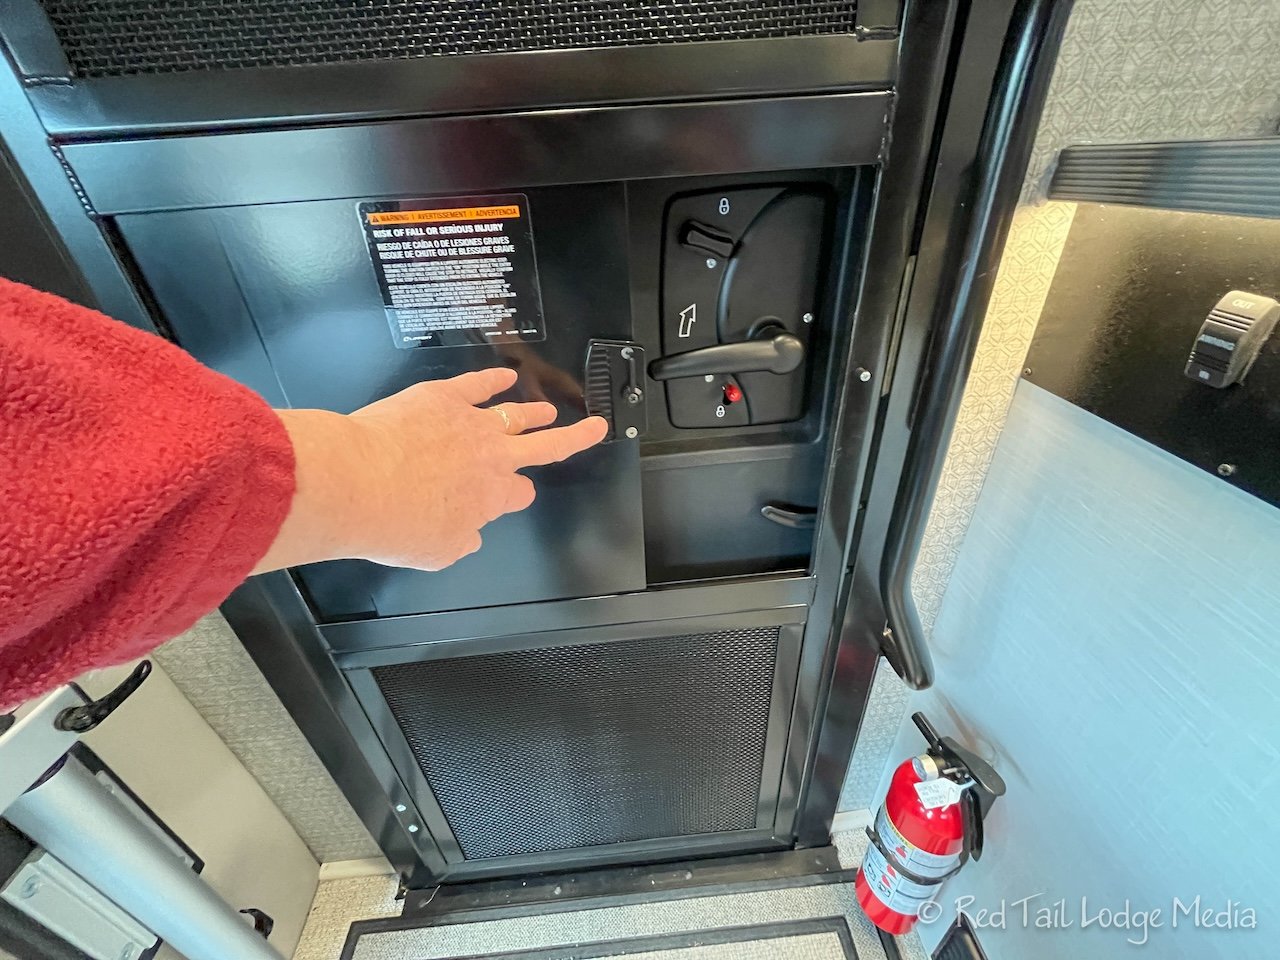
Coming from a camper van, the entry door on the EKKO has always baffled us, but we are dealing with it. It is our understanding that this is a typical RV door. We’re sure there were reasons for the clunky design, but we don’t know what they are. We can understand why both the screen door and the exterior door swing open to the outside, as you wouldn’t want the screen to swing to the inside, requiring the space to be clear. But why you want a little slider opening to reach the screen door latch on the outside is beyond us.

To make it a little easier, we’ve installed the Camco RV Screen Door Opener (paid link), so we can operate the latch from the inside. The opener is rather simple, basically a stick the goes through a hole in the door. The opener is great for opening the screen door, but not so great for closing the screen door.

We later added a simple handle to the inside of the screen door to make it easier to pull closed.

When the weather is nice outside, we leave the exterior door open and just close the screen door, allowing for wonderful ventilation and for ease of entering and exiting the RV. Neither the opener nor the handle help a whole lot when we have the exterior door closed. In that scenario, we leave the little slider open, so we can grab both the screen door and the exterior door latches at the same time. It takes two hands to open both doors simultaneously.

A strong magnet keeps the two doors together if you release both door handles at the same time. Be careful to not grab the screen door on the outside where the magnet is. The strong magnet pinched Ann’s finger as it snapped the doors together, giving her a blood blister. Surely someone can come up with a better design.

There are also three locks and three different keys on the doors. One lock is on the screen door. The other two are on the exterior door, one for the deadbolt and one to lock the door handle. Needless to say, we only use one of the locks when we leave the RV so we only have to carry one key.
Part 2: Front Cab Area

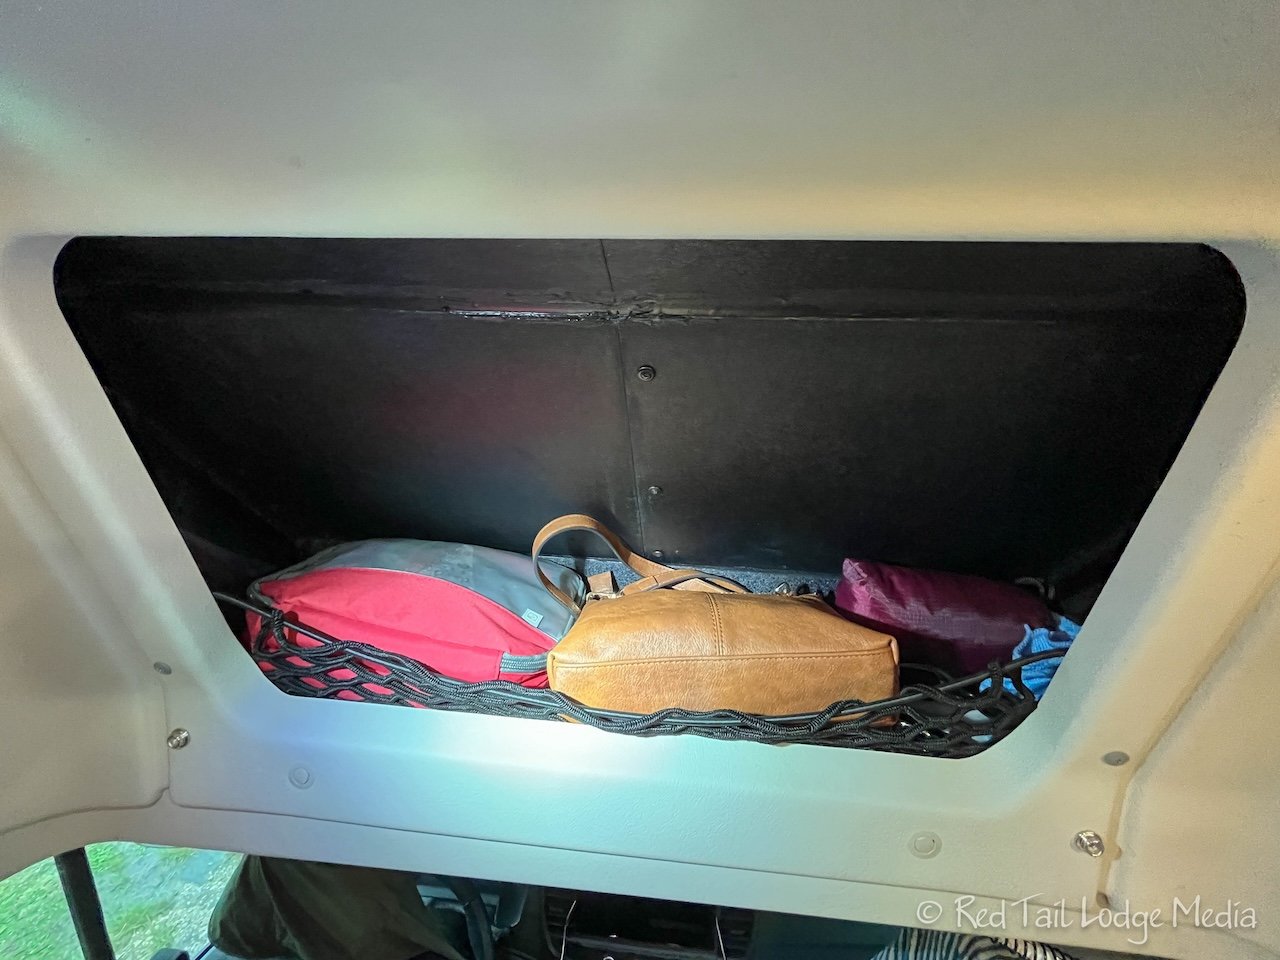
Our favorite part of the cab area is that we can reach some of the items in the overhead cubbies from the front seats, but we have long arms. However, there is a rattle somewhere in the center cubby, which we created when we removed the TV. It doesn’t bother Ann as much as Keith. Keith already added this to his list of things to investigate over the winter.

Another drawback to the cubbies, it that it can get very hot, especially when Red Tail is parked in the sun. It was especially true this year as we were traveling in the southern states during record high temperatures. Unfortunately, we chose to use the passenger side cubby to store electronics, like our camera gear. We moved our Verizon hotspot out of the cubby, mounting it just outside the cubby in order to keep it cooler.

After we lost two GoPro batteries (they started to swell), we kept most of our camera gear either on the floor between the front seats while traveling or on the dinette table when parked. However, we still developed issues with the Powershot camera, the backup Powershot camera, and the external microphone. We’re not sure if it was due to the heat exposure or we got sand or dirt in the gear. As a result, we replaced the camera and microphone when we returned home.

The right cubby is also where we have the WeBoost cell amplifier along with its antenna. When we turn it on, it gets very hot due to the lack of air flow. To counteract that, we purchased a small DC fan (paid link) that we clipped to the shelf to blow air directly onto the WeBoost. This seems to keep it cool.
We initially stored our bag of extra cables in the center front cubby, with our first aid kit stored in the storage boxes between our beds in the back. However, it didn’t take us long to realize it would be better to swap these two. Even though we probably didn’t use one more often than the other, we decided it was good to have the first aid kit more readily accessible.

At the beginning of the season, we removed the rear view mirror. It didn’t really serve much of a function since we couldn’t see out the back. We found the mirror to be a distraction when it caught some light while we were driving. However, so many places, like campgrounds and parks, give you hang tags to attach to your mirror, which we didn’t have. Not a big deal, we just laid the tag on our dash. The other issue was that we purchased the VanMade Gear (unpaid link) front shade with the hole for the rear view mirror. So now the shade doesn’t provide as much protection from the sun nor provide complete privacy.

During the day, when we want shade or privacy in the cab, we put up the VanMade Gear shades. At night, we put up the insulated curtain between the cab and the living space. Every morning, we would take the curtain back down, but leave the shades up. That allowed us to use the front seats as part of our living space during the day. We found that there was no need to use the snaps along the sides of the insulated curtain, the snaps at the top were sufficient.

When setting up at camp, we always turned the passenger seat around and set up the Lagun table. We left the arm of the Lagun table attached to the table top to make it easier to set up and take down, storing it behind the dinette bench seat.

We didn’t always turn around the driver’s seat. The driver’s seat is a little harder to turn around. The parking brake needs to be lowered out of the way and the back of the driver’s seat needs to be adjusted with the crank so that it is leaning slightly forward, so it avoids the steering wheel while being turned. We felt like we normally didn’t need the driver’s seat. There is only two of us. One would sit in the dinette bench seat while the other would sit in the passenger seat, with tables for both of us. However, Ann liked being able to prop her feet up on the driver’s seat while sitting on the bench seat. She has really long legs, so this probably wouldn’t work for most people.

Winnebago provides two seat cushions. They are intended to be used with the driver and passenger seats to bring a seated person up to the proper height of the dinette table. However, we feel it is only needed for the driver seat as the passenger seat is comfortable to use with the Lagun table when it is at its lowest height. So we left the second cushion at home and don’t travel with it.

We initially stored the seat cushion while we traveled by hanging it on the back of the passenger seat. However, that meant you had to remove it before turning the passenger seat around and had to wait to turn the seat back to the front before hanging it back. Instead, we found it was just as easy to store it on the bench seat while traveling and toss it on the driver’s seat when setting up for camp.

Before our travel season started, we had to replace the windshield on our EKKO due to a crack. Safelite would not recalibrate the windshield camera. We had to take it to a local Ford Truck service shop for the recalibration. Unfortunately, we just had window tinting done on the driver and passenger door windows along with an eyebrow tint across the windshield. We didn’t have time to have the eyebrow tint done again before we left on our trip. We still had the tint in the door windows, but missed having the eyebrow. We had an eyebrow tint on our camper van and liked it. It seems to make a difference with the solar gain inside the cab.

There are some differences from the Ford Transit of our camper van to the Ford Transit of the EKKO that we don’t like. First, we had power folding side mirrors in our camper van and we miss them. It is not a big deal, just a matter of convenience, especially when we are on the road as we are both in the EKKO and can each fold in one mirror when we need to. It is more of a pain when just one of us is driving and we park somewhere where we want to fold in the mirrors so they are out of the way. Then the driver has to walk over to the other side of the vehicle to fold or unfold the mirror.
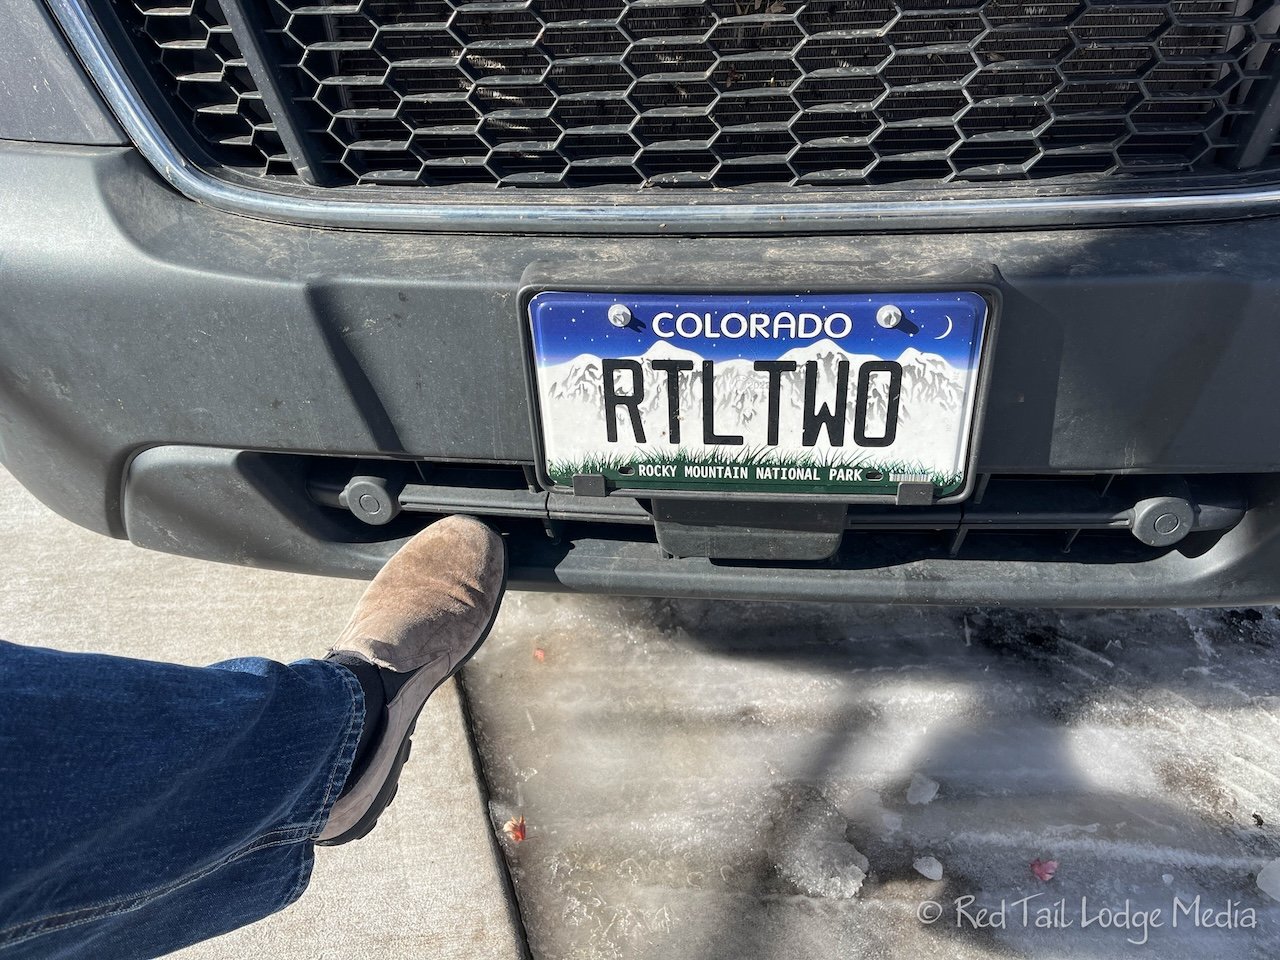
The second item is a place to step up in the front bumper. In our camper van, there was an indentation in the front bumper that we could use to step up to better reach the windshield. This was helpful when cleaning the windshield at gas stations, especially when all they had were short-handled squeegees. On our EKKO, for some reason, Ford or Winnebago covered the indentation with a plate, so that it can no longer be used as a step up. We’re not quite sure why they did that. Perhaps using it as a step up put too much strain on the bumper? That seems a little hard to believe. It’s a shame, because the windshield is so large and we have to stretch to reach the whole thing to clean it, and we’re six feet tall. We could only imagine how hard it is for someone shorter.

The third and last difference is the vehicle key. The one for our EKKO is a “switch-blade” type of key, where a button press swings the key out for use. However, it seems like it is accidentally opening up quite often in Ann’s pants pocket so that the key starts poking her. Not her favorite feature.
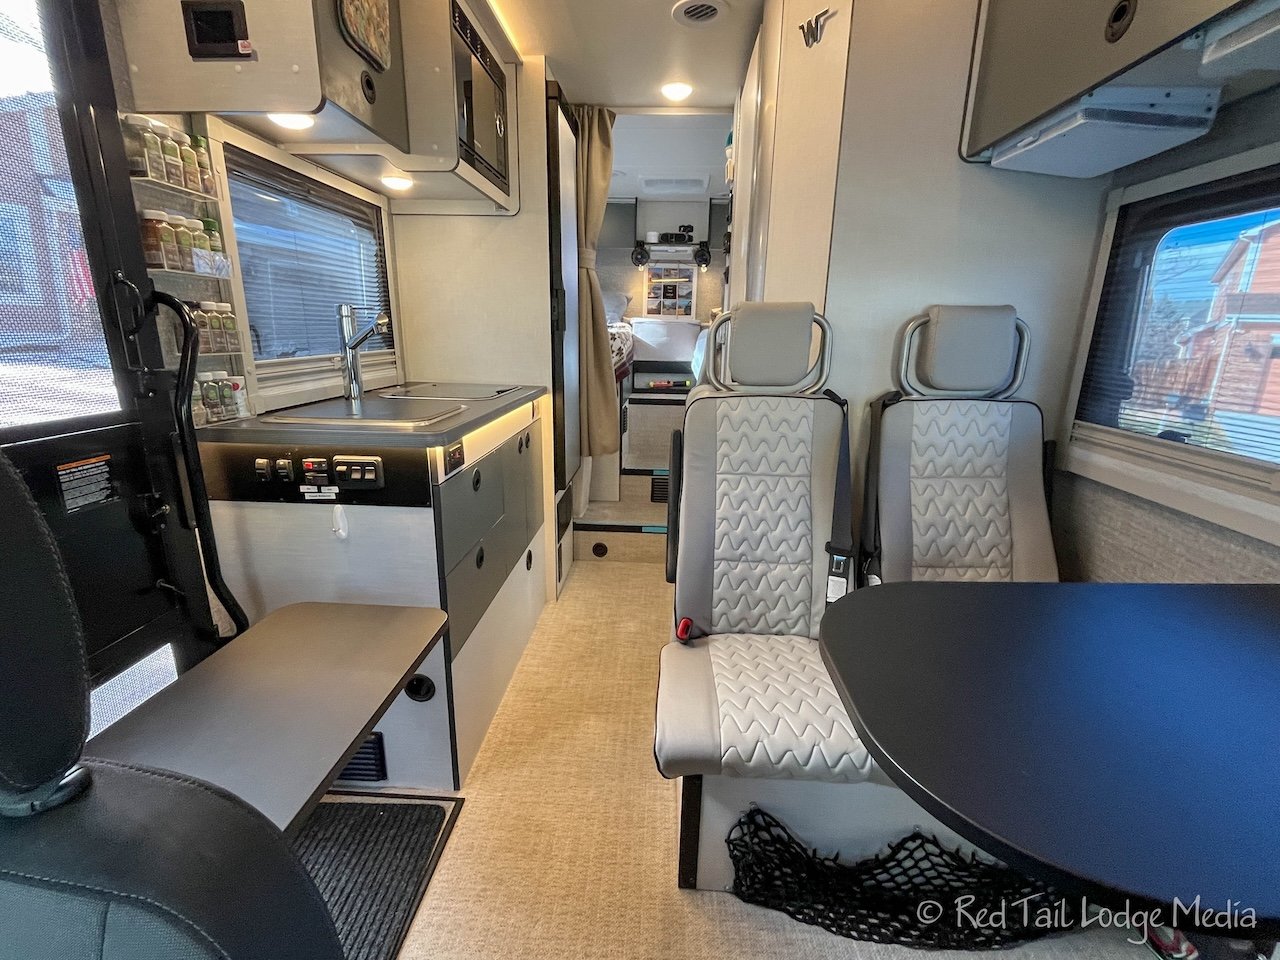
Part 3: Dinette Area

The dinette area is a great place to eat and work at a laptop or iPad. We always put up the table when we set up for camp or just stopped on the road for lunch inside. The table is quick and easy to setup. The windows on both sides provided great views of our surroundings, along with a view out the front if we don’t have the shades up. The dinette window along with the screen door and the kitchen window allows for plenty of cross ventilation.

We also added another small DC fan (paid link) above the entry door, facing the dinette, which was great for hot days when we didn’t or couldn’t run the AC. It also helped circulate the air when we had the AC on.
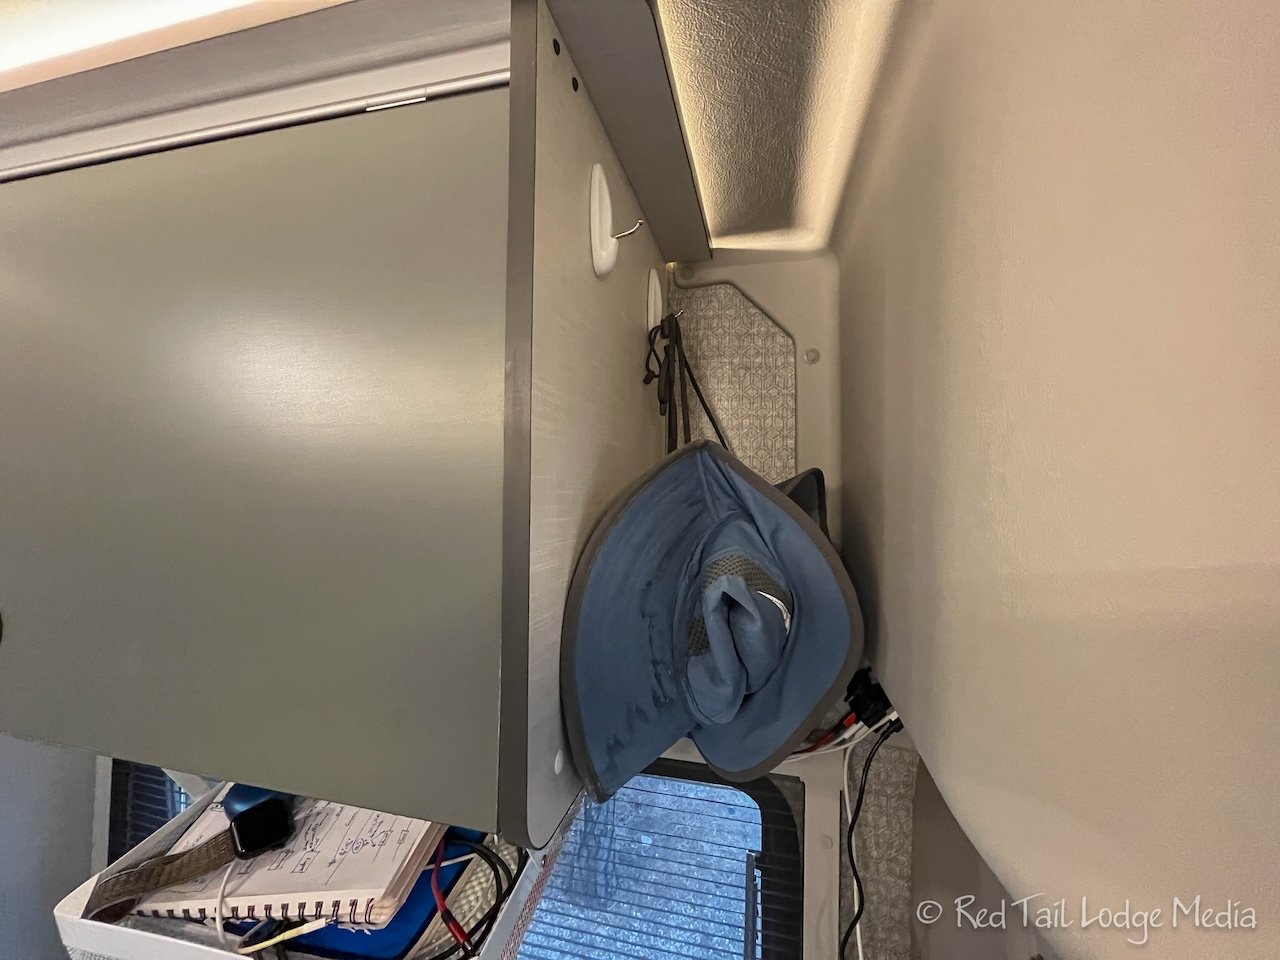
We added two command hooks on the end of the upper dinette cabinet to hang our hats. We both kept our floppy hiking hats hanging there along with Keith’s ball cap. It was a convenient place to grab them.

On the front side of the bench seats, near the floor, we installed a stretch net to hold our slippers and shower flip flops. It is a great place to store those items as they are out of the way, but easily accessible. The clamps we first used to secure the net were not strong enough and broke soon into our trip. We replaced them with beefier, stronger clamps, and have not had an issue since.

Since there is normally only the two of us, we usually didn’t have anyone sitting on the bench seat while traveling. However, we had to make a diversion trip to a memorial service and picked up a relative along the way. She sat in the dinette, with the table up, while we drove down the road. She loved setting her iPad up on the table as we moved along. However, there are no cup holders in the dinette area. Our temporary solution was to tape a roll of Gaffers tape to the top of the table. The center of the roll of tape was the perfect size for a water bottle or can of soda.

Initially, Ann would keep her laptop power cord always plugged into the AC outlet above the dinette table. However, it was a long cord, with a “brick” that just seemed to get in the way on the floor. We purchased a more powerful DC charging plug along with a shorter USB-C cable. Leaving that plugged into the DC outlet above the dinette seems to work out much better for charging Ann’s laptop.
Part 4: Kitchen

Having a dedicated area for our kitchen was a step up from our camper van. Ann loved having multiple ways to cook, a microwave, a two burner stove top, our portable induction cook top (paid link), and our Instant Pot (paid link) along with our Blackstone Griddle (paid link) in our outdoor kitchen compartment. If our batteries were getting low, we could cook with propane. If we wanted to conserve on our propane usage, we could cook with electricity. If we didn’t want to heat up the inside of our rig by cooking, we could use the Blackstone Griddle, Instant Pot or induction cook top outside.

If we were concerned about the electrical load on our inverter, we could plug the Instant Pot or induction cook top directly into our campsite pedestal. Most campground pedestals have both 30A and 20A plugs, so we could have our EKKO plugged into the 30A outlet, running our AC, then plug the Instant Pot or induction cook top into the 20A outlet, a circuit separate from our EKKO.

Before we left home at the beginning of the travel season, we had the EKKO’s microwave replaced under warranty. Pushing the button would sometimes fail to open the microwave door, sometimes for long periods of time. Just in case, we brought along a suction cup that we attached to the microwave door which allowed us to open the door in case the button failed. It didn’t take long before the new microwave started showing the same symptoms. But this time, it only happened every now and then, probably only about handful of times over the whole season, then it would start working again. We’ll just live with it and keep the suction cup with us as a workaround.
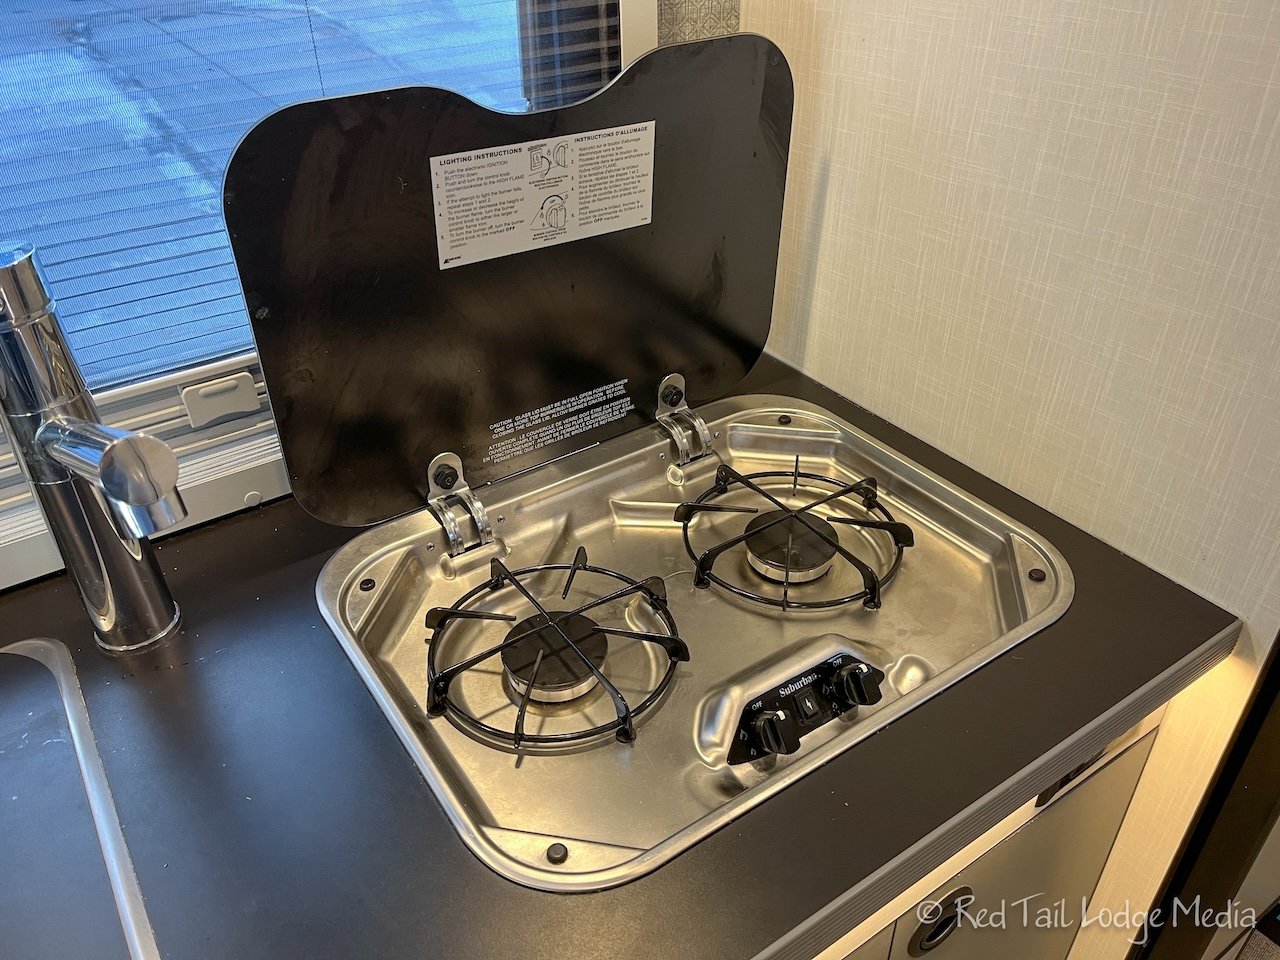
While we were on the road, Winnebago issued a recall on the propane stove top. The stove could develop a leak and be a fire hazard. We decided to wait until we were back home to have the recall fix done and assumed the risk of using it in the meantime. We did keep an eye on it and had no issues with the stove.
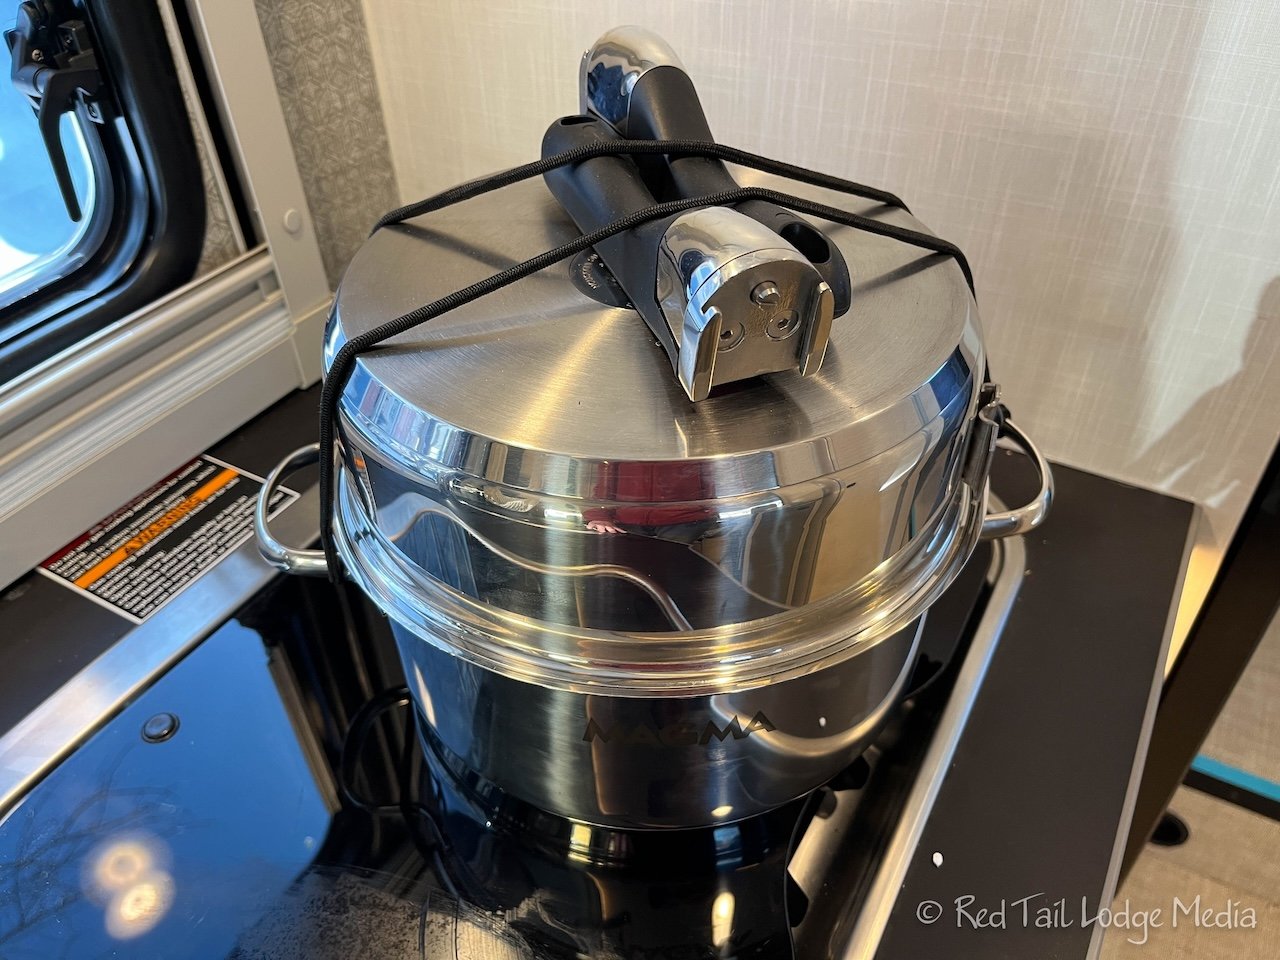
At the beginning of the season, we purchased a set of Magma stacking cookware (paid link). We are really happy with it. The version we have is compatible with the induction cooktop and takes up very little space. It is solid cookware and we like cooking with it. The only part about it we don’t like is the thin edge around the top of the pans. Ann has sliced her finger open twice on one of the pots while washing it. Perhaps there is a little defect on the edge of that pot, but we’re not running our hands along the edge to find out. We’re not sure why they designed the pots with such a thin rim.

Inside, in the kitchen, we had plenty of counter space to cook. When we weren’t using the propane stove top, the lid was down, providing more counter space. When the sink wasn’t being used, the provided sink cover created counter space. If that wasn’t enough, we also used the Lagun table along with the dinette table. The Lagun table can raise up to the height of the kitchen counter, but we rarely did that. We mainly used it as a staging area while cooking, with no need to raise it. We also used the Lagun table for placing our rinse container on while washing the dishes.

We added a command hook on the side of the lower kitchen cabinet for hanging the sink cover when it was not on the sink. This was a great way to get it out of the way and not take up space elsewhere.

We found the cabinet space to be sufficient for storing our dishes, cookware, and kitchen pantry supplies for a week’s worth of cooking (see Our EKKO Organization for more details).

If we occasionally needed a little more space, we used the extra little space we had in the driver’s side wardrobe cabinet in the bedroom. It held our back stock of beer along with items that we purchased before the previous container was empty, such as a coffee container or box of cereal. We’ve even put a small watermelon in the shoe bin until we had a chance to cut it up.

The only organizational item we were not completely happy with was where we stored our silverware. We used a pencil bag, with a flat bottom. We liked being able to grab the whole bag and take it outside to a picnic table, or just lift it up to access the cooking utensils underneath. But all the silverware was in a single compartment, making it hard sometimes to find the utensil we wanted. It would have been perfect if there were dividers to keep the forks separate from the spoons, and separate from the knives.

The fridge is much larger than the one we had in our camper van. The bottom tall drawer is great for large items like an iced tea pitcher or half gallon of milk.

It is a little frustrating how narrow the shelves are on the door. They are just wide enough to hold a can of soda or beer. Many items that we would normally put in a fridge door shelf do not fit. We also found that tall items in the top shelf of the door can interfere with the hinges on the freezer door, causing the freezer door to not be completely sealed close.
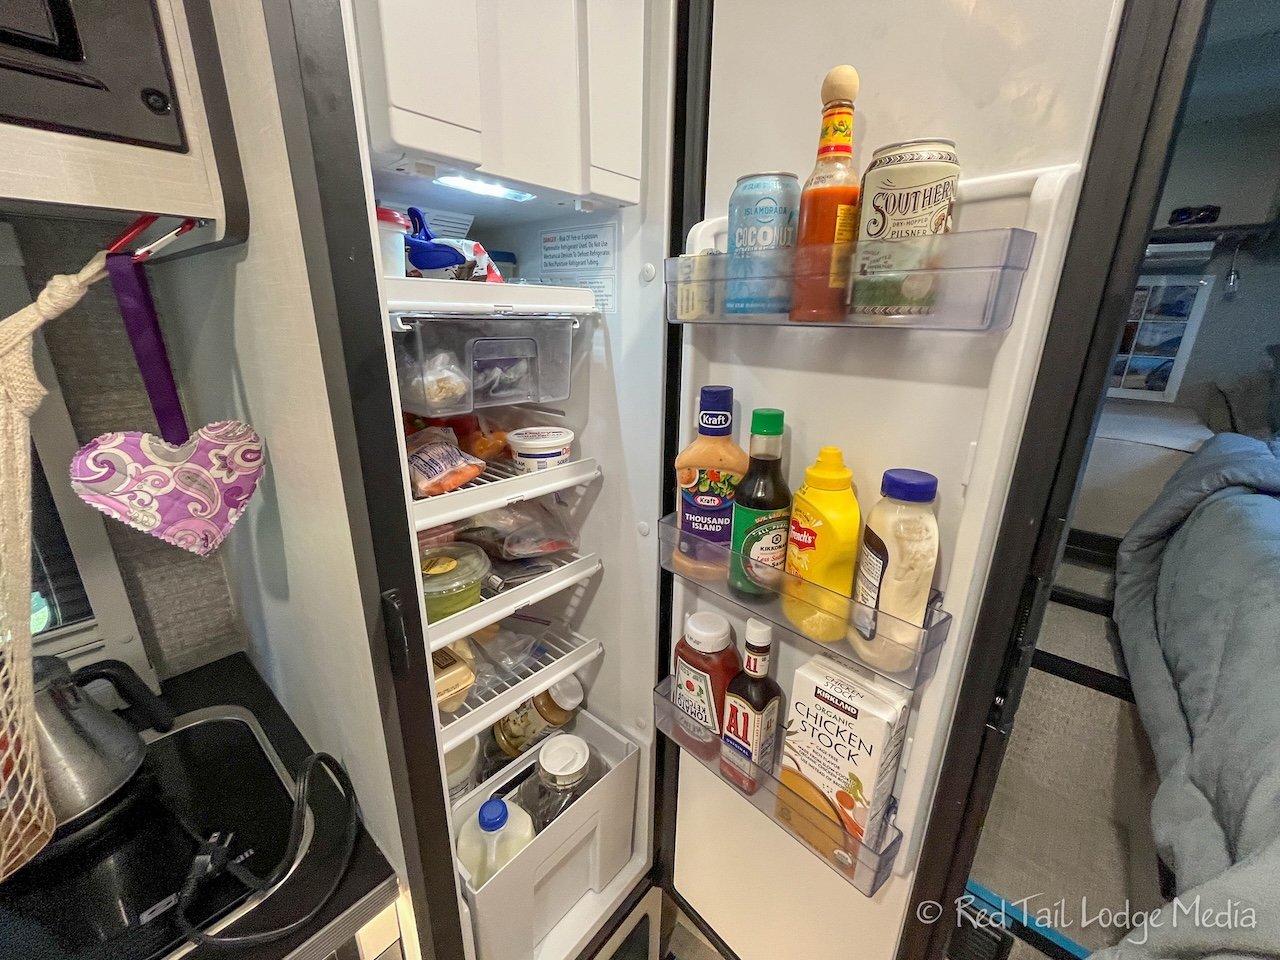
We normally had no problems fitting all of our weekly groceries that needed refrigeration into the fridge, including plenty of fresh fruits and vegetables. Although, the fridge was usually packed pretty tight right after a grocery store stop.

The freezer is also a good size. For the first time we were able to use the freezer to store extra meat. But most importantly, at least for us, was that the freezer could hold not just one, but two half gallons of ice cream. That meant we had no reason to ever run out of ice cream. However, that also meant that, despite being pretty active during our travels, Ann managed to gain ten pounds.

There are a few things we don’t like about the fridge. First, if we set the temperature controls low enough to keep ice cream hard in the freezer, the lettuce in the fridge freezes. However, we are not ready to replace the fridge with one that has separate freezer and fridge controls like the Fit RV did (Our Enormous RV Refrigerator Swap – the Nova Kool RFU 7300). We live with it. If we keep the leafy part of the lettuce away from the back of the fridge, it is less likely to freeze. Having hard ice cream is more important to us.

The second thing we don’t like is the sharp corners in the middle of the front edge of the fridge shelves. This was usually only an issue when trying to grab something quickly out of the bottom drawer without bothering to pull it out. Ann cut her hand on the shelf multiple times while pulling out the iced tea pitcher.

The third thing is how awkward it is to get things in and out of the freezer. The spring-loaded freezer door folds down from the top. Some people complain that they can’t see into the freezer as the door blocks their view. However, we are both tall, so that is not an issue for us. But it was a little tricky putting an ice cube tray full of water into the freezer without spilling it. You needed three hands, one for holding the ice cube tray, one for holding down the freezer door, and a third to lift up items in the freezer to slide the tray under them. Not having three hands, it became a coordination test. Sometimes we could prop open the door with something heavy, like a half gallon of ice cream, but then the item would be in the way of getting the tray into the freezer.

Ice built up on the back wall of the refrigerator over time. It seemed to build up faster in more humid climates. We defrosted it about every two months. It built up so thick the one time, that we lost a binder clip as it was embedded in the ice. We didn’t get the clip back until we defrosted the fridge.

The EKKO comes with a fire extinguisher mounted at the bottom of the lower kitchen cabinet, near the door. At the start of the season, we added an Element fire extinguisher (paid link) to our outdoor kitchen compartment. Although we have never had to use it yet, we are impressed with the Elements features. While we were on the road, we decided to replace the kitchen fire extinguisher with an Element. The Element is smaller, easier to use, never expires, is non-toxic, and can be used for any type of fire. We also mounted one in the bedroom and store yet another one in the driver side door. The one in the door is easy for the driver to grab in case of an engine fire.
Part 5: Bathroom

The bathroom is another area of improvement over our camper van. In the van, we only had an emergency camping toilet, one sink for both washing our bodies and our dishes, and an outdoor shower. The full bathroom in the EKKO feels luxurious in comparison. We love the European design of the moveable wall that makes the wet bath feel more like a dry bath, keeping the sink and toilet dry while showering. The design also allows the full bathroom to take up very little space in the RV.

When using the shower, it didn’t take us long to realize that we needed to pull the curtain around so that the water didn’t run under the bathroom door and onto the kitchen floor. Even so, we still put a cloth down on the floor outside the bathroom when we shower. It is extra insurance on keeping the floor dry and doubles as a shower mat when we are done showering.
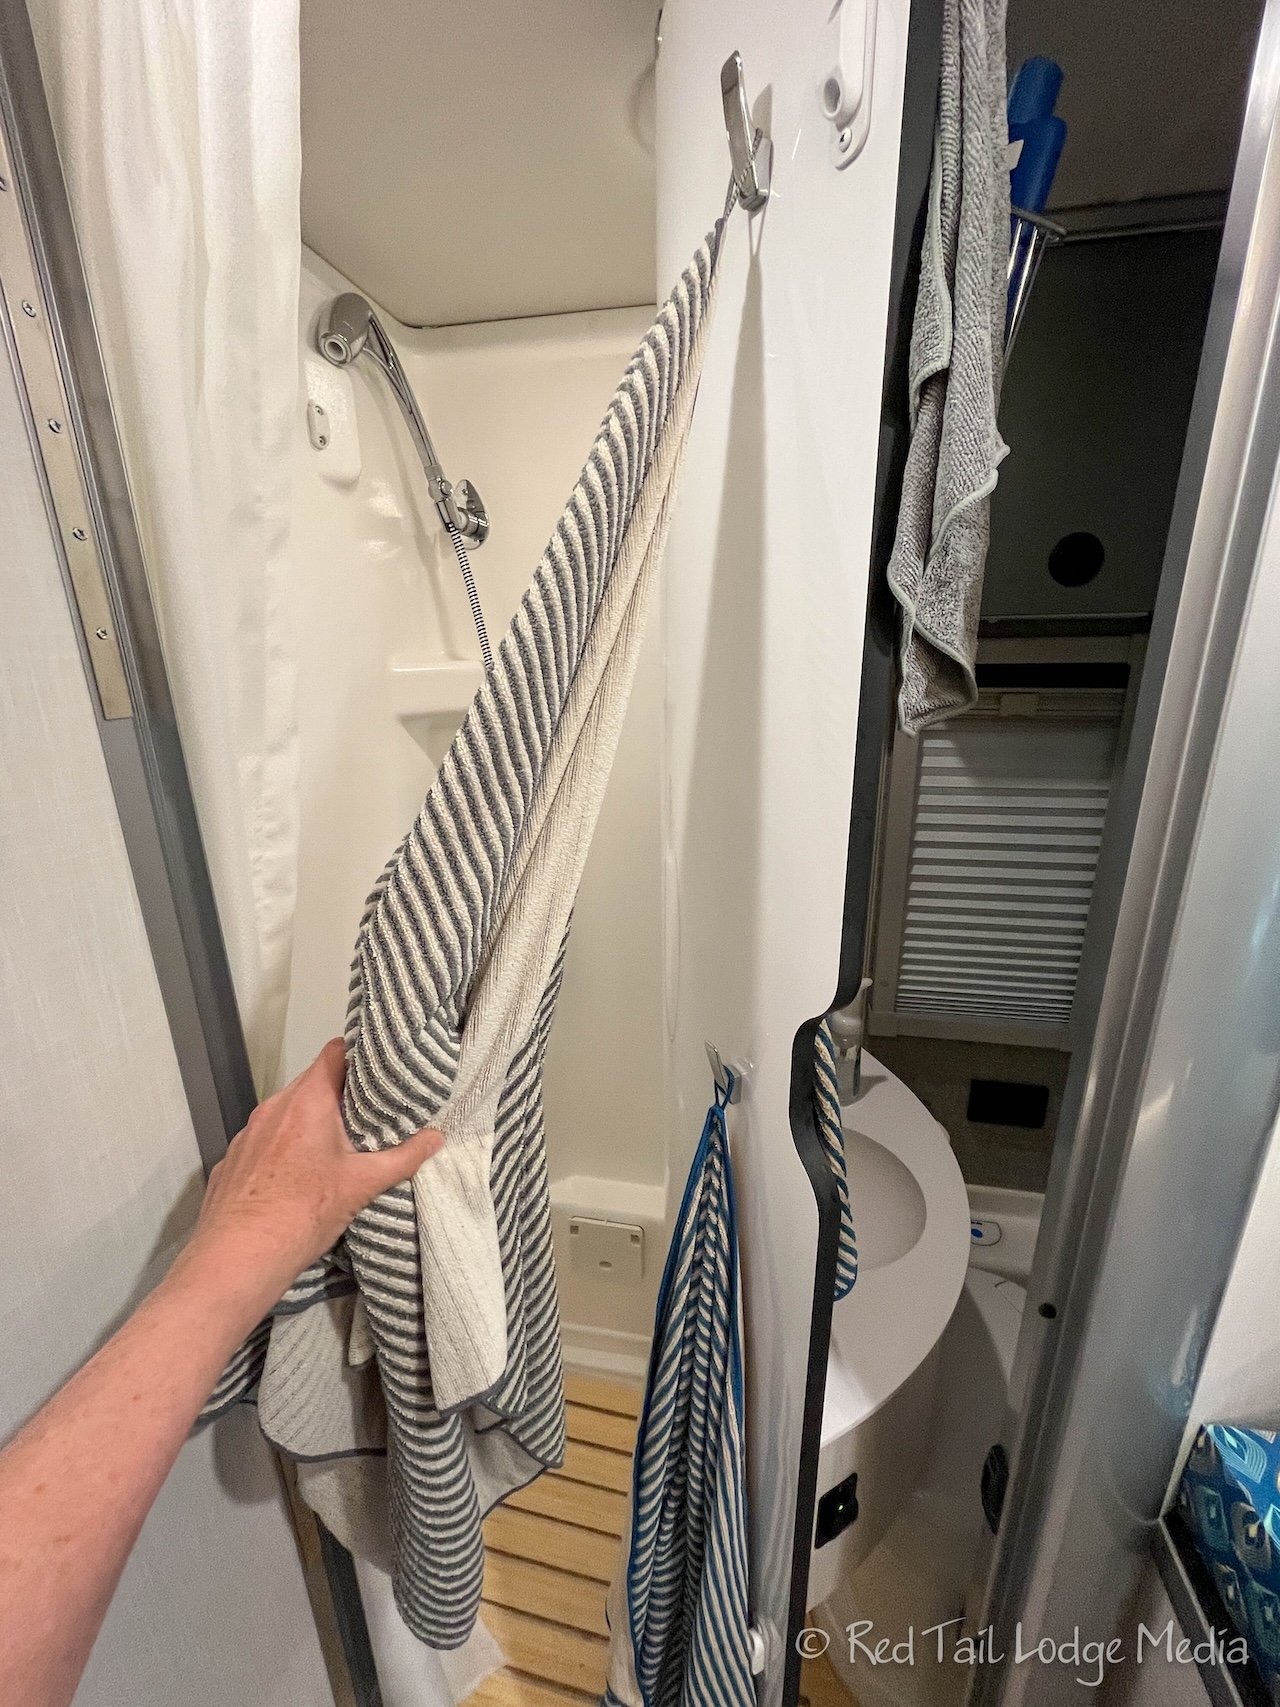
The two hooks provided on the swinging wall worked well for storing our bath towels. If we remembered to pull the curtain around, the towels stayed dry on the hooks while we showered. To dry our towels, we usually hung them over the backs of the front seats or steering wheel or on the back of a camp chair outside. If they were still a little damp when we were ready to break camp, we laid them out flat on top of our beds.

At the beginning of the season, we installed a clothes line (paid link) that pulls across the top of the inside of the bathroom. However, we normally didn’t use that for our bath towels, as they got in the way of using the bathroom sink and toilet. But we did use the clothes line to hang smaller, dripping wet items like swim suits, when we couldn’t hang them up outside. Having them dripping in an area with a drain was better than letting them drip elsewhere in the rig.

During our travels, we added a few more command hooks in the bathroom. Two of them hold our wash cloths while a third holds a cloth we use to clean the bathroom with. It was nice to have a cloth handy to wipe off the top of the sink before any water dripped off, as we weren’t always parked perfectly level. The cloth we used as a bathmat was kept draped over the top of the swinging wall.

Ann didn’t care for the short lip on the upper shelf of the medicine cabinet. She seemed to accidentally knock items off the shelf every now and then. It is not an issue when the medicine cabinet is closed, as the door prevents anything from falling off the shelf. After we accidentally left the medicine cabinet door open once when we left camp and our toothbrushes ended up on the bathroom floor, we bought toothbrush covers. The covers are spring loaded, so we’re not sure if they would stay on if our brushes fell to the floor again, but the covers made us feel better. If the lip on the edge of the shelf was any taller, it would interfere with the cabinet door hinge, so we understand why it is so short. We’ll probably come up with a solution for next season.

Keith finds the bathroom sink rather small. Water has a tendency to splash out onto the counter. He also doesn’t like that there is no stopper to allow the sink to fill.

The two bags that we Velcro’d to the bathroom wall did not work out exactly as planned. We envisioned that we would keep our toiletries in there so, when we wanted to use the campground shower, we would just pull the bag off the wall. However, we never used them like that. The bags were not a convenient place to store our most often used toiletries, as the medicine cabinet and open basket hanging on the swinging wall which much easier to use on a regular basis. Plus, the Velcro on the bags is rather strong, so it is not easy to pull them off the wall. However, we did use the bags to store items that we don’t use very often.

Under the sink, we had installed two waste baskets that mounted to the wall. One was for trash and the other for recyclables. We liked being able to separate our trash and have some place to store the recyclables until we could find a place that took them. We’re sorry to say that we ended up throwing our recyclables into the garbage a few times, as it seemed like places to recycle were few and far between this season and our basket was overflowing. The wall mounts ended up failing, as there was too much force on the mounts as we bounced down the road. However, the baskets worked out fine just sitting on the bathroom floor. They only fell over a couple of times and we normally emptied our garbage when breaking camp, so it has not been a big issue. Besides, it is now easier to pull them out of the bathroom when we want to shower.
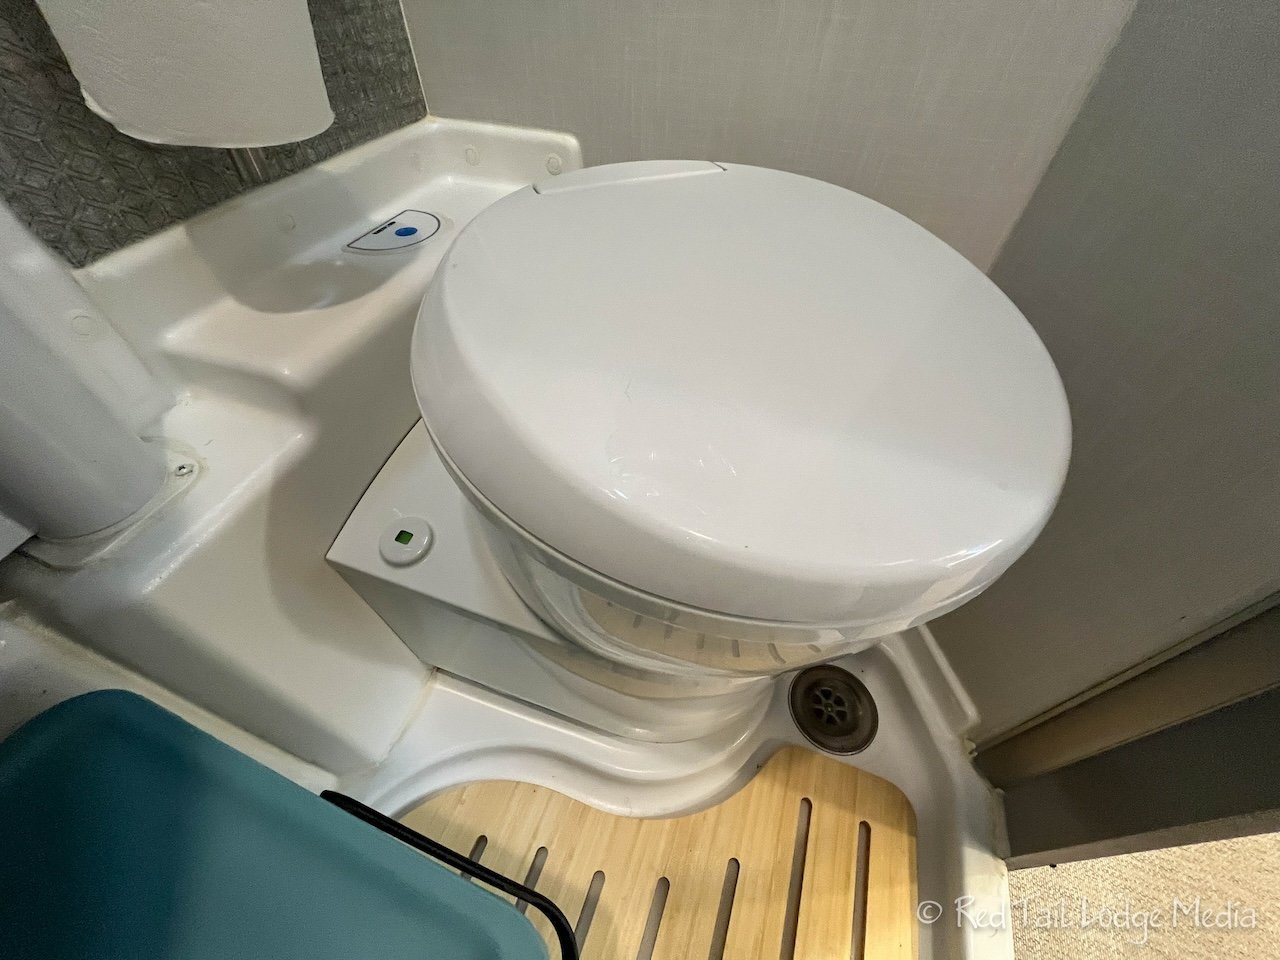
The cassette toilet does swivel, but after we moved it to an angle that was comfortable for us to use, we never moved it again. It didn’t take long to get used to how the toilet worked. We normally did not notice any odors coming from it. Every time we emptied the cassette, we added RV toilet chemicals. We found the full indicator rather useless. It didn’t turn red until it was almost too late. Just looking inside the cassette when we flushed was a much easier way to tell how full it was getting.

We loved having our own bathroom with us. However, if the bath house at the campground was decent, we generally used the campground’s toilet and shower during the day, when it wasn’t raining or otherwise nasty outside. The less often we used our own bathroom, the less often we had to dump and fill our tanks, and the less often we had to clean the bathroom.
The light switch for the bathroom light that comes with the EKKO is in an awkward location, outside the bathroom on the wall behind the bathroom door. The motion-sensor light (paid link) under the medicine cabinet that we installed worked out nicely. Ann rarely used the EKKO bathroom light, but Keith still turned on the EKKO light when he used the toilet. He didn’t want the light to turn off on him. Ann quite didn’t understand this as the toilet doesn’t move while he’s in there. But if the light helps improve his aim, she’s all for it. However, she swears she had to turn off the bathroom light switch about once a day, as Keith would forget to turn it off. The motion-sensor light has rechargeable batteries. We found we had to recharge the light via a USB-C cord about once a month. We also installed the same motion-sensor lights in several of the exterior compartments, so we would charge those about every other time we had to charge the bathroom one.
Part 6: Bedroom

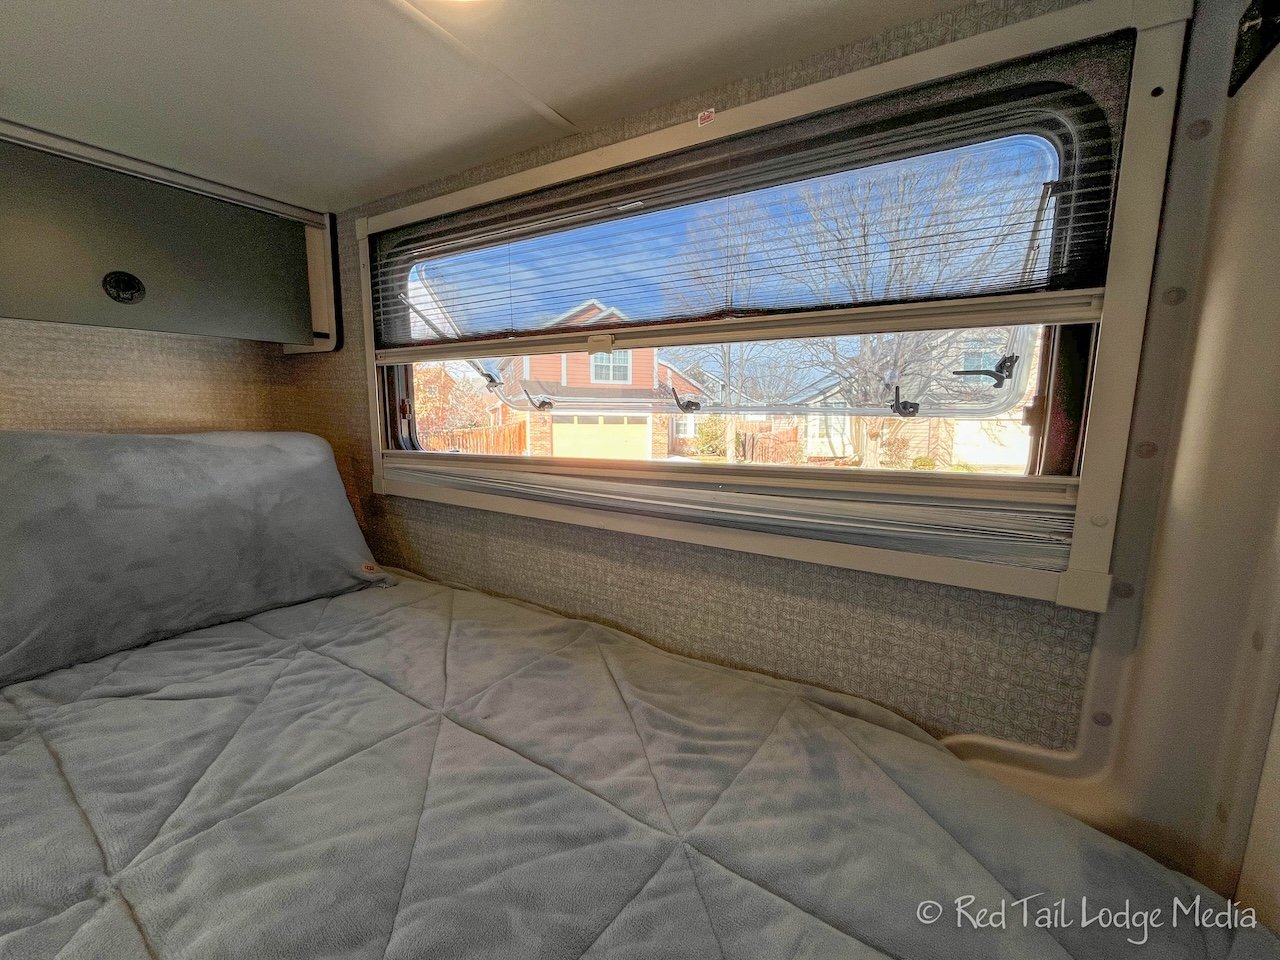
We love having a separate bedroom, where one person can retreat to while the other person is still up or working in the dinette. There is enough room above the beds to sit up, especially if you sit with your back against the front wall.

Some people like to sit facing forward, but we find that there isn’t enough space for us to sit up under the overhead cabinets on the back wall, so we prefer to sit up in bed facing the back. However, that means there is not a good place to set a drink within reach. So we installed two cupholders (paid link). One is on the passenger side wall, but there was not enough space on the driver’s side wall. For the second cup holder, we installed it on the wall outside the bathroom, under the light switches. It is a little awkward to reach from the driver side bed, but it still works. The cup holders fold up pretty flush against the wall when not in use, so as not to bump into it when entering or exiting the bedroom.

We find the beds pretty comfortable and sleep well on them. Our fitted sheets, which are cot-sized, have a tendency to eventually slip off after several days, especially on the passenger side bed, which has a corner cut off of the mattress at the foot of the bed. Keith did not like the thick, twin size comforters that we bought. He found it too bulky, especially since the mattress is narrower than a twin. So he swapped his out for a wool blanket. If he gets too cold, he grabs the spare blanket we carry with us.

We are both six feet tall and the beds are just barely long enough for us. Keith swapped out his pillow for a smaller pillow to give himself a little more room.

Ann is a little less picky and is comfortable with her regular pillow and thick comforter. She sleeps on the driver’s side. There is a metal plate inside the wall on her side which is there to support the optional bat wing awning (which we do not have). On cold nights, she does notice that the wall is cold, but she still manages to stay comfortable at night. Perhaps that is why she prefers the thick comforter.

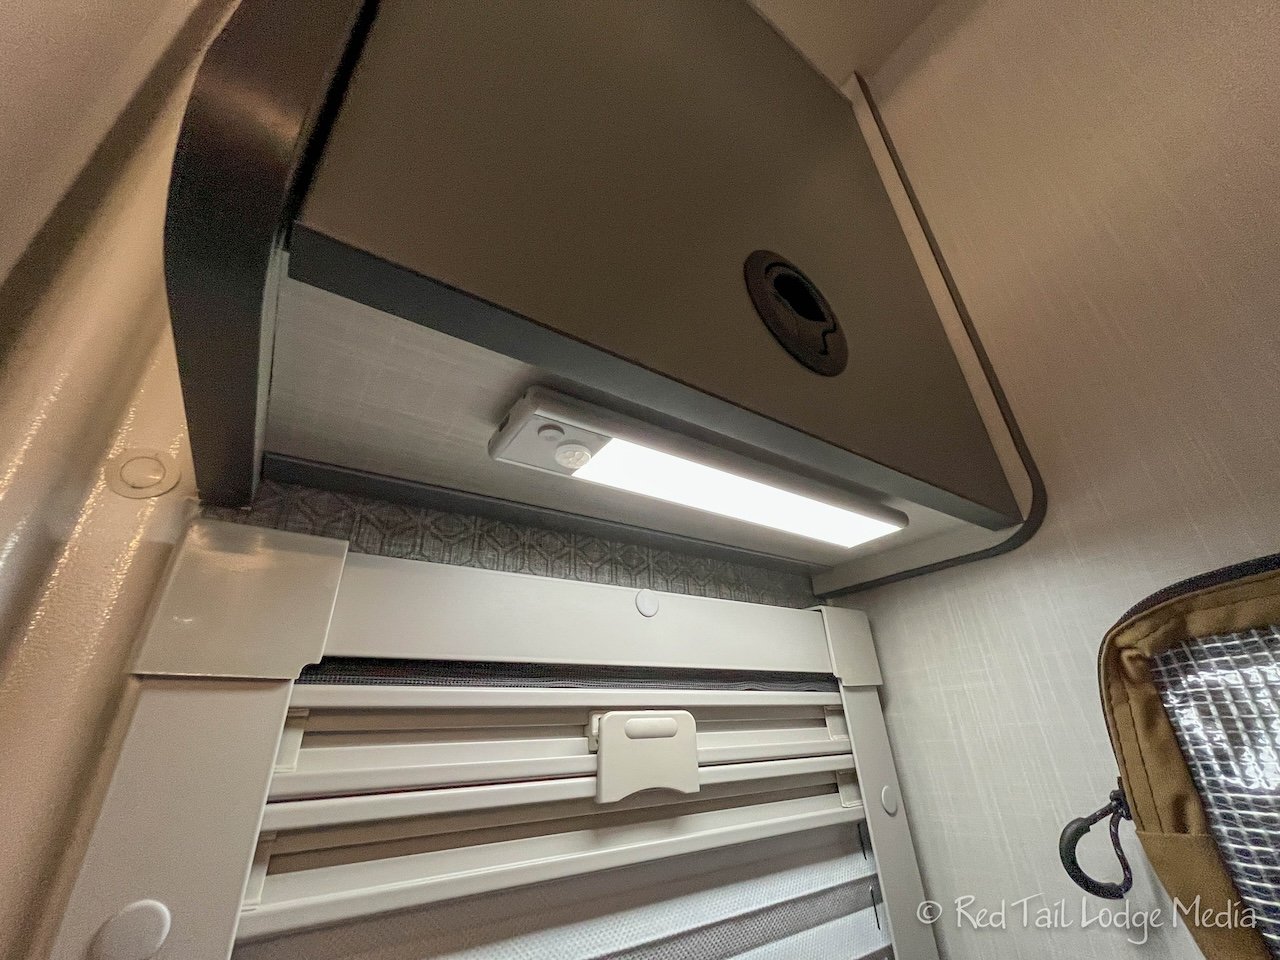
The two large windows in the bedroom are nice. We can sit up in bed with nice views to the outside. Or leave the blinds open at night so we can see the stars on a clear night. We prefer sleeping with the windows open at night, if the weather allows, so we can fall asleep listening to the sounds of nature, like crickets chirping and frogs croaking, and wake up to the sound of birds singing in the morning. The two windows allow for a nice cross breeze, but we sometimes compliment that with the two small DC fans (paid link) that we attached to the shelf between the two upper cabinets.

Unfortunately, from our experience, it seems like the screens do not keep out some of the small bugs, like no-see-ums. After being bit up one night, we were careful about when and where we left the windows open. We have two bug zappers (paid link) inside the rig, one up by the entry door and one back in the bedroom. However, since bug zappers attract bugs to them, we don’t leave the one in the bedroom on at night.

We heard that essential oils can repel insects, so we purchased an essential oil diffuser (paid link) and set it up on the shelf in the bedroom. We didn’t conduct any controlled experiments to know if it really works, but it makes us feel better and we haven’t been bitten up during the night since starting to use it. It could be that we just haven’t had the windows open at night in an area with no-see-ums since then.

After seven months into our trip, with only about a week left, the strings in both bedroom blinds broke, about five minutes apart from each other. We were still able to somewhat work the blinds up and down, but they sagged and didn’t look the greatest. We immediately emailed our Winnebago dealer to report the issue. We were approaching our one year anniversary and wanted to make sure they would be fixed under the one year warranty.

What we found annoying with the windows were the hinges. Despite lubricating and tightening them on a regular basis, the hinges would stick. There were times when we couldn’t get them to stay open as they wouldn’t catch, but most other times, more frustratingly, we couldn’t get the windows to close. It always seemed to occur when we were trying to go to bed for the night, or when we were packing up to leave camp. One evening, we eventually dismantled the hinge with a screw driver in order to close it and get to bed. When the hinges work properly, they are great. But when they don’t, they are a pain. The bedroom windows seem to have this issue more than the other windows, perhaps because they are a little bit larger windows. We’ll probably try to fix this issue before next season.
At first, we thought you had to lift the windows all the way up in order to get them release so you could close them. Then we discovered you only needed to lift them up to the next position for them to release. Of course, this was only if the window hinges were operating properly and not sticking.

We do like being able to lock the windows with them still cracked open. It makes us feel a little more secure to be able to lock them open while we are away from Red Tail. It is also nice when it is windy, as the wind cannot move the windows when they are in that position.

The glow-in-the-dark tape (paid link) we installed on the bedroom steps have worked out great. They seem to retain enough glow during the night that we’re able to see where the steps are when we get up in the middle of the night. The strip of tape we added to the top edge of the inside of the entry door is useless. It has no affect on preventing Ann from hitting her head, which she still does every now and then when exiting our rig. Maybe we just need to keep Ann wrapped up in bubble wrap all the time. But even Keith hit his head once on the door frame.
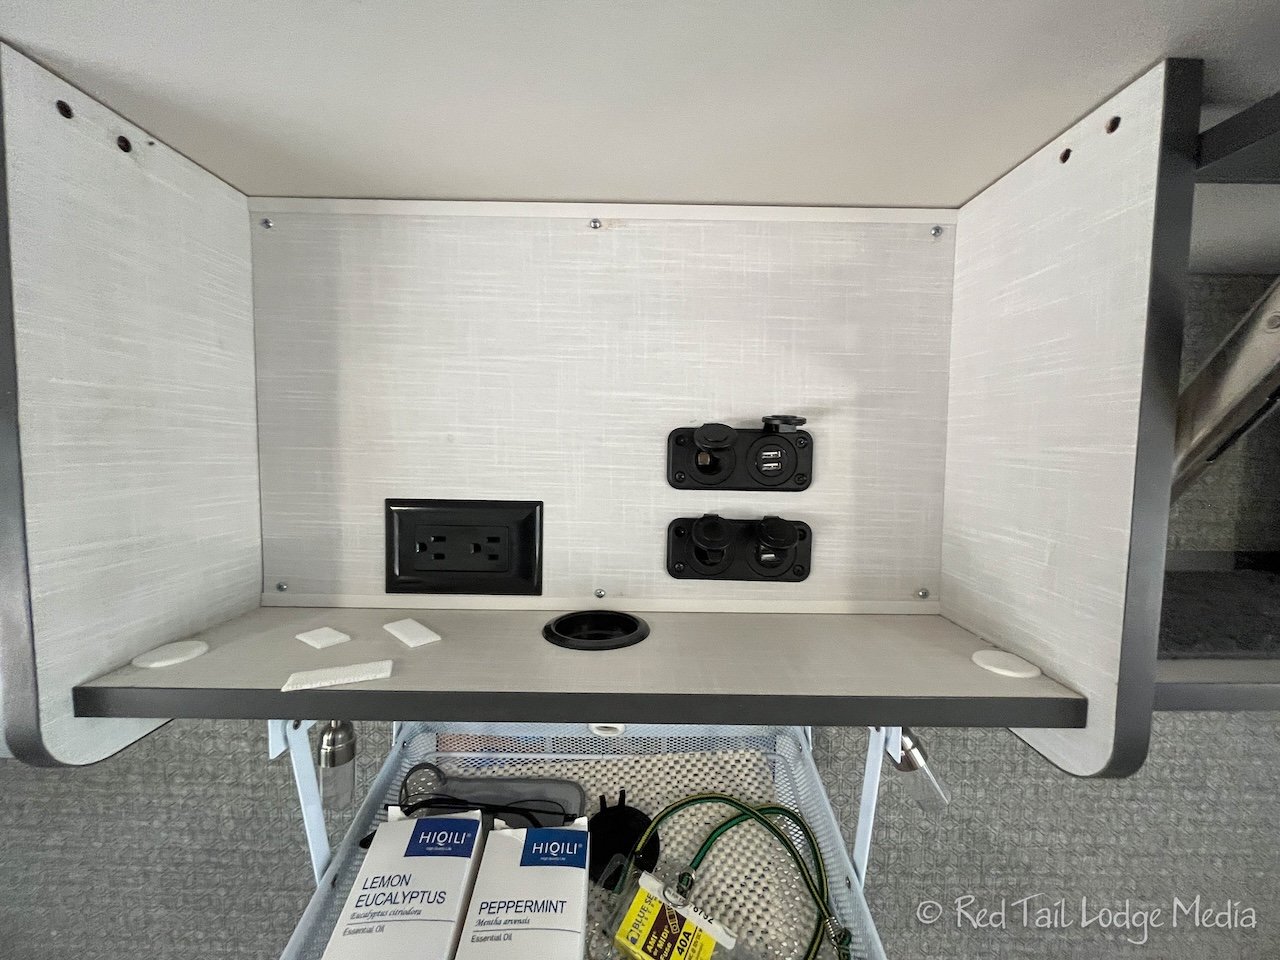
The EKKO comes with some outlets above the bedroom shelf. There are more outlets inside the driver side upper bedroom cabinet. We use a lot of electronics in the bedroom including the essential oil diffuser, a bluetooth speaker, two DC fans, an iPad, a laptop, two cell phones, and sometimes need to charge an electric toothbrush and headphones. The outlets on the shelf are not enough. Since we store clothing in the upper cabinets, the DC outlet inside the cabinet are not very useful there. So we moved the outlet from inside the cabinet over to the shelf.

The curtain that EKKO provided across the bedroom entry way barely stretches across the opening. Some people replace this with something a little more decorative, but we haven’t. The curtain serves its purpose. When we want a space to quickly change clothes in, we just pull up the shades on the two bedroom windows and pull the curtain closed, sometimes tucking it between the mattress and the wall to help keep it closed. We also use the curtain when one of us gets up earlier than the other. The curtain keeps the light from the dinette area bothering the person who is still in bed, whether the light is from one we turned on or a window that we opened the blinds on.

The laundry hamper and laundry backpack that we store in the passenger side wardrobe cabinet worked out well. We liked that we had removed the cabinet door, so it was easy to throw our dirty clothes into the hamper. The backpack worked out as we intended. We pulled the liner out of the hamper and loaded it into the backpack to haul our clothes over to the campground laundry and back. It is so much more comfortable to haul the clothes on your back than to carry some type of large bag in your hands. Keith thought reattaching the liner to the hamper was a bit of a pain, but Ann didn’t mind it. The detergent sheets were also great. They were so much lighter and took up less space than a bottle of liquid detergent. Plus, we didn’t have to worry about a bottle of liquid leaking inside our rig. In our camper van, we once had a hole develop in a large bottle of windshield washer fluid. What a mess! (Pioneer Park, Fairbanks, Alaska - July 31st to August 1st, 2022)
Part 7: Heating and Air Conditioning

We’ve given both the heater and the air conditioner a good workout this season. It was still snowing when we started the season and was dropping close to freezing near the end of the season. In the middle of the season, we were in record high temperatures. The thermometer on the dash said 123 degrees at one point while we were driving down the highway, entering Fort Worth, Texas in the middle of July. Both the heat and AC worked fine for us.

We generally ran the air conditioner when we were plugged into shore power at a campground. However, as we accidentally discovered, we can run the AC off our batteries for as long as seven hours. We forgot to flip the breaker switch on the campground pedestal after plugging in. Luckily, we turned off the AC later that evening, then wondered why our batteries were down to 38% (Savannah, Georgia - May 9th to 12th, 2023). If we had left the AC on overnight or had we been in more extreme heat, we might have drained our batteries. But it was nice to know that we could run the AC off the batteries if we needed to. In fact, we ran the AC for a couple of hours at a time off the batteries a few times to cool down the inside to a bearable temperature. On travel days, or when we parked somewhere without hookups, such as stopping for lunch, a hike, or a paddle, the inside of the rig can get pretty hot, even if we had the Ford AC running while driving. The Ford AC cools the cab down, but doesn’t do much for the rest of the rig.

The air conditioner is located in the roof, right above the beds. It can be rather noisy while sleeping, so we prefer to turn it off at night. However, there were many nights this season when we had to leave the AC on. At first, we turned the fan to manual low instead of automatic. Having the fan turn on at the same time as the compressor would turn on was rather startling and would wake us up. When the fan is on all the time, the starting of the compressor is not quite as noticeable. However, we quickly learned that manual low was not a good setting. The AC coils would freeze up as there wan’t enough air flow across them and the AC would shut off. After switching the fan setting to manual high, we never had the AC shut down on us again.

The air conditioner seems to dump more cold air from the unit itself that what it sends out to the rest of the ducts. We taped up the cold air dump just inside the AC unit, reducing the amount of air that comes out of the unit and redirecting to the rest of the ducts. This quick mod (thanks FitRV - RV Air Conditioner Performance Improvement Tests), although not perfect, made a difference. The mod in addition to the two DC fans (paid link) in the bedroom and the DC fan above the entry door helps with the air circulation and evens out the temperature throughout the rig.

In extreme heat or cold, we would put up the insulated curtain during the day in addition to the night so the AC or heat didn’t have as much area to cool or heat. The insulated curtain also reduces the amount of heat gain or loss through the uninsulated cab.

Before hitting the road for the season, we installed several remote temperature sensors (paid link). One taped on the underside of the rig, one in the Gear Garage, and a third in the water compartment. A fourth sensor is in the main console itself, which we mounted inside, just under the heater and air conditioner control panels. Having a temperature sensor inside the rig was a great way to determine if the heater or air conditioner was working properly and able to maintain the set temperature. Knowing the outside temperature from inside was nice to easily determine if it had cooled off as we were getting ready for bed, so we could decide if we wanted to turn the AC off and open up the windows. It was also nice to know the outside temp when we got up in the morning, to help us quickly decide whether we wanted to walk over to the campground bathhouse or use our own toilet, if it was cold outside. The temps inside the Gear Garage and water compartment were important to make sure nothing froze.
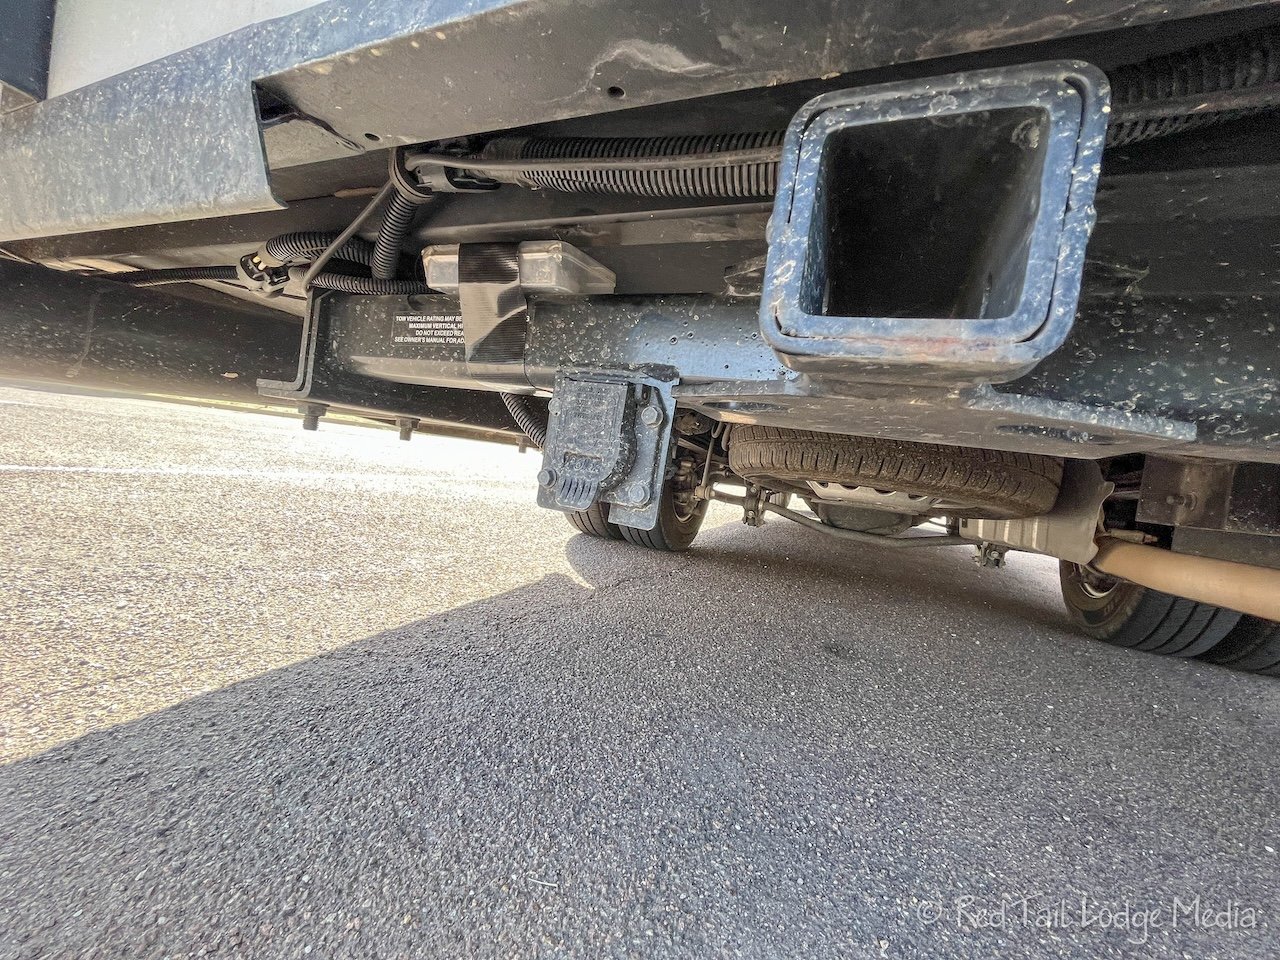
Where we first mounted the outside remote sensor did not work out very well. The tape we mounted it with came loose and we couldn’t get it to stay. We moved it to the top of the crossbar of the hitch receiver, underneath the back end of Red Tail. It was still out of the direct sun, but, because the sensor was now resting on top of something instead of hanging down, there was less strain on the tape. It has held now for months, with no signs of coming loose.
Part 8: Outdoor Kitchen

Our EKKO came with the Outdoor Kitchen option. However, we ripped it out so we could use the compartment for more storage. We do store our Blackstone griddle (paid link) in there, so in a sense, it is still our outdoor kitchen area. We still love the extra storage space and don’t miss giving up the outdoor kitchen. (For what we store in there, check out Our EKKO Organization post).

The Blackstone griddle has worked out great. It provides a larger surface to cook on and we like the way the food turns out. Before, with just one skillet, we could only prepare one tortilla pizza at a time. With the griddle, we can cook both of them at the same time, or four pancakes at the same time. In addition, we use less pans and dishes, meaning less items to wash later. Using the tortilla pizzas as an example again, we would sauté peppers and onions to use for toppings. Before, we had to move them from the skillet to a plate before putting them on top of the tortillas. With the griddle, we just push the peppers and onions to the side and load them directly from the griddle to the tortillas as we build up the pizzas, all on the griddle.

Ann’s favorite part about the Blackstone is that she gets Keith more involved with the cooking. He normally gets the griddle set up and starts cooking while Ann is inside prepping items. Then Keith is usually the one cleaning up the griddle and putting it away, while Ann cleans up inside and starts the dishes. It is harder to divide up the cooking responsibilities when cooking inside because of the small space and two people just get in each other’s way.

We also store our leveling blocks in the outdoor kitchen compartment. This season we switched to using GoTreads (unpaid link) in addition to some 2x6’s. The GoTreads double as traction devices in addition to acting like leveling blocks. They have worked out well, but we haven’t had to use them as traction devices yet. It is nice knowing that they are there in case we need some traction.

The GoTreads fold up onto themselves, so they can be adjusted to raise up a wheel in one inch increments, from one to four inches. We generally use the 2x6’s if we need less than two inches. For two to four inches of lift, we use the GoTreads. There has been a couple of times we needed more than four inches. Once we used the GoTreads on top of 2x6’s, but that seemed a little sketchy to us. So the other time, we just lived with four inches of lift and not being quite level.

By the end of the travel season, two of the four 2x6’s had split in two. They are pretty much scrap wood, so we’ll replace them with another two from our workshop in the garage at home.

We traveled with a small level to help us level our rig when we are setting up camp. However, we didn’t use it much. We preferred to use the Truma phone app (unpaid link), as it tells us exactly how many inches are needed under each wheel.
Part 9: Gear Garage

The Gear Garage was one of the features that sold us on the EKKO. We still feel that way. The item we wanted to make sure we could store in there is our two e-bikes. We purchased two RadExpand 5 (unpaid link) bikes because they would fit in the Gear Garage. To see how we rigged up the storage area to easily load, unload and secure them, see Our EKKO Modifications post.

The e-bikes worked out like we imagined. We used them to explore further than we could on foot. Being e-bikes, we felt confident traveling on unfamiliar trails and roads, knowing we could add power assist when we got tired, the terrain was steep, or we were facing a stiff wind. About half the time, we had the power turned off, using our bikes as heavy seven speed bicycles, giving us a workout when we wanted one. We thought we would use them a little more to make runs to the store without packing up our rig. However, we got in the habit of stopping at a grocery store on our travel days, so we didn’t normally need anything while we were at a campground. However, when we were camped at the Albuquerque Balloon Festival for eight nights, we ran out of ice cream. So we hopped on our bikes and made a grocery run. And yes, we hauled ice cream back on our bikes. We wrapped it in a sweater and it was still hard by the time we returned to Red Tail after 23 minutes of riding.

We were surprised about how long the e-bike batteries lasted. We never dropped more than one bar out of five during any of our bike rides. We only recharged the bike batteries a handful of times the whole season. Originally we considered charging the bike batteries using the electrical outlets inside the Gear Garage. But after hearing about the danger of bike batteries overheating and catching on fire, we decided it was better to charge the batteries outside our rig. The AC outlet on the outside of Red Tail was a handy way to plug in the bike batteries for charging.

We only had two flat tires on our e-bikes the whole season. The first time it was a slow leak. We didn’t feel like trying to find the leak and repairing it, so we dropped it off at a bike shop and just had them replace it for us. The second time was at the Albuquerque Balloon Fiesta. That time we replaced the inner tube ourselves. We were a little nervous about how difficult it would be, since it was the rear tire, where the motor is. However, getting it off and back on the bike was pretty simple and straightforward. Getting the tire back on the rim was actually much easier than our previous hybrid bikes, with narrower tires.

The Gear Garage not only holds our two e-bikes, but most of our other outdoor gear, such as our hiking gear, camp chairs, and sand-free mat (see Our EKKO Organization for details). We like having three different doors to access all of the Gear Garage. But the three doors, with their two locks each, was also what we didn’t like about the Gear Garage. We like to keep the compartment doors locked, which meant we had to lock and unlock two locks every time we wanted to open one of the compartment doors. To get our e-bikes out or put them away, we needed to open all three doors, which required dealing with six locks and latches. Technically, we only needed to open one of the side doors and the rear door to get the bikes in or out, but Ann normally wanted to ride with her small backpack, which was behind the third door. Initially, we needed to open all three doors to access all of our hiking gear, but we moved our trekking poles so that we only needed to open two doors, one for our poles and hiking boots, and the other one for our backpacks. Having a central locking system on the exterior compartments, more like a van or car, would definitely be more convenient.

This was the first season we’ve carried a sand-free mat (unpaid link). Ours is 8 feet by 11 feet. We only used it a few times, but we wish we would have used it more. Ann really like setting her yoga mat out on top of the mat to do her daily stretches. Well, she would like them to be her daily stretches, but she seemed to find excuses not to stretch while we were traveling. She feels better when she stretches every day, like she does when we are home, but she lacked the motivation when it was too hot or too cold outside, or the ground was too wet, too dirty, or too buggy. Even though her yoga mat (paid link) is larger than the standard yoga mat, it is smaller than the one she used to travel with, because the old one was too larger to fit in the Gear Garage. When she goes through her stretching routine, her arms and legs extend beyond the mat and onto the surrounding ground. With the sand-free mat underneath, she didn’t have to worry about the dirt, sand, bugs, or mud underneath. She plans to use the sand-free mat more often during future seasons.

The Gear Garage is a nice place for storing our muddy, dirty, and wet gear instead of bringing them inside the rig. That gear includes our hiking boots, our surf shoes, trekking poles, backpacks, life jacket, camp chairs, collapsible ladder, folding outdoor table, and the sand-free mat. It helps keep the inside of the rig cleaner.
Part 10: Roof

Most of the roof of the EKKO is covered by solar panels and the air conditioner. However, there is one small open area. We purchased a Roof Bag (paid link) that fits perfectly in that space. We use the bag to store our inflatable paddle board (paid link) and our backpacking packs. These were items we didn’t access very often, so we didn’t mind climbing onto the roof to access them. The built-in ladder on the rear of the EKKO brings you right up to this open space. It would take two of us to get those items up or down. Ann would climb up to the roof and Keith would stand below on the side to take the items that Ann would hand down or pass the items up to her to put them away.

What we didn’t like about the built-in ladder was that it was black. When it sits out in the sun, it gets blistering hot. There were a couple of times that Ann was concerned she wouldn’t be able to put the paddle board away because the ladder was too hot to touch, let alone grab. However, by the time the gear dried off, the ladder was in the shade and it wasn’t an issue. However, Ann almost burnt the top of her feet on the black trim on the edge of the roof as she was kneeling up there putting things away.

The other issue was that the buckles on the Roof Bag started wearing holes in the bag. We covered the holes with Gorilla tape, but the buckles eventually wore through the tape as well. We’ll have to figure out what to do for Season Six, to keep the buckles from rubbing.

Ann liked using the paddle board. It took a lot longer to get comfortable on it than she imagined it would. It took less than ten minutes to pump up the board using the supplied hand pump, but it was a little bit of a workout, especially when it was hot weather. She only used the paddle board about eight times during the season, but some of those were incredible experiences, like paddling with the manatees in Silver Springs State Park in Florida (Silver Springs State Park, Florida - March 30th to April 2nd, 2023).

Our backpacking tent was also stored in the Roof Bag. By the time we used it in August, we discovered it was no longer waterproof. Luckily we had a tarp with us that we draped over the tent so we didn’t get soaking wet. We’re not sure how the tent was damaged. It could have been because it sat in the black Roof Bag for months in the extreme heat, or how it was stored in our garage for four years, or the seams were damaged from how we cinched it up to our backpack. It might have been a combination of all of those things. We are sure that whatever you store up on the roof is going to be exposed to extreme heat and freezing temperatures. So make sure you only store things up there that can handle those temperatures.
Part 11: Awning

We have a love-hate relationship with our awning. When it deployed without effort, and the sun was on the right side of the rig, at the right angle, and it wasn’t too windy, the awning was great. It provided shade to sit in, although we had to move our chairs as the sun moved. It also shaded Red Tail, keeping it from heating up. But the awning liked to stick, so much so that we got in the habit of always slightly pulling on it as it deployed, helping it along whenever we opened it.

We accidentally closed the awning once when there was a small twig sitting on top of it. It jammed the awning and we had a heck of a time getting it to deploy again, with part of that time trying to figure out why it wouldn’t open, since we didn’t realize there was a twig jammed inside. From then on, we tried to remember to check if there was any debris on top. That was not always an easy thing to do, since we normally had to stand on something, or climb up on the ladder, in order to see the top of the awning. And if there was something on top, it was not easy to remove it. It usually involved a step stool and a squeegee with an extendable handle. Those are probably not the best tools to use for the job, but it was what we had on hand.

The awning has a wind sensor on it, so it would automatically close when it detected that it was too windy. We appreciated the sensor since a gust of wind (or dust devil) damaged the awning we had on our camper van. However, the sensor has batteries in it that died several times during the season. As the batteries get low, the sensor starts emitting an annoying alarm, whether the awning was deployed or not. It always seemed to start beeping just as we were getting ready for bed. It was not an easy matter to get to the batteries, so we learned to pull the fuse for the awning from inside the rig until we wanted to deal with batteries.

Replacing the batteries involved deploying the awning, using a stool to reach the sensor on the end of the awning, using one screwdriver to remove two screws to remove the sensor from the awning, then using a different size screwdriver to remove the four screws to open the battery compartment, replacing the batteries, then reversing the whole process to put the sensor back.

We traveled with a Moon Shade awning (unpaid link) stored in our Gear Garage. However, despite our frustrations with the EKKO awning, we didn’t use the Moon Shade even once. We used the Moon Shade with our camper van and were happy with it. It has strong magnets to attach it directly to the side of a metal vehicle, but the outside of the EKKO is not metal. Even on our van, we found the magnets would move and slide in strong winds, so we had hooks on our roof rack which we used to attach the Moon Shade. We could have done the same on the EKKO, but the roof is much higher, making the shade less effective. The Moon Shade also had suction cups which we could have used to attach the Moon Shade to the side of the EKKO. We didn’t really trust that the suction cups would hold, but we didn’t even try. The side that is not attached to the vehicle works more like a tent, with poles that need to be assembled and attached to the far corners of the shade. It’s not a big deal, but it takes a little bit more effort to deploy than the EKKO awning. Needless to say, we will not continue to carry the Moon Shade with us in future seasons.
Part 12: Propane

We didn’t have propane in our camper van, so traveling with propane was new for us. We were curious about how much propane we would go through during the season. The EKKO uses propane for the furnace, the water heater, and the stove. There is also a quick connect on the outside of the rig which we hook our Blackstone griddle into.

From our experience, the furnace seems to be the biggest consumer of propane. It was cold the first two to three weeks of the season, so we were running the furnace a lot. We refilled one of the tanks at only 8 days into our trip, and again 16 days later. But then we didn’t use the furnace for quite a while, so we didn’t need to refill our propane for three months. We topped off one of the tanks two months after that, as we wanted to make sure we had plenty of propane as we were boon docking high in the mountains for four nights, with temps dropping below freezing.

So for us, if it’s cold and we’re constantly running the furnace, we could go through a 20 lb tank of propane in a week. Also, if it is even colder that what we experienced this season, the furnace would burn even more fuel. In warmer weather, a tank can last us about three months. Of course, that is dependent on how often we cook with propane and how many hot showers we take in the rig. Your consumption may be different than ours.

Keep in mind that there are two tanks. We would use one until it was just about empty, then switch over to the other one. Then we would fill up the empty one, so we always had at least one full tank on board.
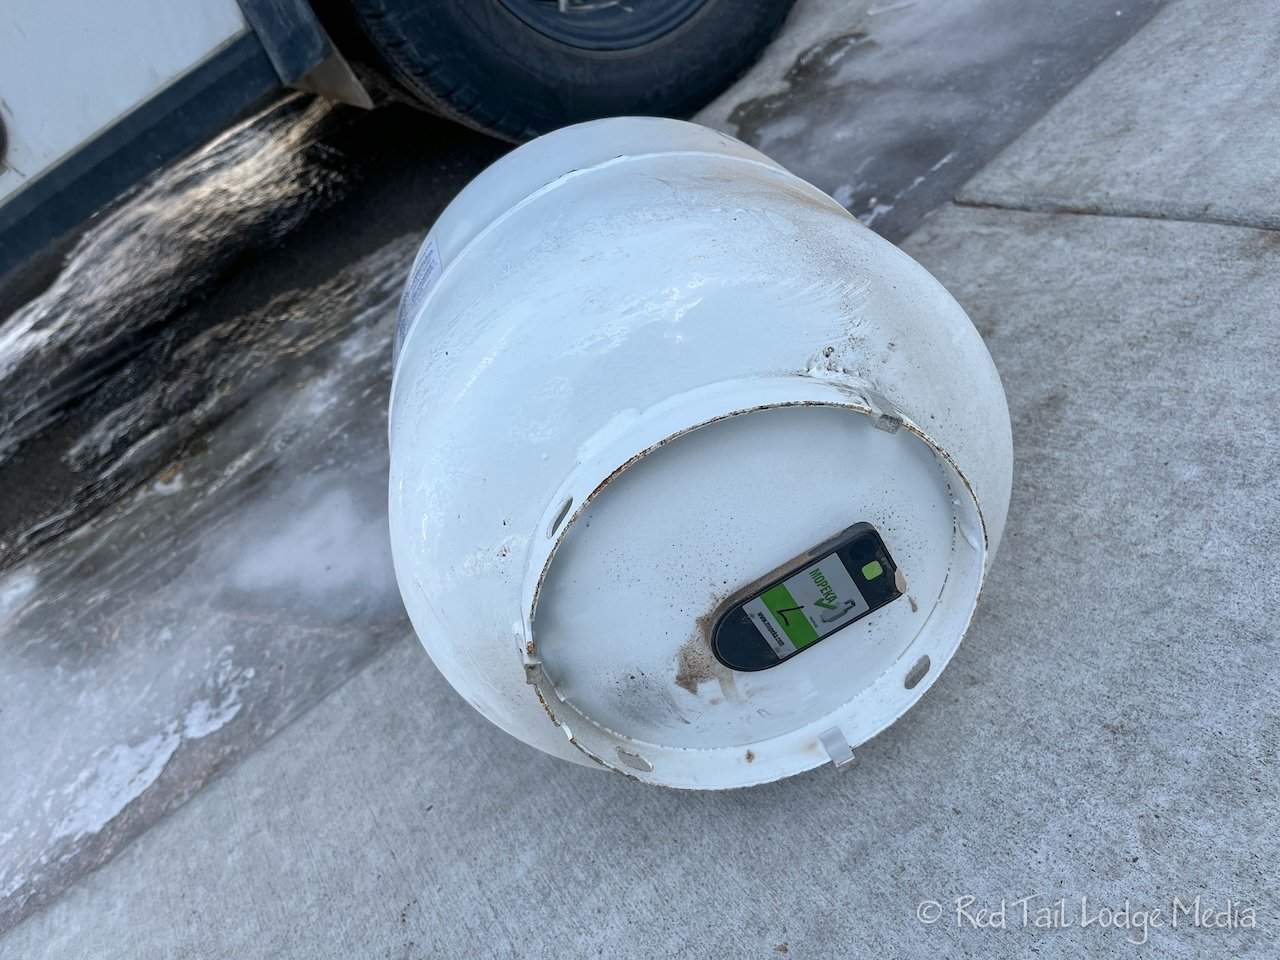
The tank sensors (paid link) that we installed on the bottom of our tanks worked great. The sensors attached to the bottom of the tank with just a magnet and transmitted the data to an app on our phones. They seemed to accurately measure the levels of the tanks. The batteries in the sensors started getting weak by the end of seven and half months, but we waited until we returned home to replace them.
Part 13: Water Systems

The EKKO water systems consist of the on-demand water heater, the fresh tank, the gray tank, the five gallon cassette tank, and the water pump. Hot and cold water are accessible at the kitchen sink, the bathroom faucet, the bathroom shower, the outdoor kitchen compartment, and the water compartment.

There are two heating settings on the water heater in addition to the temperature setting. They are Eco and Comfort. The Comfort setting recirculates the hot water through the lines so that the water immediately comes out hot when a hot water faucet is opened. This means that water is not wasted, flowing down the drain, while you wait for it to get hot. Generally, we set the water heater to Eco mode and only set it to Comfort several minutes before taking a shower. When we are just washing dishes, we would first fill the soapy water in the sink, then fill our plastic bin for rinse water after the water had gotten really hot. When taking a shower, we would set it to Comfort mode and try to set the temperature so that we wouldn’t have to mix any cold water in. We’re not sure if that really saves any significant amount of propane, but it makes it easier to adjust the mix at the shower, we just set it fully on hot. The temperature that seemed to work for us for showers was around 90 degrees.

Most of the compartments of the EKKO are heated, but the water heater is not. This is normally not an issue while camped and you have the water heater turned on, as it will keep the water heated. However, you shouldn’t have your water heater turned on while you are traveling down the road, as your propane should be turned off. This means that if you are traveling in temperatures below freezing, you risk freezing the water heater or the lines leading to and from it. Truma makes an electric antifreeze kit for the water heater. The kit goes in place of the normal filter inside the water heater. Since we knew we would be encountering freezing temperatures during the season, we kept the antifreeze kit installed the whole time. However, we only set the water heater to AntiFreeze and put the flue plug in while we were traveling and expected the temperatures to drop below freezing. We added it to our breaking camp and set up check lists to make sure we didn’t forget.
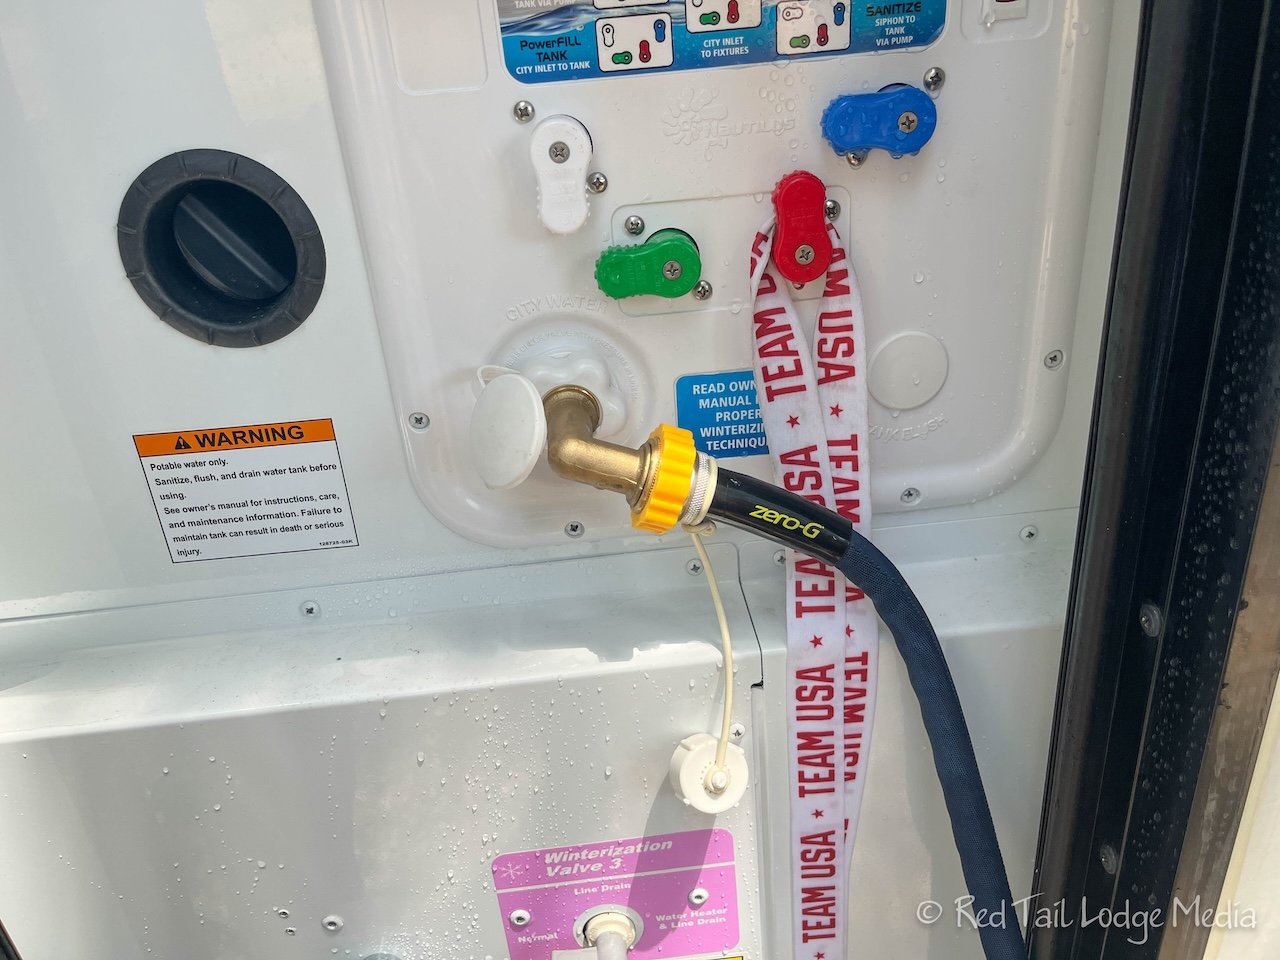
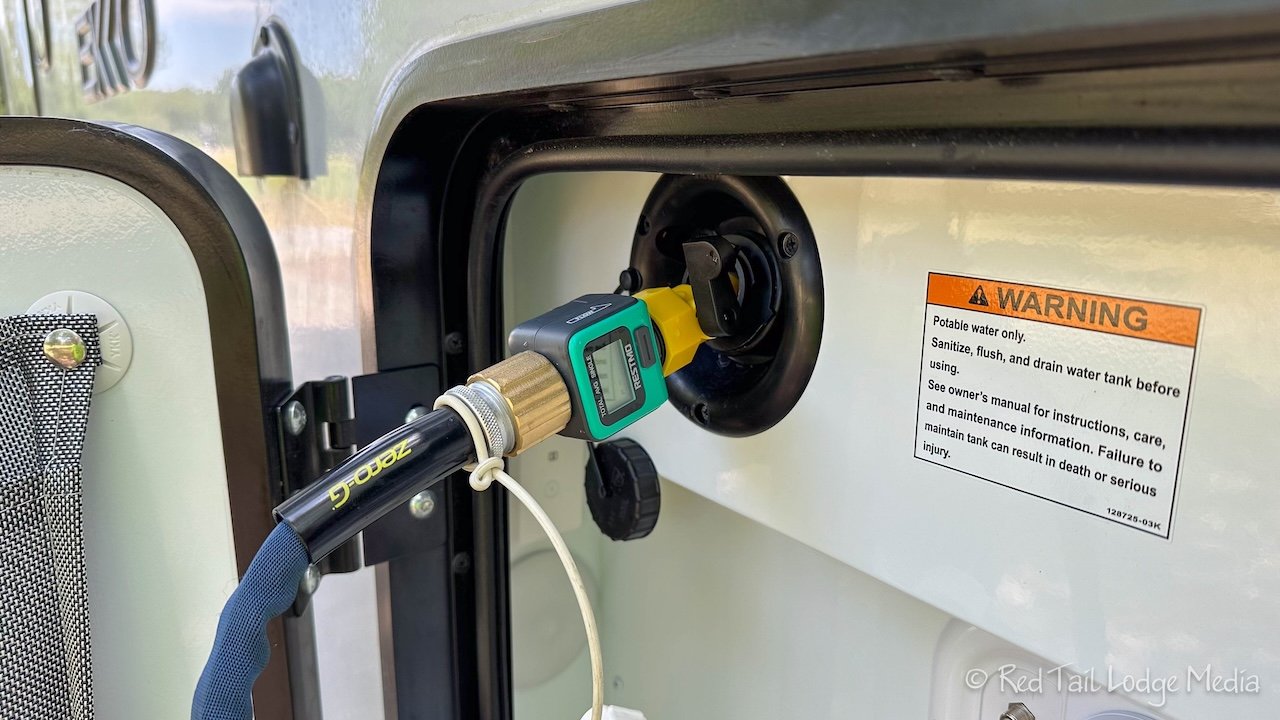
There are two ways to get fresh water into the system. One is to gravity fill the water into the fresh water tank. The other is to connect a pressurized water source to the city water connection, which bypasses the fresh water tank. Even though we’ve had water hookups at several of our campsites during the season, we only connected to the city water input once. We prefer to fill our fresh water tank. By always using our fresh water tank, it keeps the water in the tank, well, fresh. Since the EKKO fresh tank is about the same size as the gray tank, if we always dump our gray tank every time we fill our fresh tank, then we never have to worry about overflowing our gray tank.

There is a level sensor on the gray tank, but it didn’t seem very accurate, so we didn’t rely on it. Plus, the gray tank sensor lost communications with the control panel part way through the season. We relied more on the fresh water level sensor. If we accidentally overfilled the fresh water tank, it would just overflow onto the ground. Spilling fresh water is a lot better than spilling gray water.
Because we had our EKKO loaded close to the weight limit (GVWR - Gross Vehicle Weight Rating), we normally only filled the fresh water tank to about 75 percent or less, to make sure we didn’t exceed our weight. We pushed that limit a little bit when we went to the Albuquerque Balloon Fiesta. We were boon docking in the fiesta RV lot for eight nights with no hookups. So we filled our fresh tank in Santa Fe up to about 95% and managed to make it last through the fiesta.

More surprisingly, we were able to make it through those nine days/eight nights without filling up our 5 gallon cassette toilet. We were disciplined to use the provided port-a-potties most of the time, except for in the middle of the night. We ate out more than usual, but we still cooked about half our meals, including washing dishes. We washed up a few times at the sink, but only took one shower. There was a truck service at the fiesta that would come to your rig, dump your tanks and fill your fresh water. However, it was $30 to dump and $30 to fill. We did not want to pay $30 to dump a five gallon cassette, assuming they would even service a cassette.

We bought four collapsible 2.6 gallon water containers. These are smaller than the ones we had in our camper van. We thought the smaller ones would be easier to carry as it seemed like having a 2.6 gallon container in each hand would be easier than trying to lug around one 5 or 6 gallon container. Our intended purpose for these is two fold. One is to fetch water at a campground that does not have a tank fill station, only a container fill station. The other is to temporarily increase our fresh water and gray water capacity for extended periods of boon docking. We meant to fill up two of these containers before arriving at the Albuquerque Balloon Fiesta, but we forgot. Luckily, we were able to make it through the fiesta without the extra water. So we haven’t actually used these containers yet.
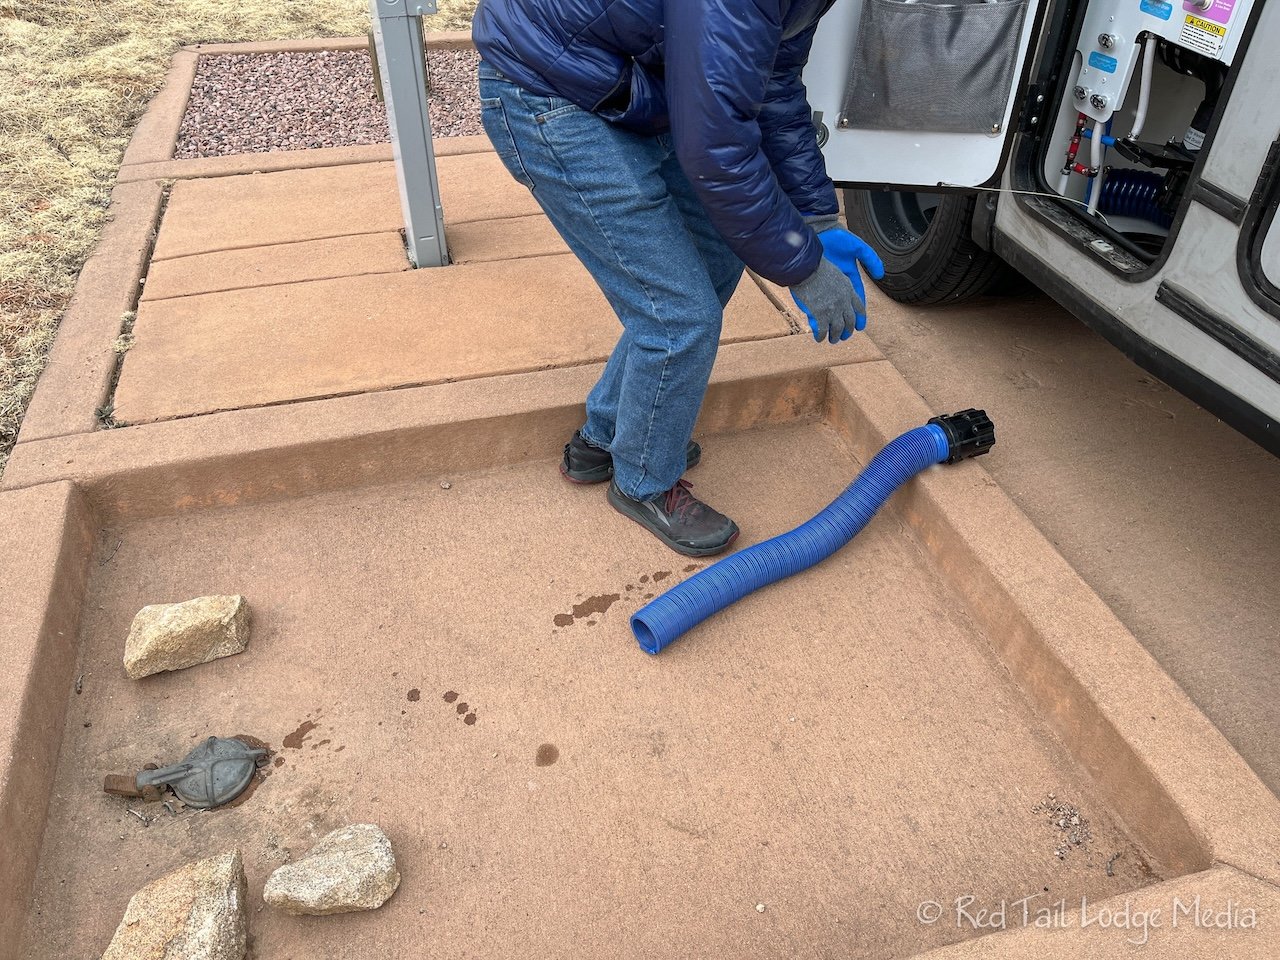
The first time we tried to dump our gray tank, we discovered that the sewer hose that came with our rig was too short. It was supposed to be a ten foot hose, but it seemed like it wasn’t even five feet long. We were at a campsite with a sewer connection, but the concrete apron around the connection wouldn’t let us get our rig close enough for our hose to reach. (Little Sahara State Park, Oklahoma - March 7th to 8th, 2023). We’re not sure why our hose was so short. Surely this was not supposed to be the hose that comes with the EKKO.
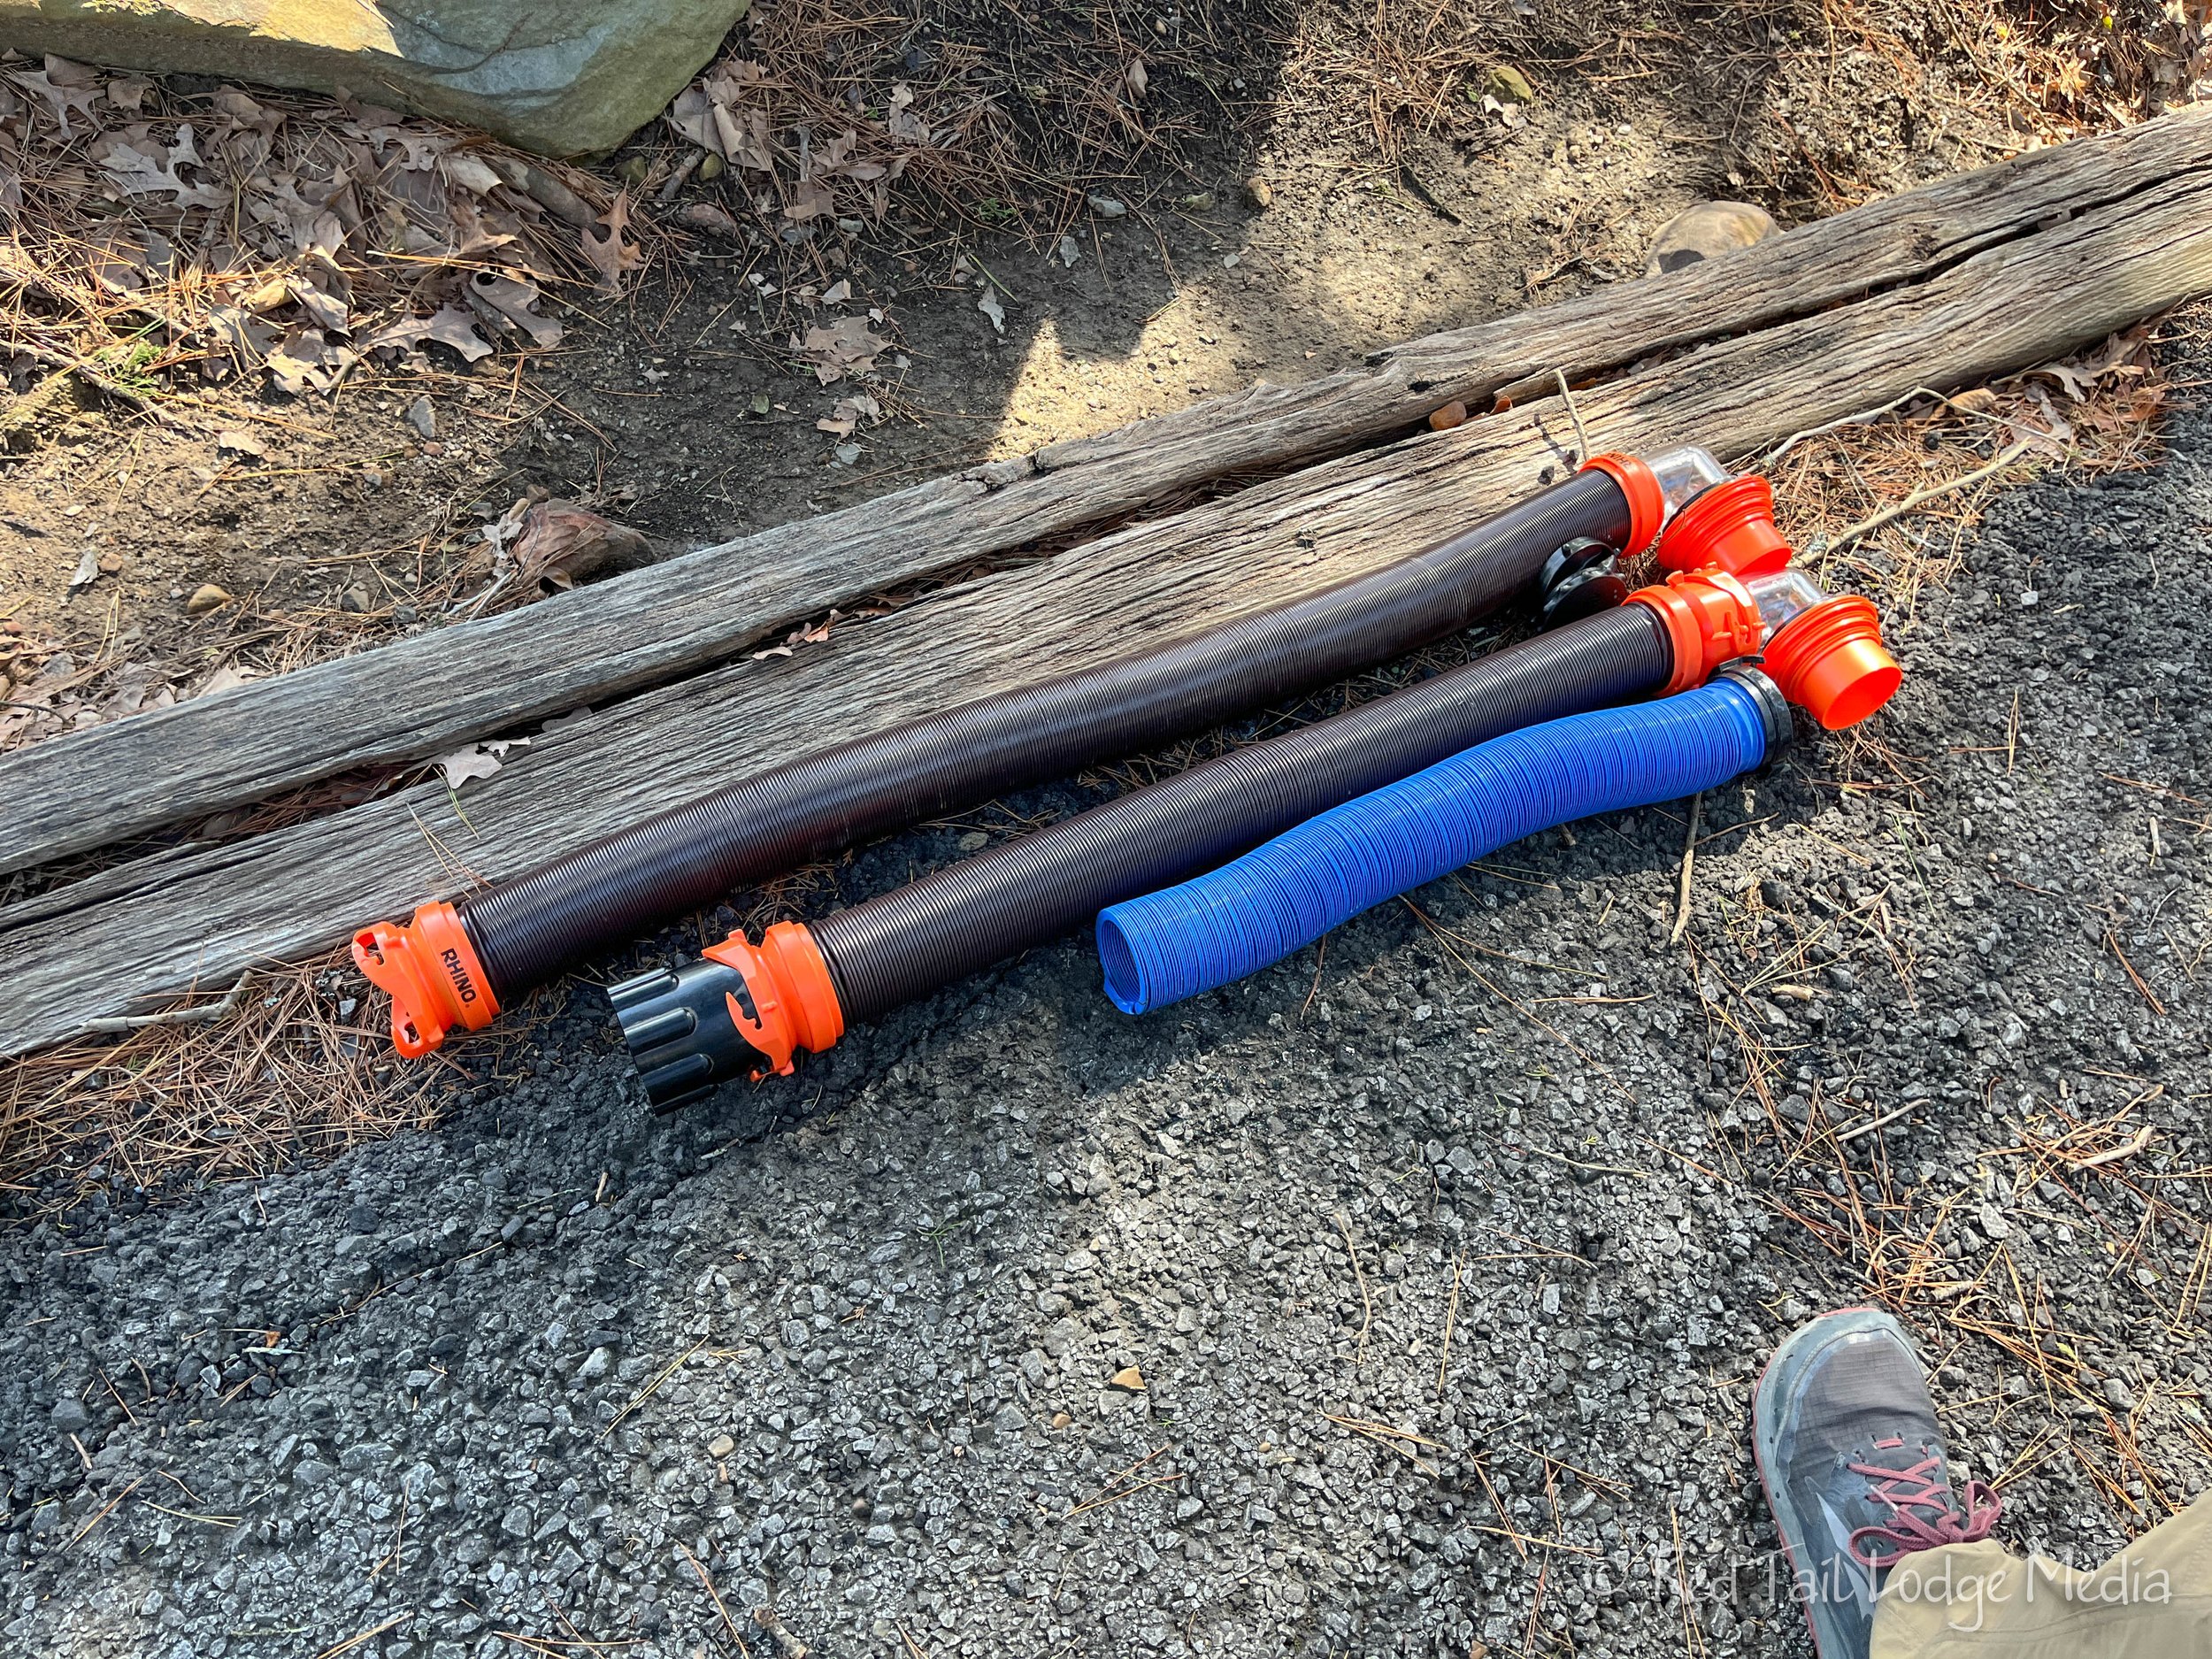
We stopped at the store and bought a 15 foot Rhinoflex sewer hose. We store the sewer hose in a SuperSlider (paid link) that we mounted underneath the EKKO. The SuperSlider expands enough for a 15 foot hose to fit inside, but we couldn’t find enough clear space under the rig to remount the SuperSlider when it was expanded that long. So we went back to the store and bought a 10 foot Rhinoflex hose (paid link).

Even with the 10 foot hose, it was tricky to get the SuperSlider mounted. We had to mount it at an angle (Talimena State Park, Oklahoma - March 9th to 12th, 2023).

There are three switches that turn the water pump on and off. One is next to the bathroom sink, another one is in the water compartment, and one is on the control panel next to the entry door. So there is a switch conveniently near where you would use a water faucet, except for the faucet in the outdoor kitchen compartment. But we never used the outdoor kitchen faucet, so that was not an issue for us. We preferred using the switches over using the control panel, as the switches were easier to operate. All three of the switches acted like a three way electrical switch, as flipping any one of the switches would toggle the water pump on or off. The water pump doesn’t actually turn on until a faucet is opened, but switching it off meant that the pump would not come on when a faucet opened. We normally liked to turn the water pump off at night, while we were driving down the road, or when we were leaving the rig for any length of time. Having the pump turned off reduced the risk of a faucet being bumped on and the rig flooding.
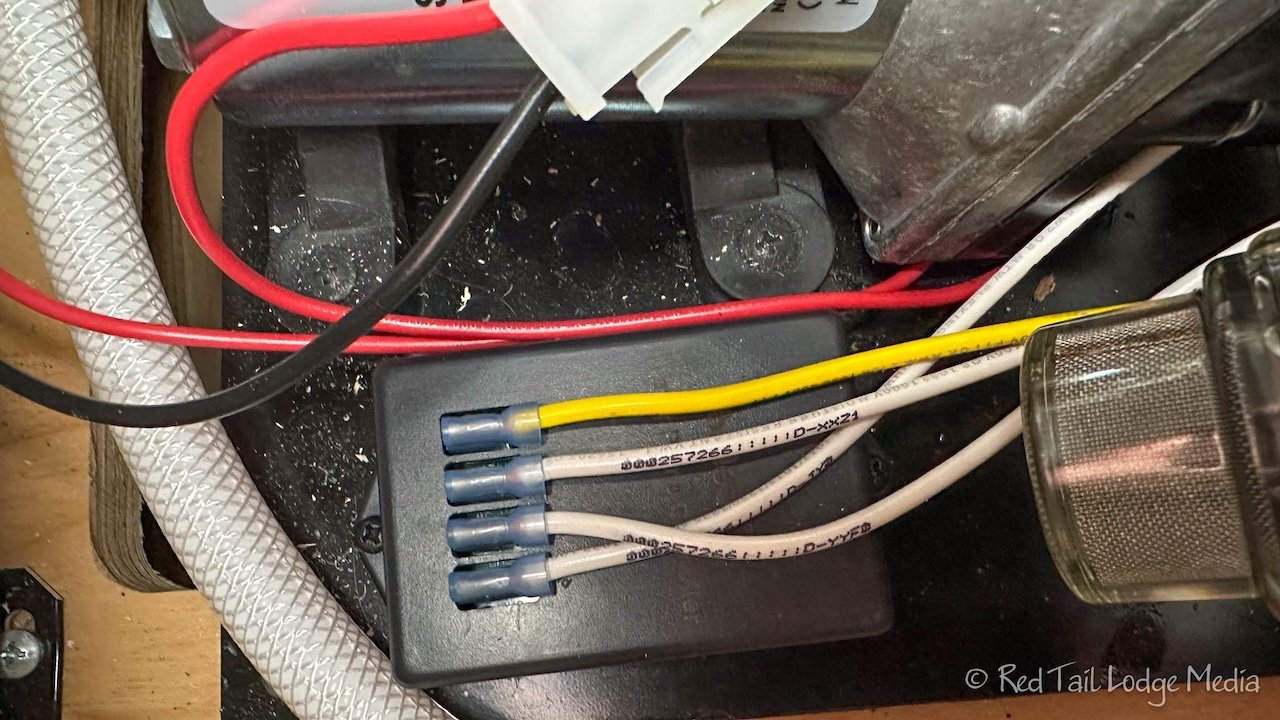
About a month and a half into our trip, we lost the ability to turn off the water pump. No matter which switch we tried, the light remained on and the water pump was active. A little internet searching, consulting the EKKO Facebook group, and a little debugging work, we determined that the water pump controller had failed. All three of the switches go through a water pump controller that handles the toggling. Luckily, it was stuck with the water pump on instead of off, so we could still use the water pump and our faucets. We just couldn’t turn it off to reduce the risk of flooding. We ordered a new water pump controller. It was pretty easy to install. If the controller had broken with the pump in the off state, it would have been easy to bypass the controller and have the pump on all the time.

We have noticed that the water pump seems to be noisier after a travel day. We’re not sure why and have not have any other issues with the water pump. Time will tell if the noise is something to worry about or not. Perhaps it is just air getting into the lines.

The cold water for the kitchen sink goes through a water filter. The filter provided by Winnebago is a Culligan D-20A, which is a 5 micron filter. Keith noticed an off-taste at a couple of the campgrounds we visited, so he ordered a replacement filter that was 0.5 microns (Culligan D-30A - paid link). Since we installed it, we haven’t noticed any off flavors. The filter must be doing something, because the water flow rate was noticeably reduced.

A coiled quick connect water hose with a spray nozzle was provided with the EKKO. It connects to the faucet in the water compartment. It worked fine, but we replaced it. We wanted a coiled hose that we could use both with the quick connect faucet and with the water hook up in a campground. We mainly use the hose to spray off equipment, such as muddy hiking boots or bikes or rinsing off the paddle board and associated gear. It is nice to use the hose with the campground water faucet, if we have one at our site, instead of the water compartment faucet so that we aren’t using water from our fresh tank and reducing the wear and tear on our water pump. The coiled hose (paid link) we purchased has a normal garden hose connector, and we also purchased an adapter (paid link) that allows it to attach to the quick connect faucet.

We like the Get Wet Organizer (unpaid link) we attached to the door of the water compartment. Everything that we need for filling and dumping our tanks is handy to access (except for the sewer hose, which is mounted under the rig). However, the water compartment is not very deep and the Zero G fresh water hose that we store in the organizer is bulky. We are concerned that it may be pushing on the controls of the water panel sometimes. That is probably not a good thing, although we have not had any issues yet. We’ll probably figure out something different for next season.

There is a light just above the water compartment. The cover for the light came loose, but we were able to attach it back on with silicone. It has not been a problem since.
Part 14: Electrical Systems

Our EKKO electrical systems consist of 640 amp-hours of lithium batteries, 455 Watts of solar panels on the roof, a 2000 Watt inverter/charger, a solar controller, a second alternator under the hood, and a 30 amp shore power connector. The lithium batteries can be charged via the solar panels, the second alternator when the engine is on, or shore power. We use the electrical power for our refrigerator, microwave, air conditioner, MaxxAir roof fan, water pump, inside lights, four DC fans, the power awning, an induction cooktop, an Instant Pot, an electric tea kettle, a Bluetooth speaker, an essential oil diffuser, our WeBoost (cell signal booster), and Verizon hotspot along with charging a laptop, iPad, two cell phones, an Apple Watch, camera batteries, an electric toothbrush, a razor, and the motion-activated lights.

The EKKO comes with a switch between the air conditioner and the microwave. If the air conditioner is on and you turn on the microwave, the AC automatically shuts off. The AC then automatically comes back on after the microwave turns off. We didn’t think this would be a big deal, but it so nice not to have to think about it or forget, possibly overloading the inverter and having it turn everything off.

At the beginning of the season, we had an issue trying to use the induction cooktop when running off the batteries (while not hooked up to shore power). When we were using the induction cooktop (paid link) on high for ten minutes, trying to boil water for pasta, the inverter would eventually kick off due to a low voltage error. The low battery cut-off setting (LBCO) on the inverter was 12.1 V. However, there is a significant drop of voltage from the batteries to the inverter, so the recommendation of folks on the Facebook group was to lower the LBCO to 10.5V. After changing the LBCO setting, we have not had an issue.

Whenever we plug into shore power, we use our Hughes Watchdog surge protector (paid link). This not only protects our rig against surges, but also against things like low voltage. One evening during the season, a thunderstorm came rolling through. When lightening struck nearby, all of our power turned off. The Hughes reported a Line 1 Voltage Error. After 90 seconds, the surge protector allowed the power to come back on. We were thankful, because we were in Big Bend National Park during some extreme heat and needed to have our air conditioning running. Had the lightning surge damaged our rig, that could have meant we lost our AC. The surge protector was worth its weight in gold.

Early in the season, when we were plugged into shore power, Ann noticed a bright light coming in her bedroom window during the night. Who has a bright light on! When Ann peeked out the window, she realized the light was coming from the Hughes surge protector. When it is plugged in, the face of the dog is lit up with a white light (it turns red if there is an error). It probably isn’t noticeable in a brightly lit campground, but we were in a dark, state park. The next day, we covered up most of the dog with electrical tape, except for its eyes, so we could still see if the light was white or red. That was much better.
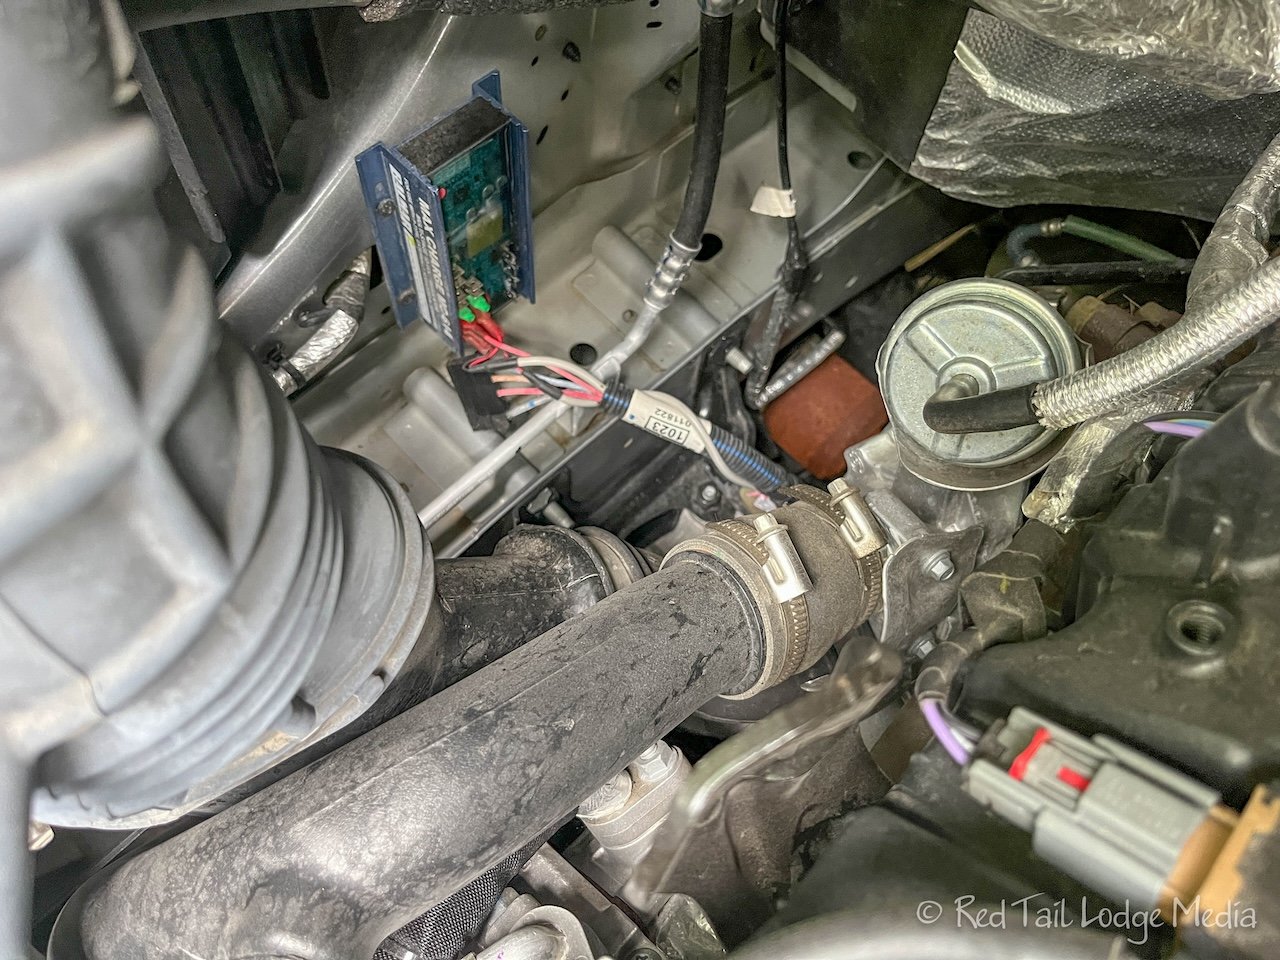
Winnebago issued a recall for the second alternator. The alternator would overheat and start to smoke. We heard about the recall, but it took quite a while for Winnebago to come out with an official fix. In the meantime, our alternator started to make some funny noises when we started the engine. We decided not to risk it overheating, so we disconnected it. However that meant that we could no longer charge the batteries from the engine on travel days.

We had some campground reservations coming up which had no electrical hookups. We were concerned our solar would not be enough to keep up with our electrical needs. We do not have a generator (we opted for the extra lithium batteries instead). So we ordered and installed a Kisae DC to DC charger (paid link). It charges the lithium batteries from the chassis battery (so it is using the original Ford alternator). It took a little while for us to round up all the supplies we needed for the install and to understand how to connect it properly. After installation, we were back in business. The charger seemed to work well, topping off the batteries on travel days.

We were not that happy with the way the solar controller was sending power to the batteries. It seemed to be in float mode often and would stop charging the batteries when they were only 70% full. Since the Kisae DC to DC charger also had a solar controller in it, we decided to reroute the solar panels to the Kisae. Again, that took a little while to understand and find all the right connections and supplies. However, once we had it all hooked up, we were happy with it. The solar panels seemed to be charging the batteries much better than the EKKO’s Zamp solar controller. We’re not sure what the issue was with the Zamp controller, whether it was just some settings that were not right or something else.

The real test of our electrical system was at the Albuquerque Balloon Fiesta, nine days and eight nights with no hookups and no driving. That meant our only means to recharge the batteries was through our solar panels. Keith was a little worried that they wouldn’t keep up, so he purchased a portable solar panel (paid link) that we can connect to the solar input on the side of the EKKO. We tested the panel out and it seemed to work. All we needed to do was use the adapter to reverse the polarity of the panel.

However, we never had to use the portable panel. We had sunshine most of the week and our batteries never dropped below 75%. The solar panels kept up with our electrical needs with plenty to spare. Of course, we were not running our air conditioner and we did eat out more than normal. But we did use the induction cook top for one meal and the Instant Pot for another. The fridge was running and we were charging all of our devices like we normally would. As long as the sunshine held out, we could have continued forever, at least as far as electrical needs were concerned. Naturally, if the weather had been cloudy or rainy the whole time, it might have been a different outcome. There is still some solar gain during days with clouds and rain, but nowhere near the amount of gain from full sunshine.

We have an appointment for the alternator recall fix. After the fix, we’re not sure if we’ll keep Kisae DC to DC charger. It depends on how well the fix works and if it has any affect on the solar controller. We’ll keep you posted.
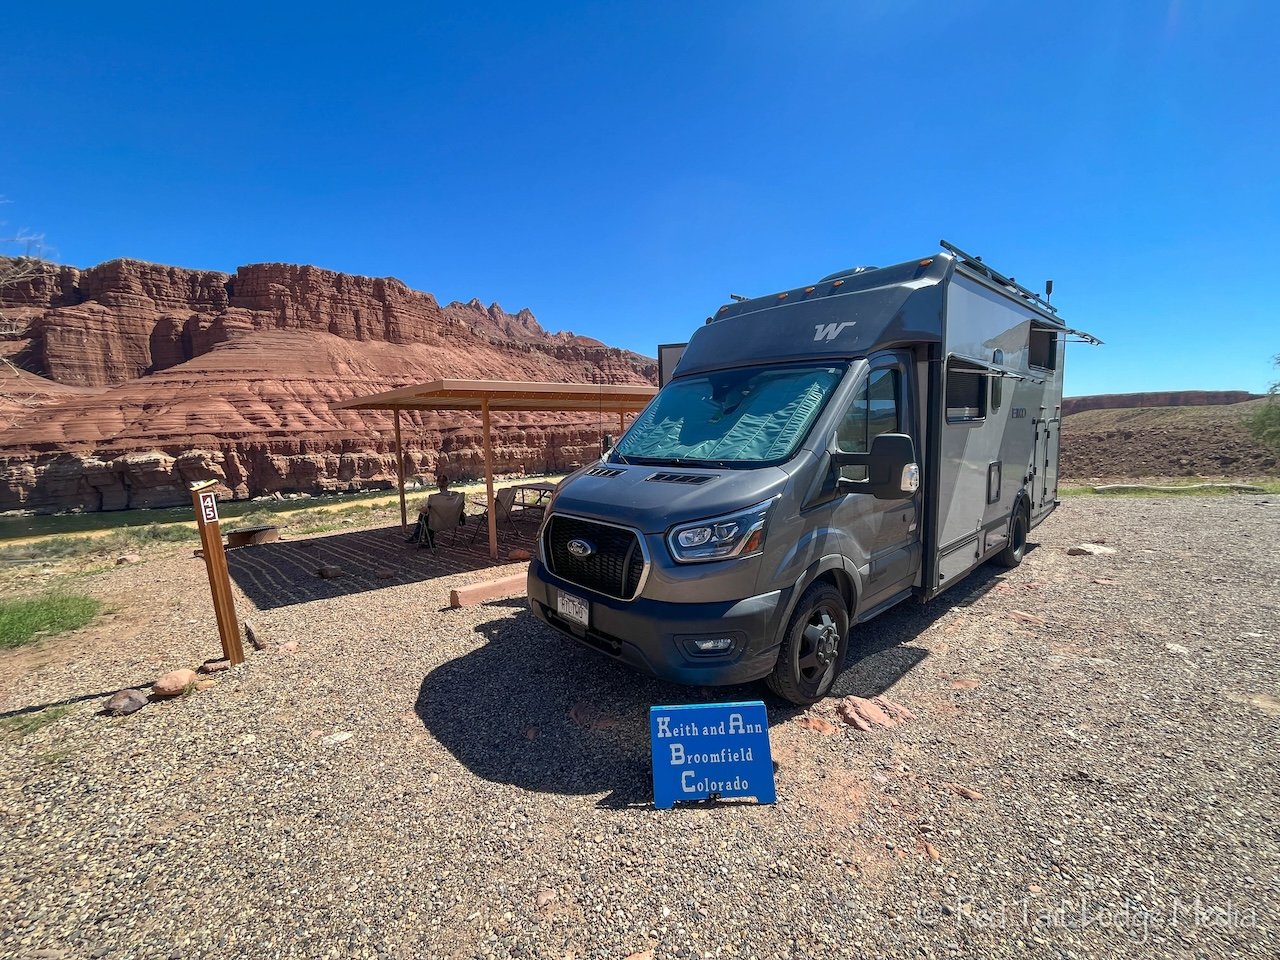
Part 15: Drivability

The EKKO is built on a Ford Transit cutaway chassis. Our camper van was built on a Ford Transit passenger van. So driving the EKKO is very similar to driving our camper van. However, the EKKO is a little longer, has dually rear wheels, is a little heavier, and has the ECO-boost (turbo assist). We find the EKKO handles better, has more power, is more stable, and less prone to being pushed around by a cross wind than our camper van. It is a much nicer driving experience.

The extra length of the EKKO over our camp van (23 feet vs 19 feet) has not been a big issue, but it does cause us to be a little more cautious about where we go and where we park. There were only two times when we struggled with the size of the EKKO. We picked out a restaurant in a small strip mall, but had to move on because the parking lot was too tight for our comfort. The other time was when we needed to pick up a new laptop at an Apple Store in Scottsdale, Arizona. The shopping area was mostly pedestrian, with the only obvious place to park was in parking garages, where the EKKO is too tall (our camper van would have also had the same issue). We ended up having Ann hop out as Keith briefly stopped in the road in front of the store, then he swung back around to pick her up when she was done. In both cases, we should have scoped out the area better ahead of time using the satellite view in Google Maps.
Part 16: Overall Impressions

Overall, we still love our EKKO. We have been able to work around all the issues that we have encountered. Nothing has prevented us from continuing our seven and a half month trip. All of the reasons why we chose to purchase the EKKO still hold true.
The EKKO has all of the features we liked about our camper van. It is small and nimble. The ceiling is high enough for us to stand up in. We can both fit in the beds (we’re both 6 foot tall). It is quick and easy to set up and pack up. All the plumbing is inside heated spaces so the rig can be used year round.

The EKKO has all the features we were missing in the camper van that we were looking for. It has more storage room. There is a gear garage that is large enough to hold our two e-bikes. It has a larger gas tank, a larger fresh tank, and a larger gray tank. The beds are closer to the floor, making it easier to get in and out of bed (climbing up into the bed in our camper van was painful when Ann had a broken tail bone - Shades State Park, Indiana - April 6th to 7th, 2022). The beds have enough space above them so we can sit up in bed. It has a real bathroom, with a cassette toilet, and an indoor shower. It has a separation of space, with the dinette separate from the bedroom. It allows one of us to be working in the dinette or cooking in the kitchen, with the other person in the bedroom, out of the way, perhaps sleeping in or taking a nap. As much as we love spending so much time with each other, it is also nice to be able to be apart every now and then.

For our needs and the way we like to travel, we have not seen a rig better than Red Tail, our EKKO. Is it perfect? Nothing ever is. Did it have issues? Yes, as most rigs do. But we are happy with our purchase.
Hopefully this review has helped give you more insight into what the EKKO is really like on the road. No matter what rig you travel in, we hope it meets your needs and desires. Safe travels!
(Ann)