
Planning for the Tour du Mont Blanc
The Tour du Mont Blanc (TMB) is a 165 kilometer (103 mile) hiking trail through France, Italy, and Switzerland. We are sharing how we planned our hike of the TMB in hopes that our experiences may help you.
Step 1: Get Familiar with the Trail
Step 2: Figure Out a Comfortable Pace
Step 6: Plan Water and Lunch Stops
Step 1: Get Familiar with the Trail
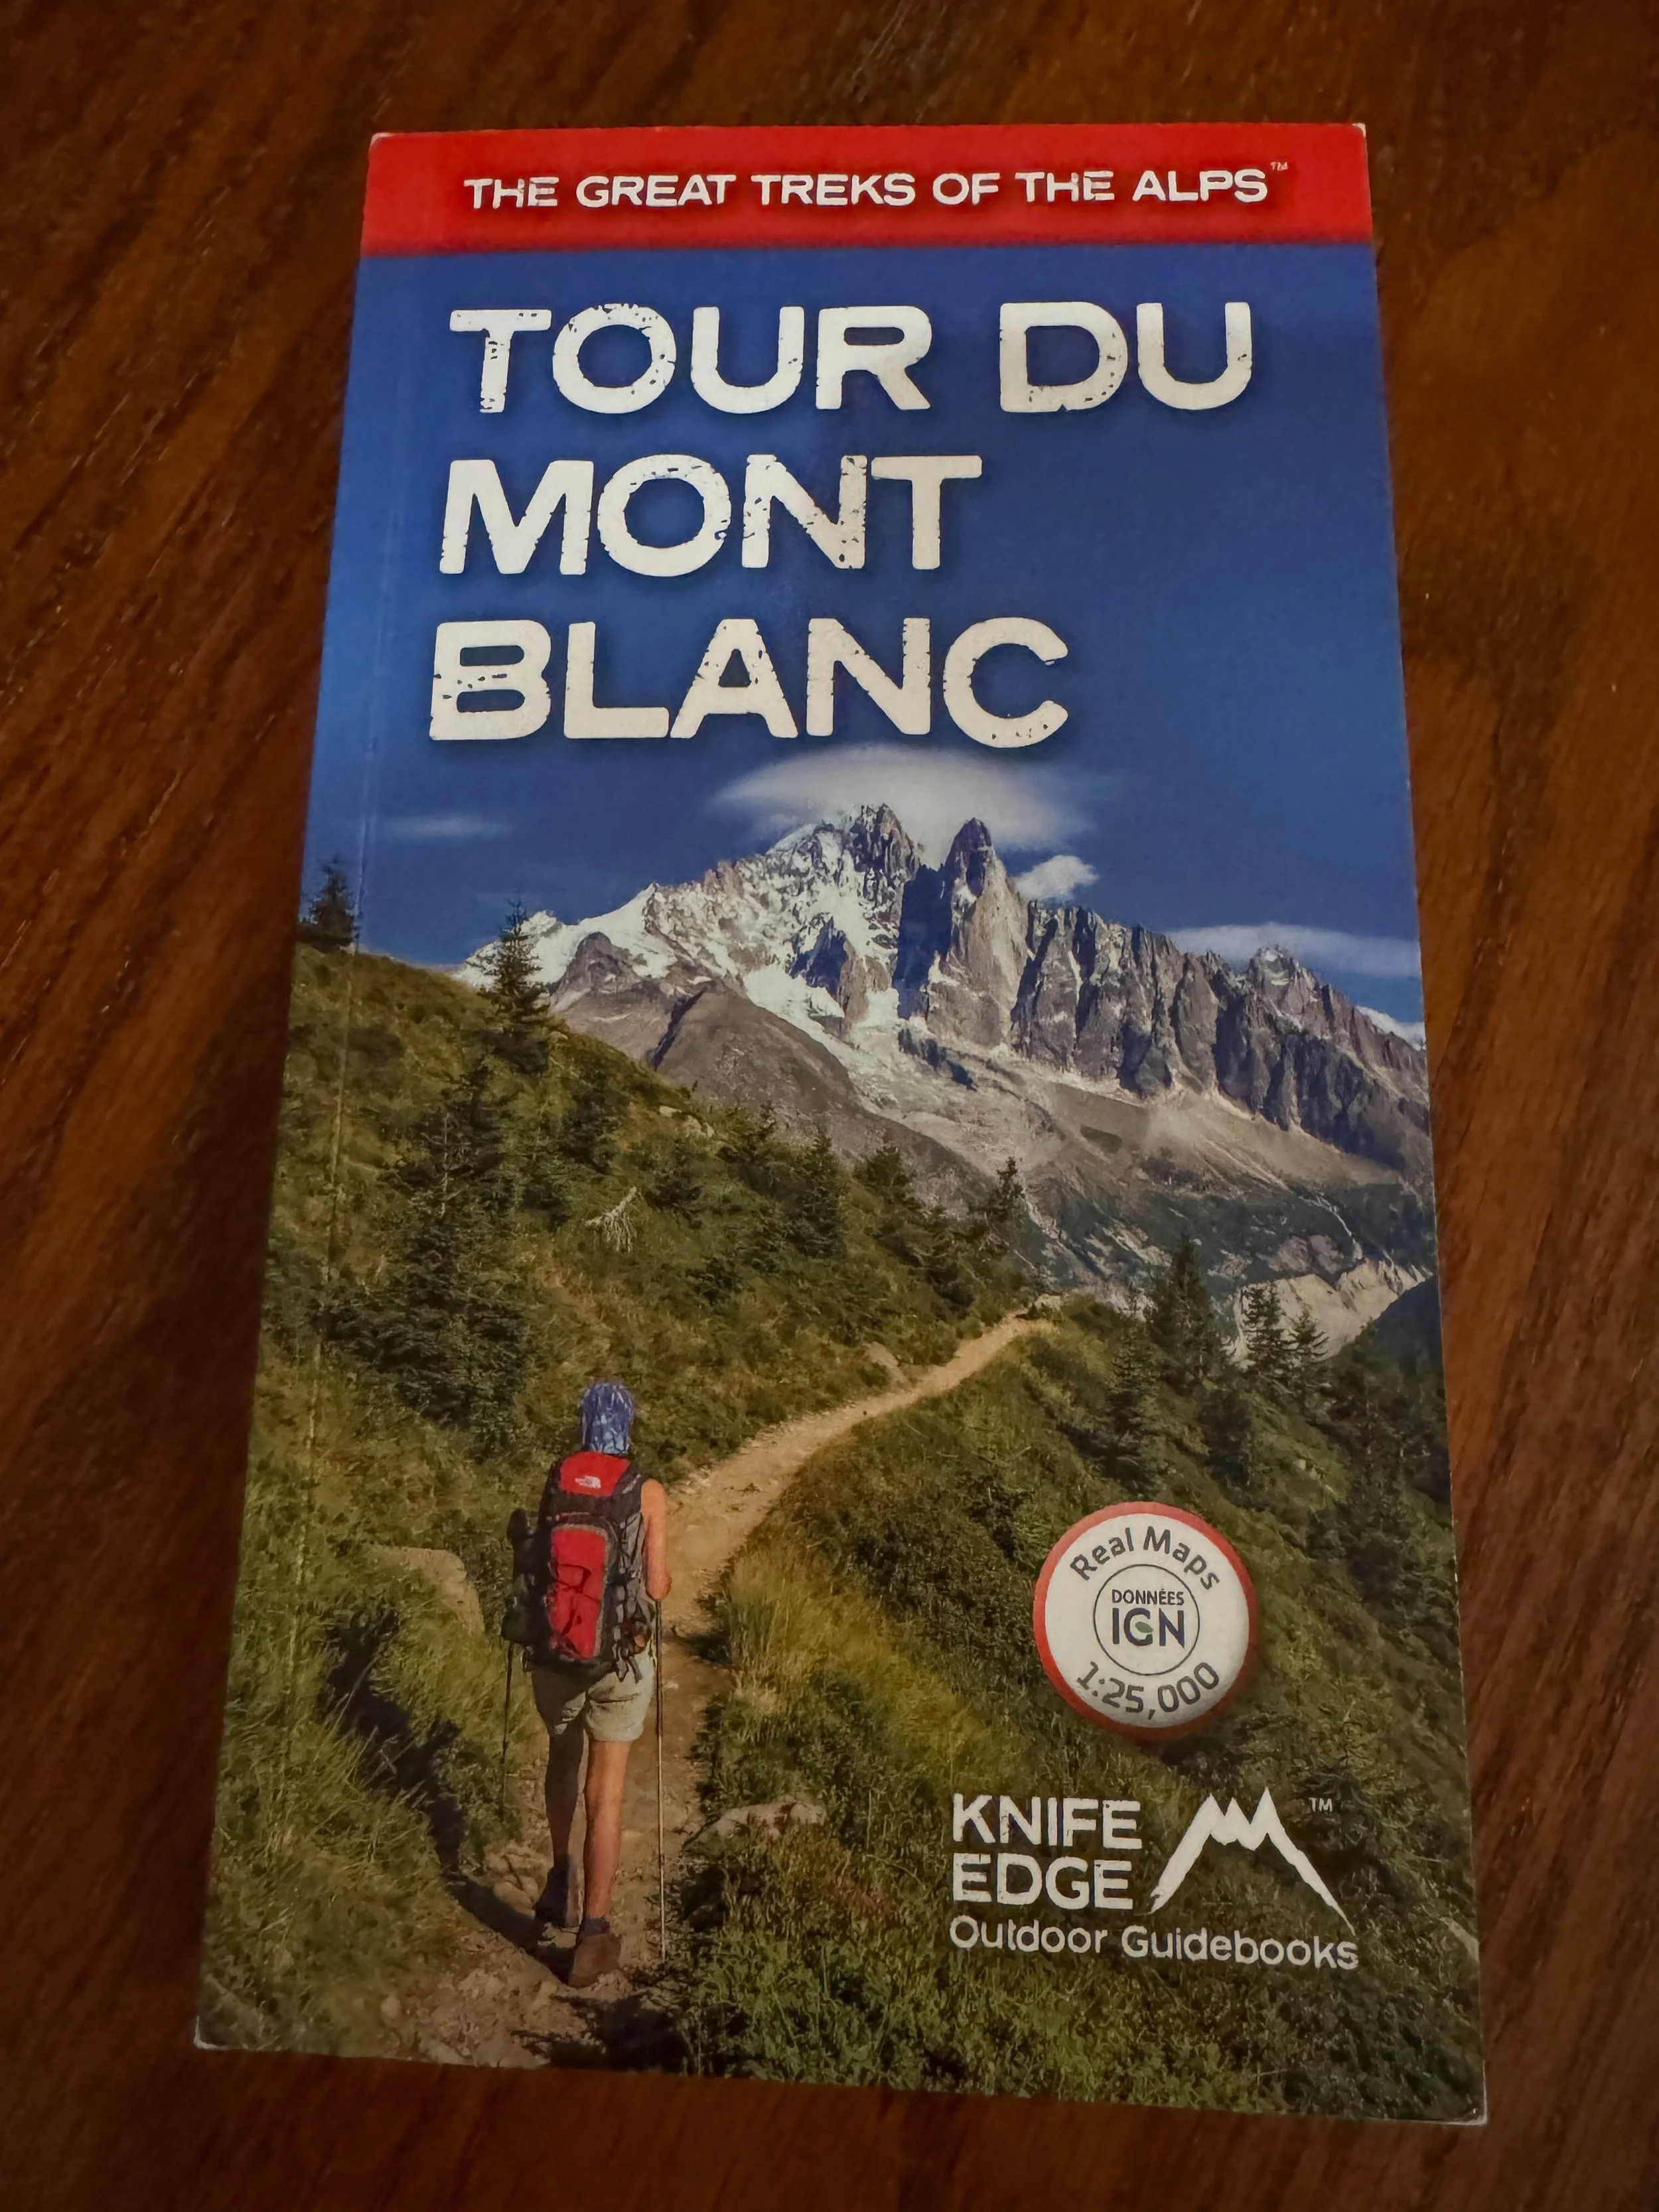
We started out researching as much as we could about the trail. We read books, such as Tour du Mont Blanc by Andrew McCluggage (paid link). We joined a Tour du Mont Facebook group, which not only provided information for planning, but also up-to-date information while we hiked it. We watched YouTube videos and searched for info online. We tried to answer as many of the questions we had about the trail as we could. How many days do most people take to hike it? What are the distances and elevation gain and loss for each day? What types of accommodations are available along the route? What kind of weather can we expect during different times of the year?
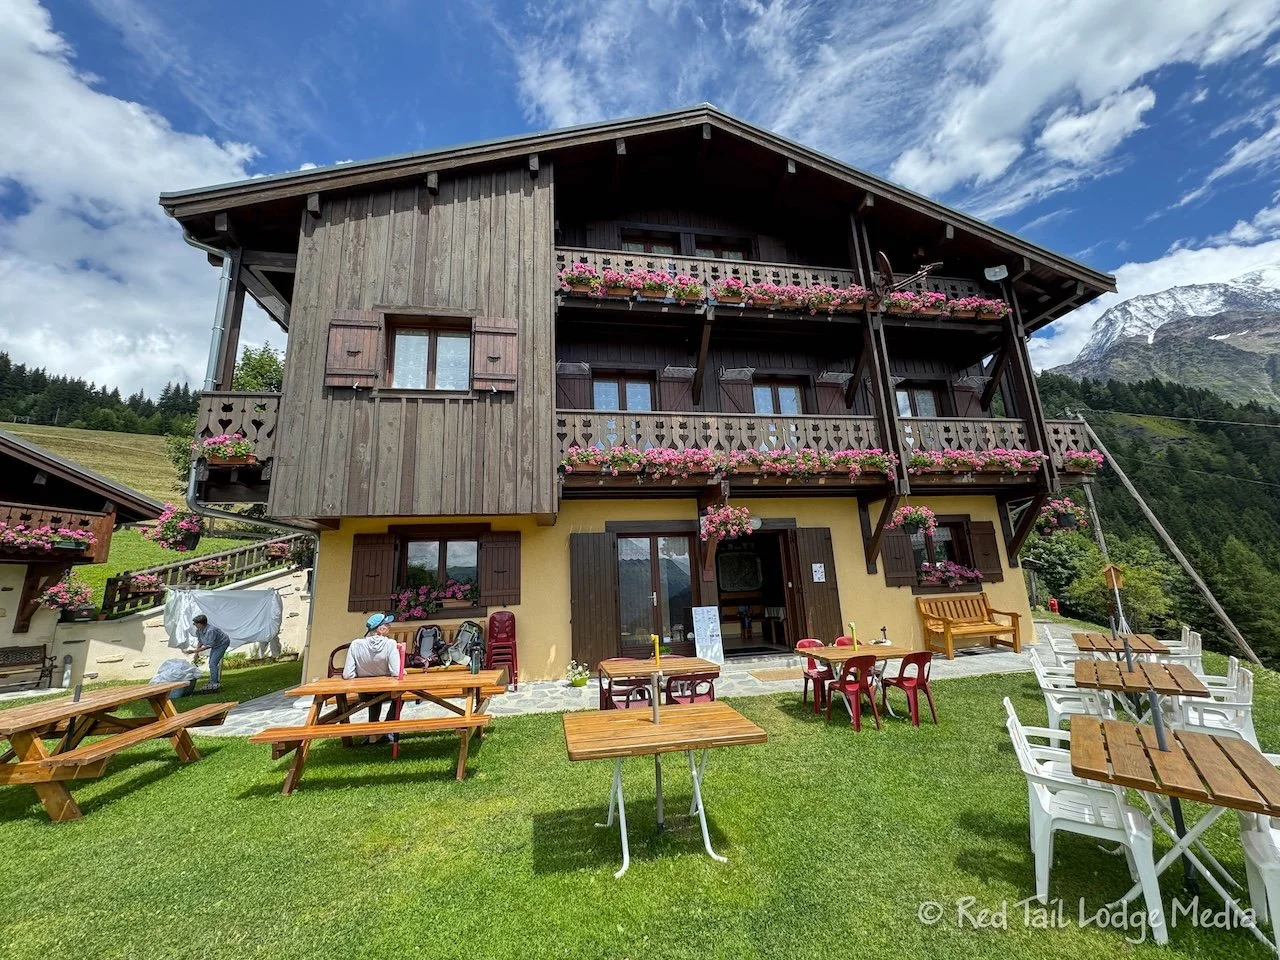
There are several ways you can approach the hike. You can hire an agency to arrange all of the lodging with breakfast and dinner included, provide a guide to hike with you or a group, provide sack lunches each day, and have your luggage transferred between lodging locations. At the other end of the spectrum, you can plan it all yourself, camping in a tent along the way, cooking your own meals, and carrying everything on your back. We went with something in between. We arranged all of our own lodging, hoping for half-board when that was available, stopping along the way for lunch or packing something with us, and carrying all of our gear on our backs. Since we were planning on staying in mountain huts or hotels along the way and only carrying enough food for during the day, we didn’t have to carry as much gear as a backpacker. If you’re interested in what we carried, see our previous post: Packing for the Tour du Mont Blanc.
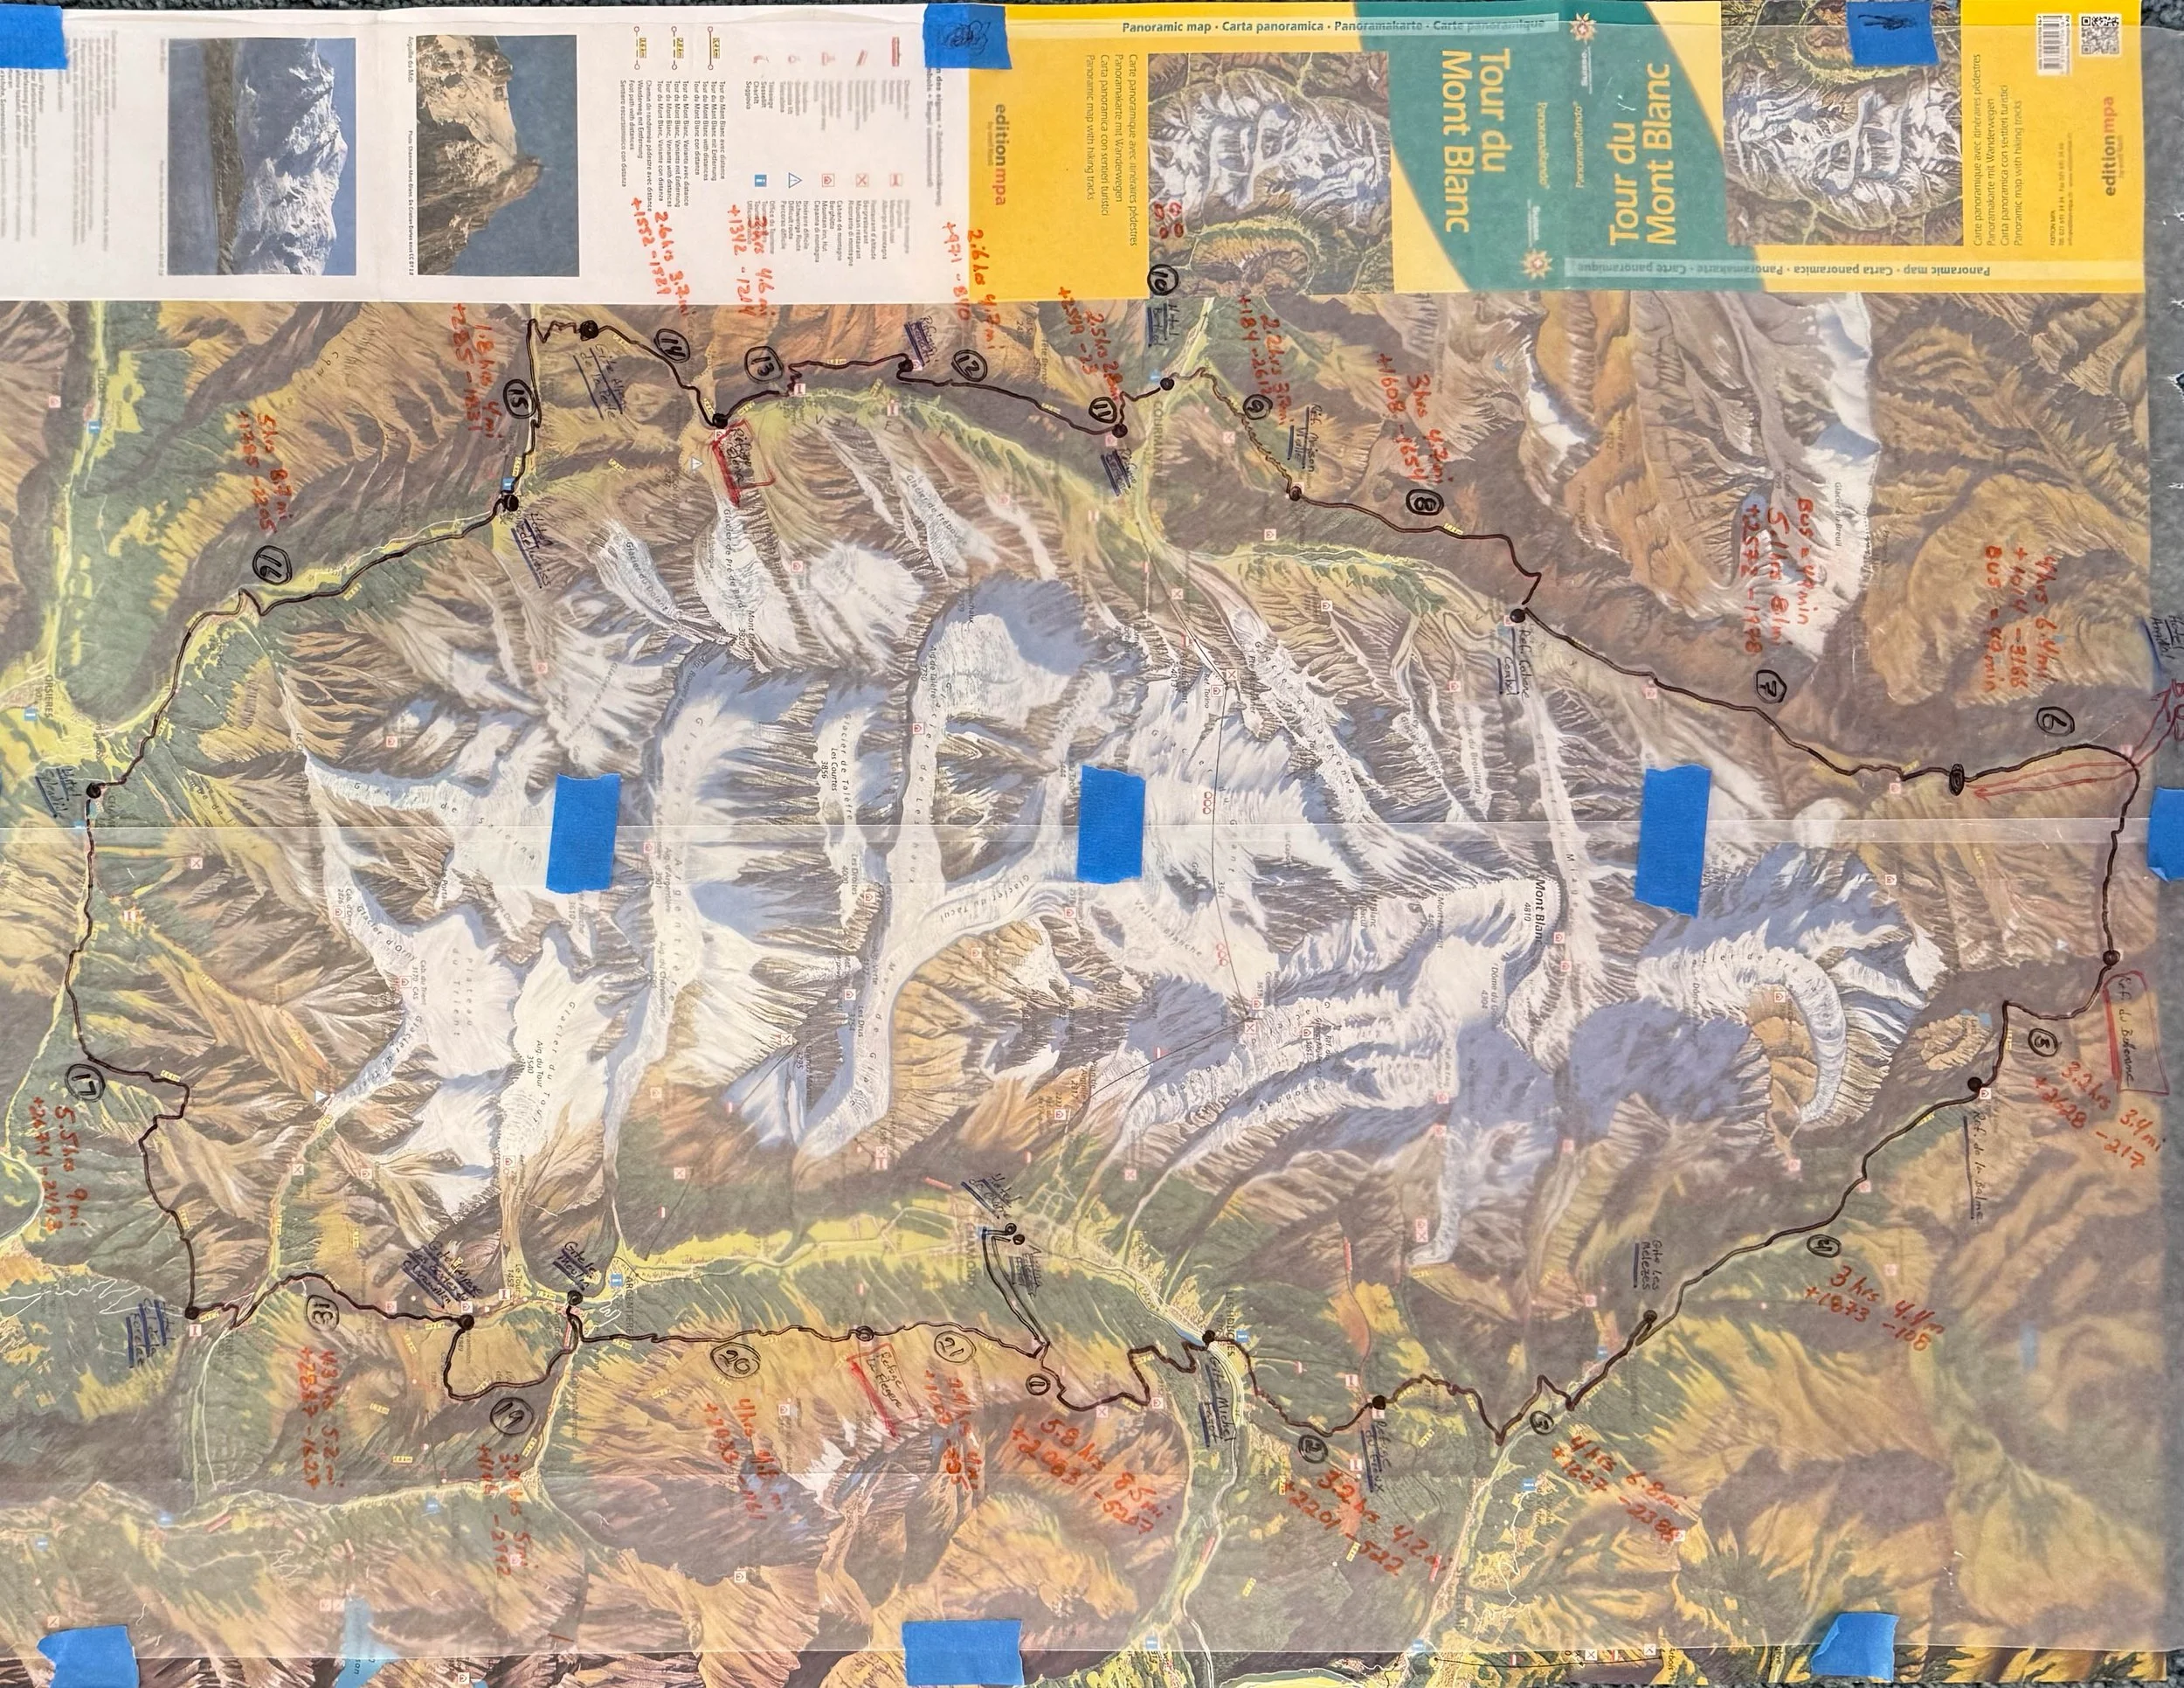
We also bought a map of the Tour du Mont Blanc - Panoramic Map with Hiking Routes (paid link). Call us old-fashioned, but there is something different about having a paper map in front of you, so you can get the overview and the details all at once, without having to zoom in and out as you do for digital maps. We added clear plastic sheets over the map so we could mark our particular route, stops and other data, retaining the ability to make changes without destroying the map. Keith found this invaluable to get a good feel for what we were getting ourselves into. However, this particular map was a little strange it that north pointed down to the bottom of the map instead of up, so it took us a little bit to get used to the fact that the map was upside down.
Step 2: Figure Out a Comfortable Pace
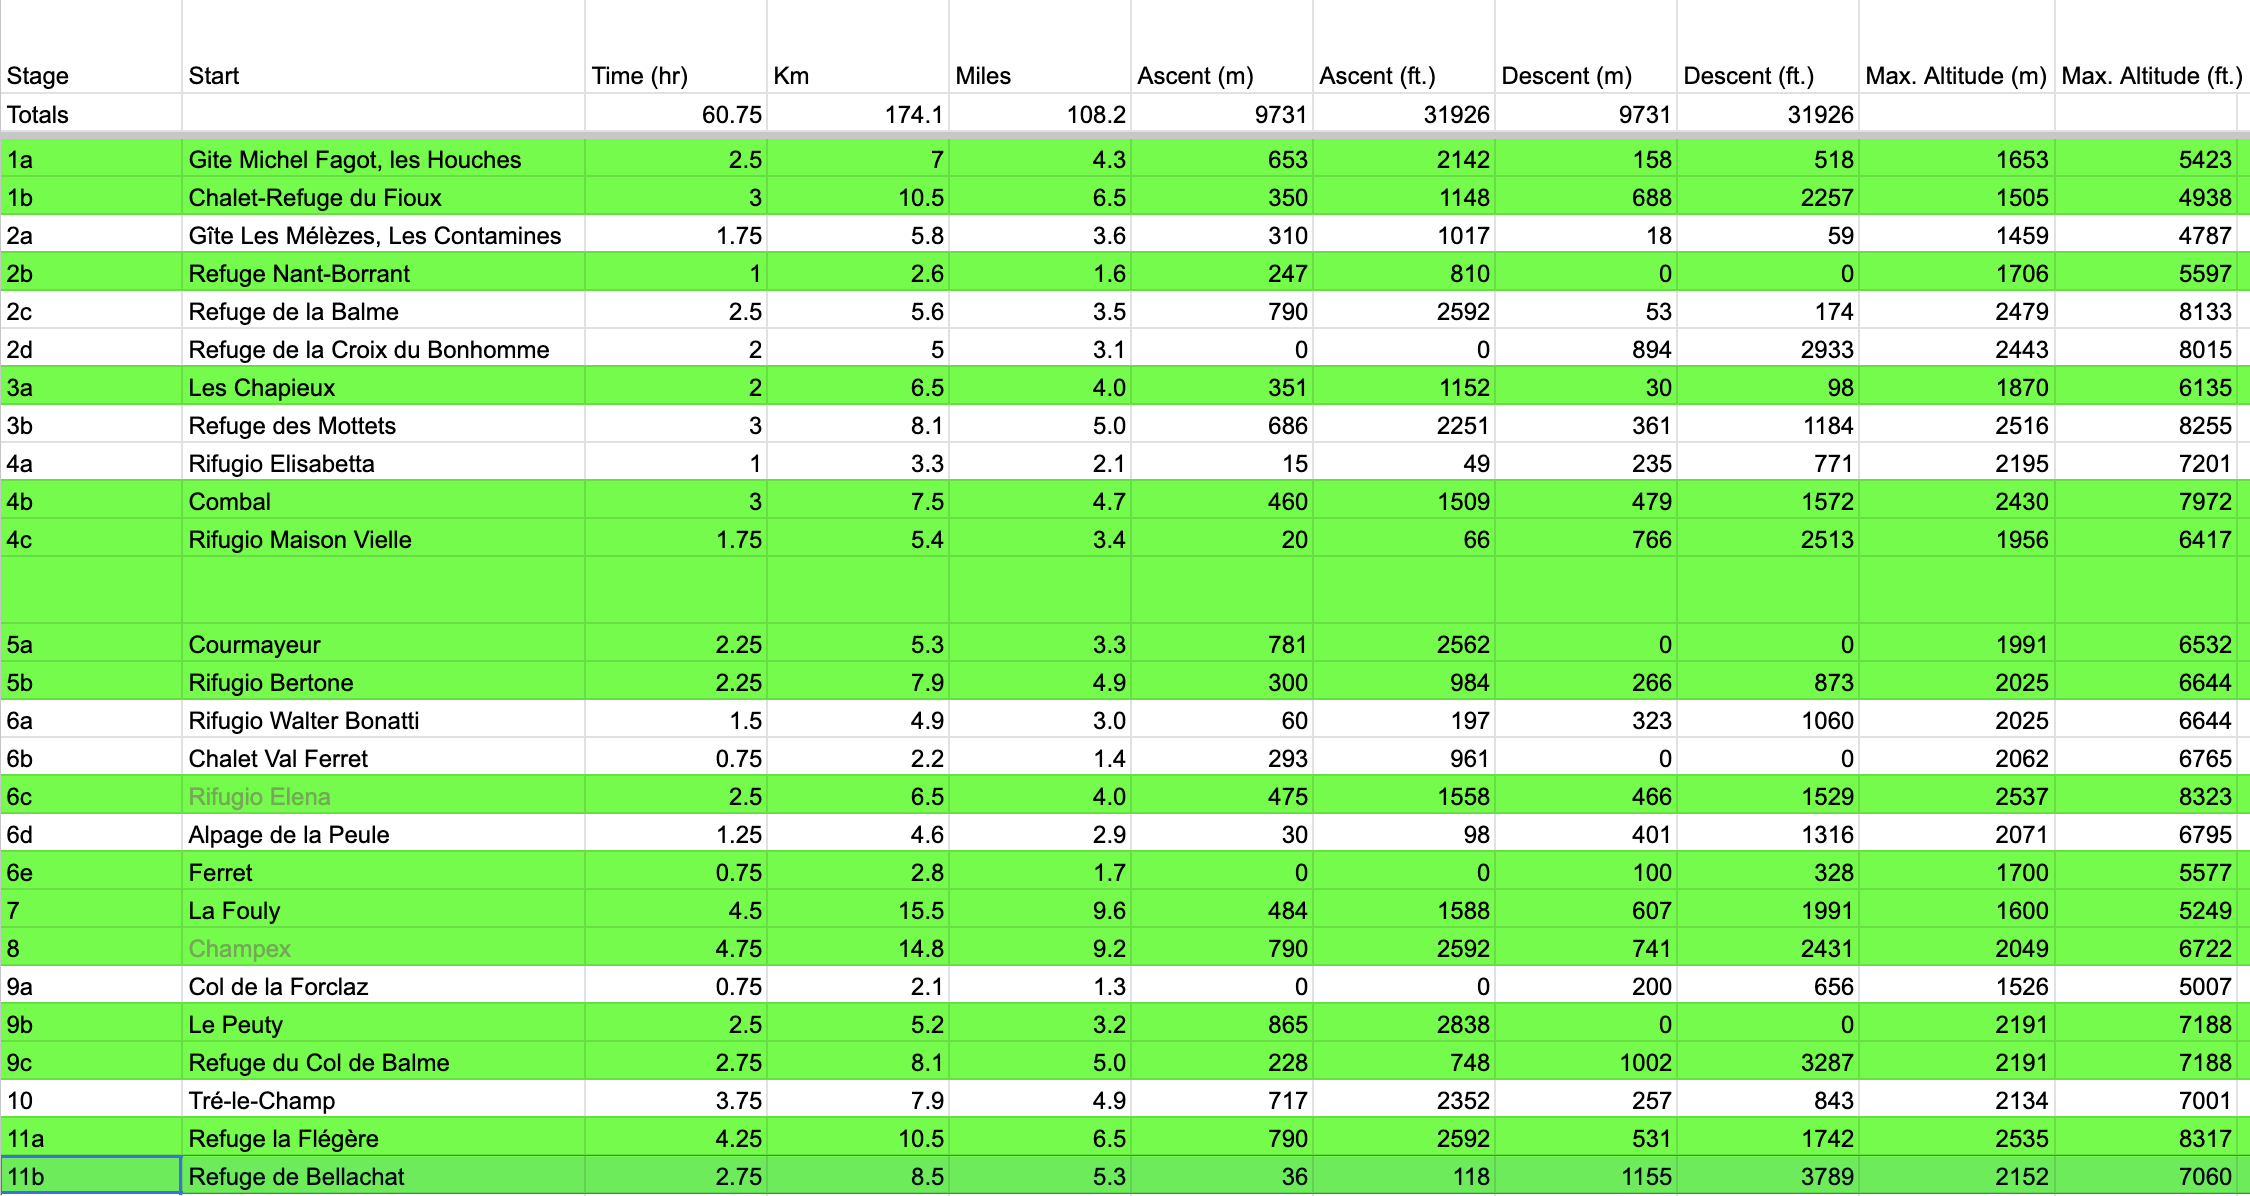
We hike often, but rarely several days in a row. So we know what distances and elevation gains are comfortable for us to complete in a day. Andrew McCluggage’s book breaks up the official trail into 26 stages, with accommodations located in between each stage. We put the distances and elevation gains and losses of each stage in a spreadsheet, in both metric (kilometers and meters) and English units (miles and feet). We knew that most of the signage and tools in Europe would be in metric, but we were more familiar with English units. We wanted to get accustomed to the metric.
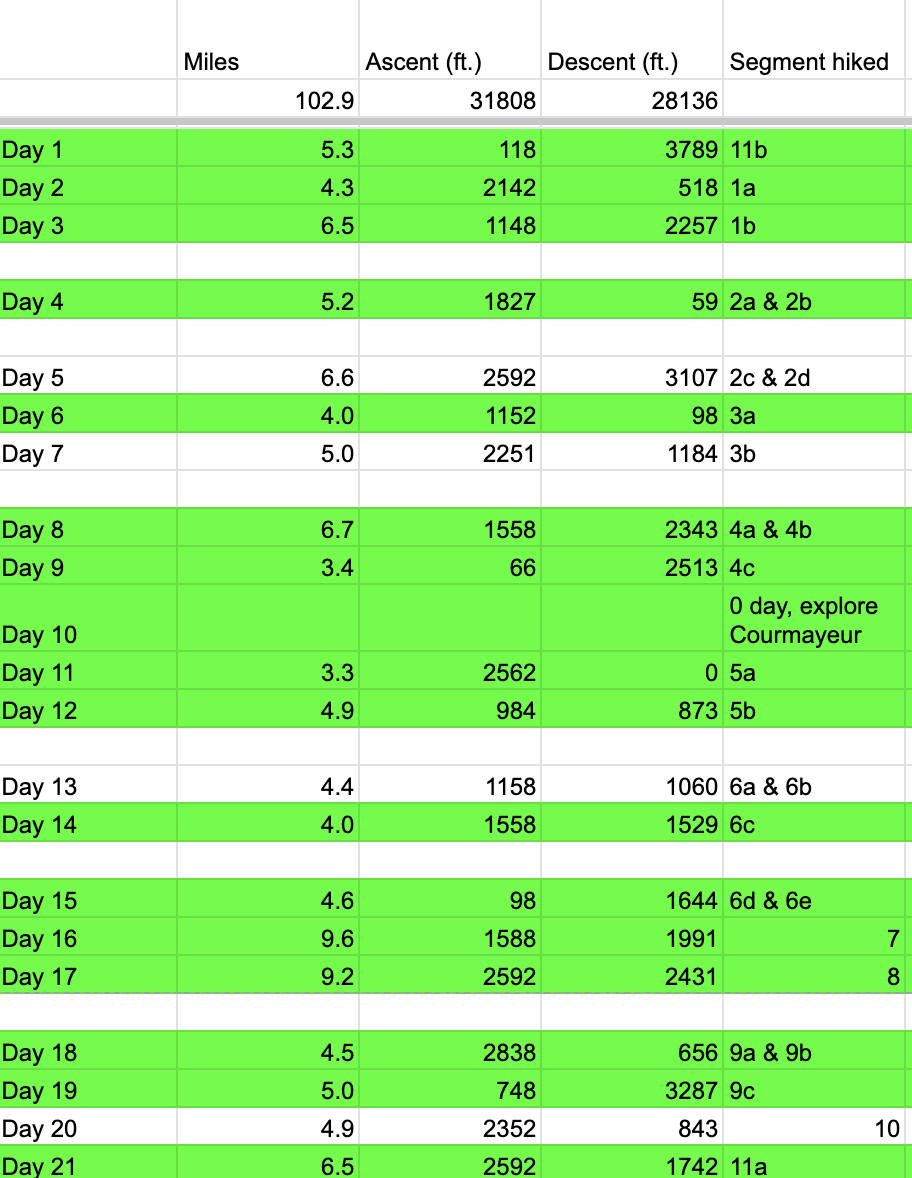
Then we started combining the stages into comfortable days of hiking for us. Most people complete the TMB in seven to twelve days with some doing it in as few as two to three days (trail runners) and others taking as many as 14 days. But we are in our sixties and not fast hikers. We like to enjoy the scenery and Ann likes to stop and take lots of pictures. We were not interested in setting any speed records. So our comfortable pace plan turned out to be 21 days, which included a “zero day” in Courmayeur, Italy. We’re retired, so we have the luxury of time.
Most people take the circular trail in counter-clockwise direction, but you can hike it in the clockwise direction as well. Just keep in mind that you will probably be going against the flow of most of the hikers and you will see new faces at each of your stops, reducing the chances of seeing the same people.
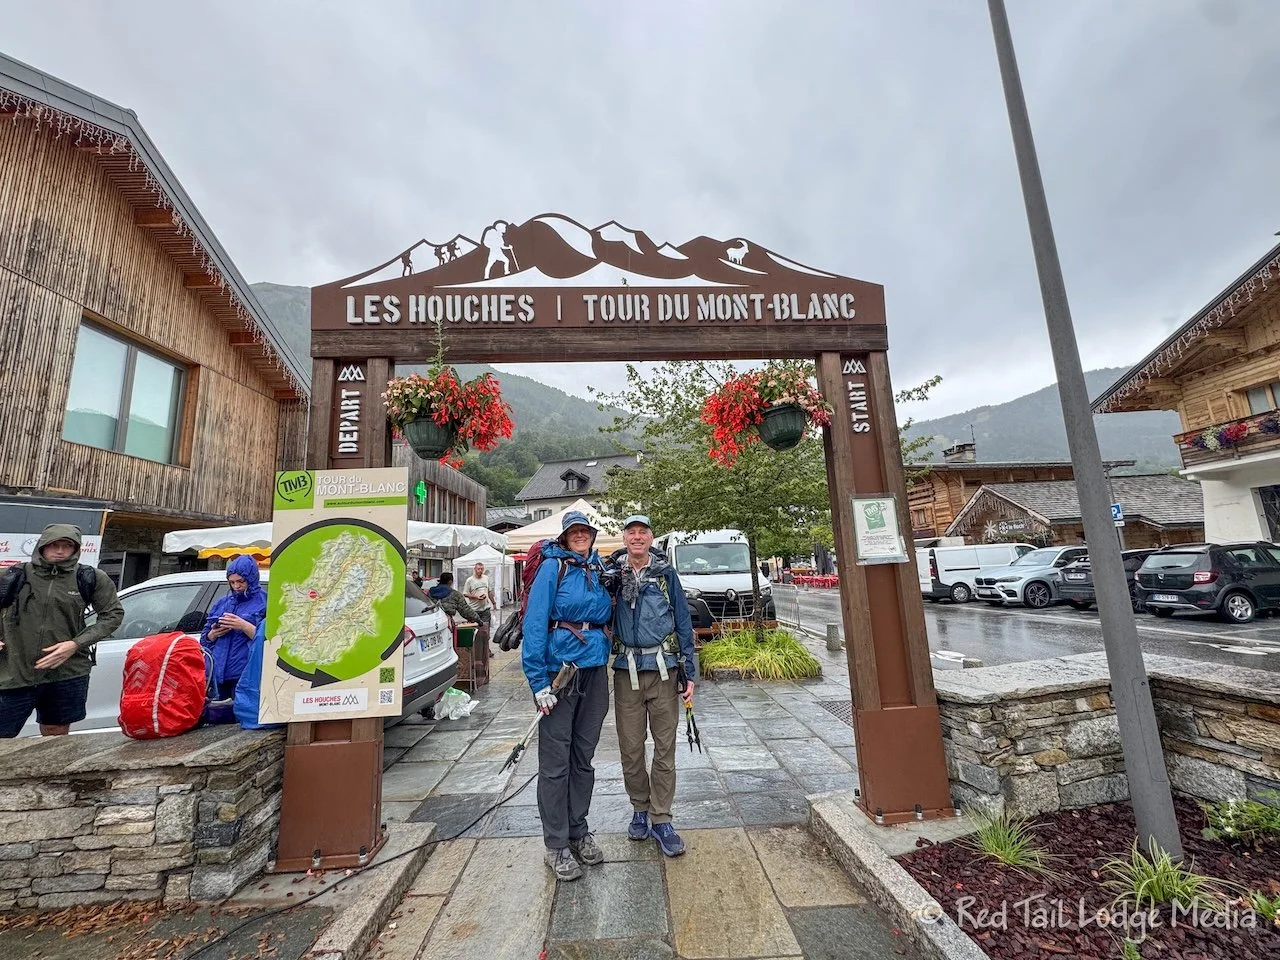
The official trail starts and ends in Les Houches, France. However, at the time we were working out the daily plan, Refuge de Bellachat lost their water source and was not taking reservations. So the last day would have been from Refuge la Flégère to Les Houches, which seemed too long and steep for our comfort. In order to break up that day, we would have to take a gondola down to Chamonix to a hotel, then take a gondola back up to the trail to continue. If we were taking the gondola anyway, we decided to start and end in our hike in Chamonix instead of Les Houches, which many people do.
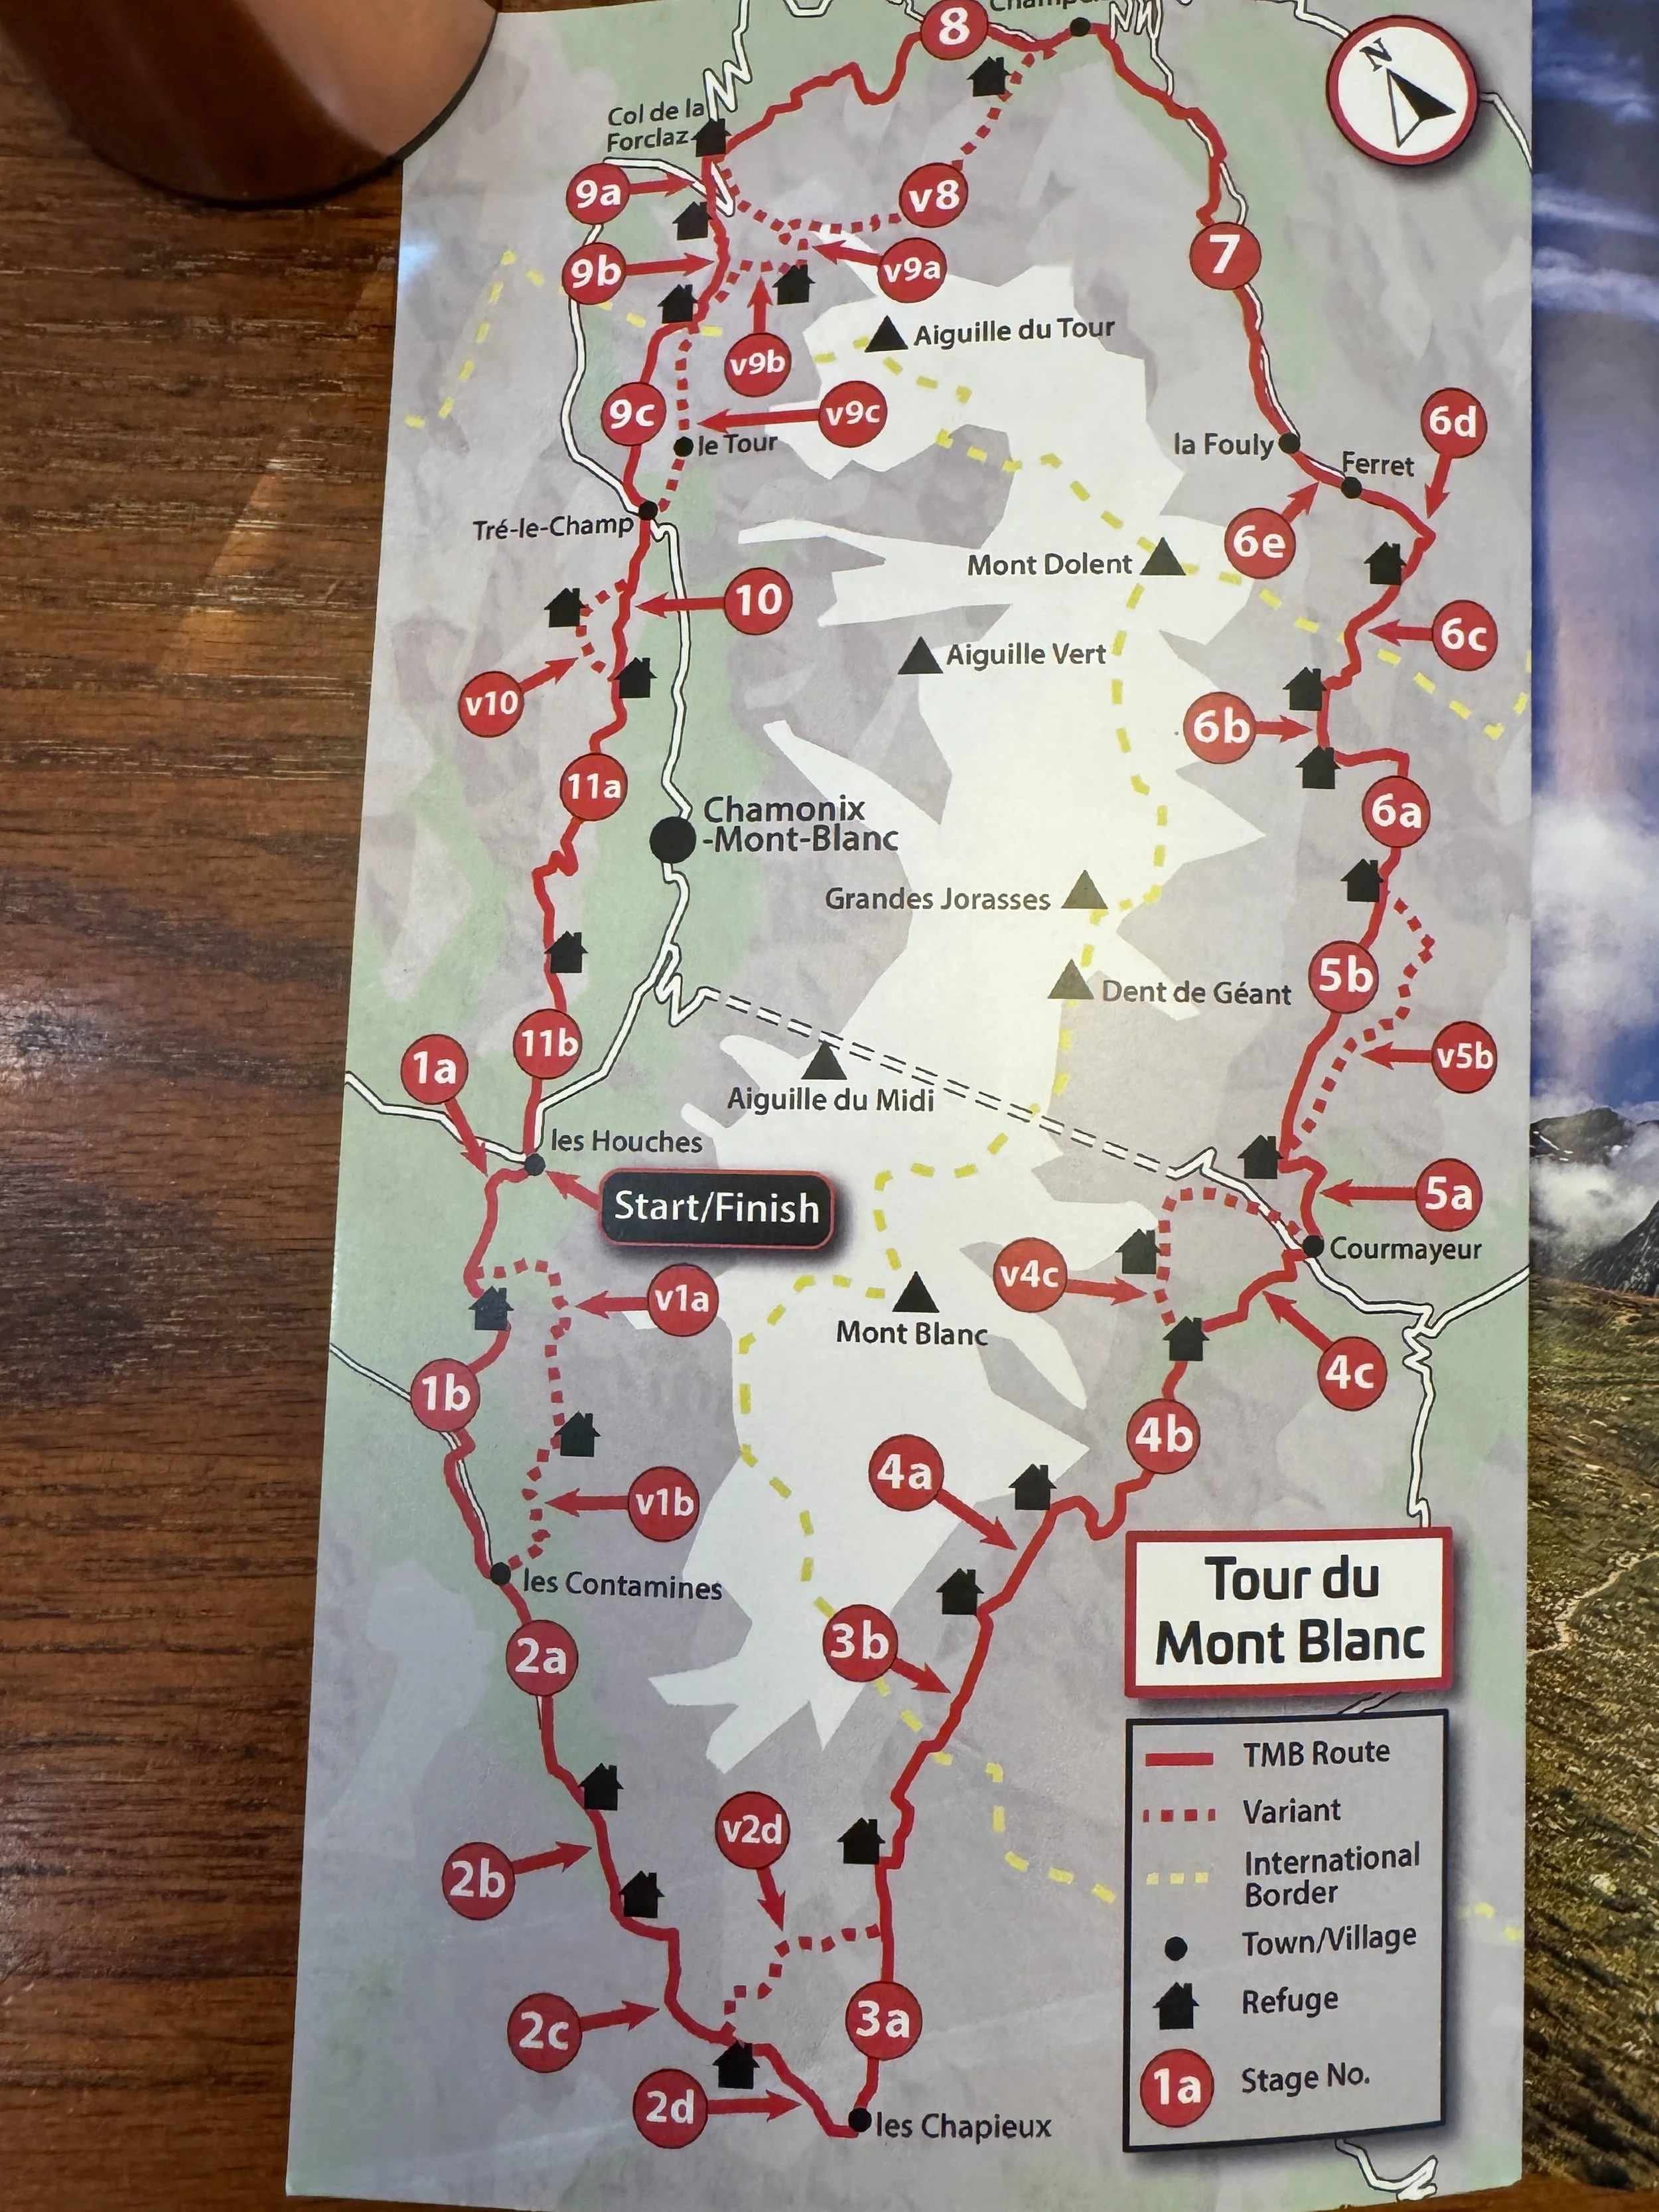
In addition to the official trail, there are several variants. Most of the variants are harder than the official trail, so we just wanted to stick to the original trail. Or at least that was the plan anyway.
Step 3: Pick Out Lodging
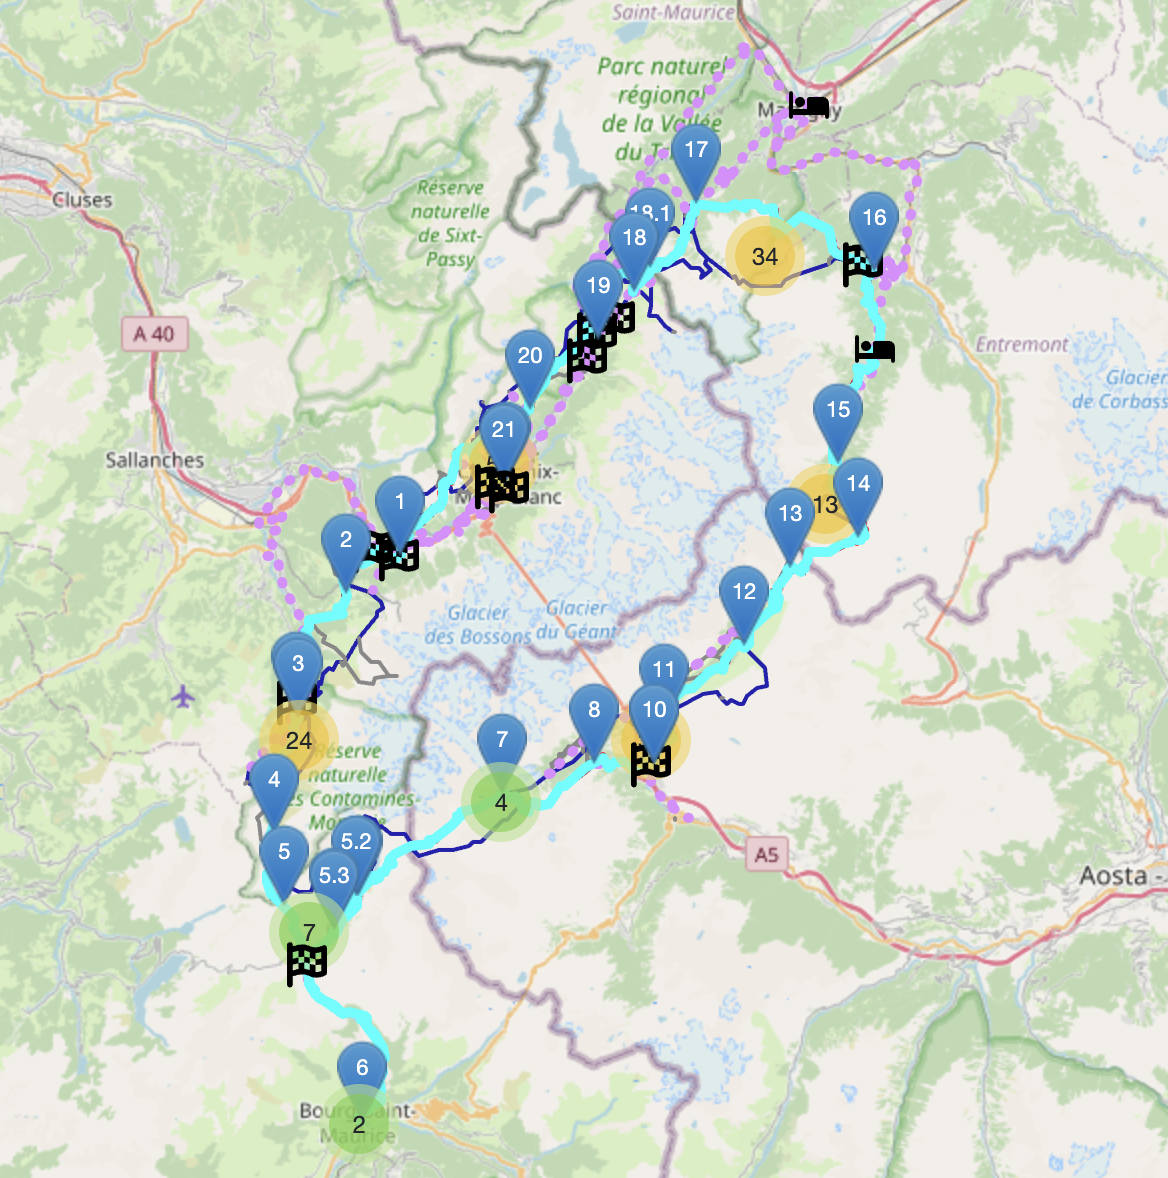
It was about at this step in the process that we discovered The Hiking Club, through someone posting about it in the Facebook TMB group. The Hiking Club is a small company started by three people, operating out of Australia. The company provides access to their online planning app for a reasonable price (as of January 2026, the price was 79 euros). The app allows planning and navigating multi-day hikes in Europe, for not only the TMB, but also other popular trails in Europe such as the Walker’s Haute Route and the West Highland Way. The Hiking Club Planning App quickly became our number one resource for the TMB.
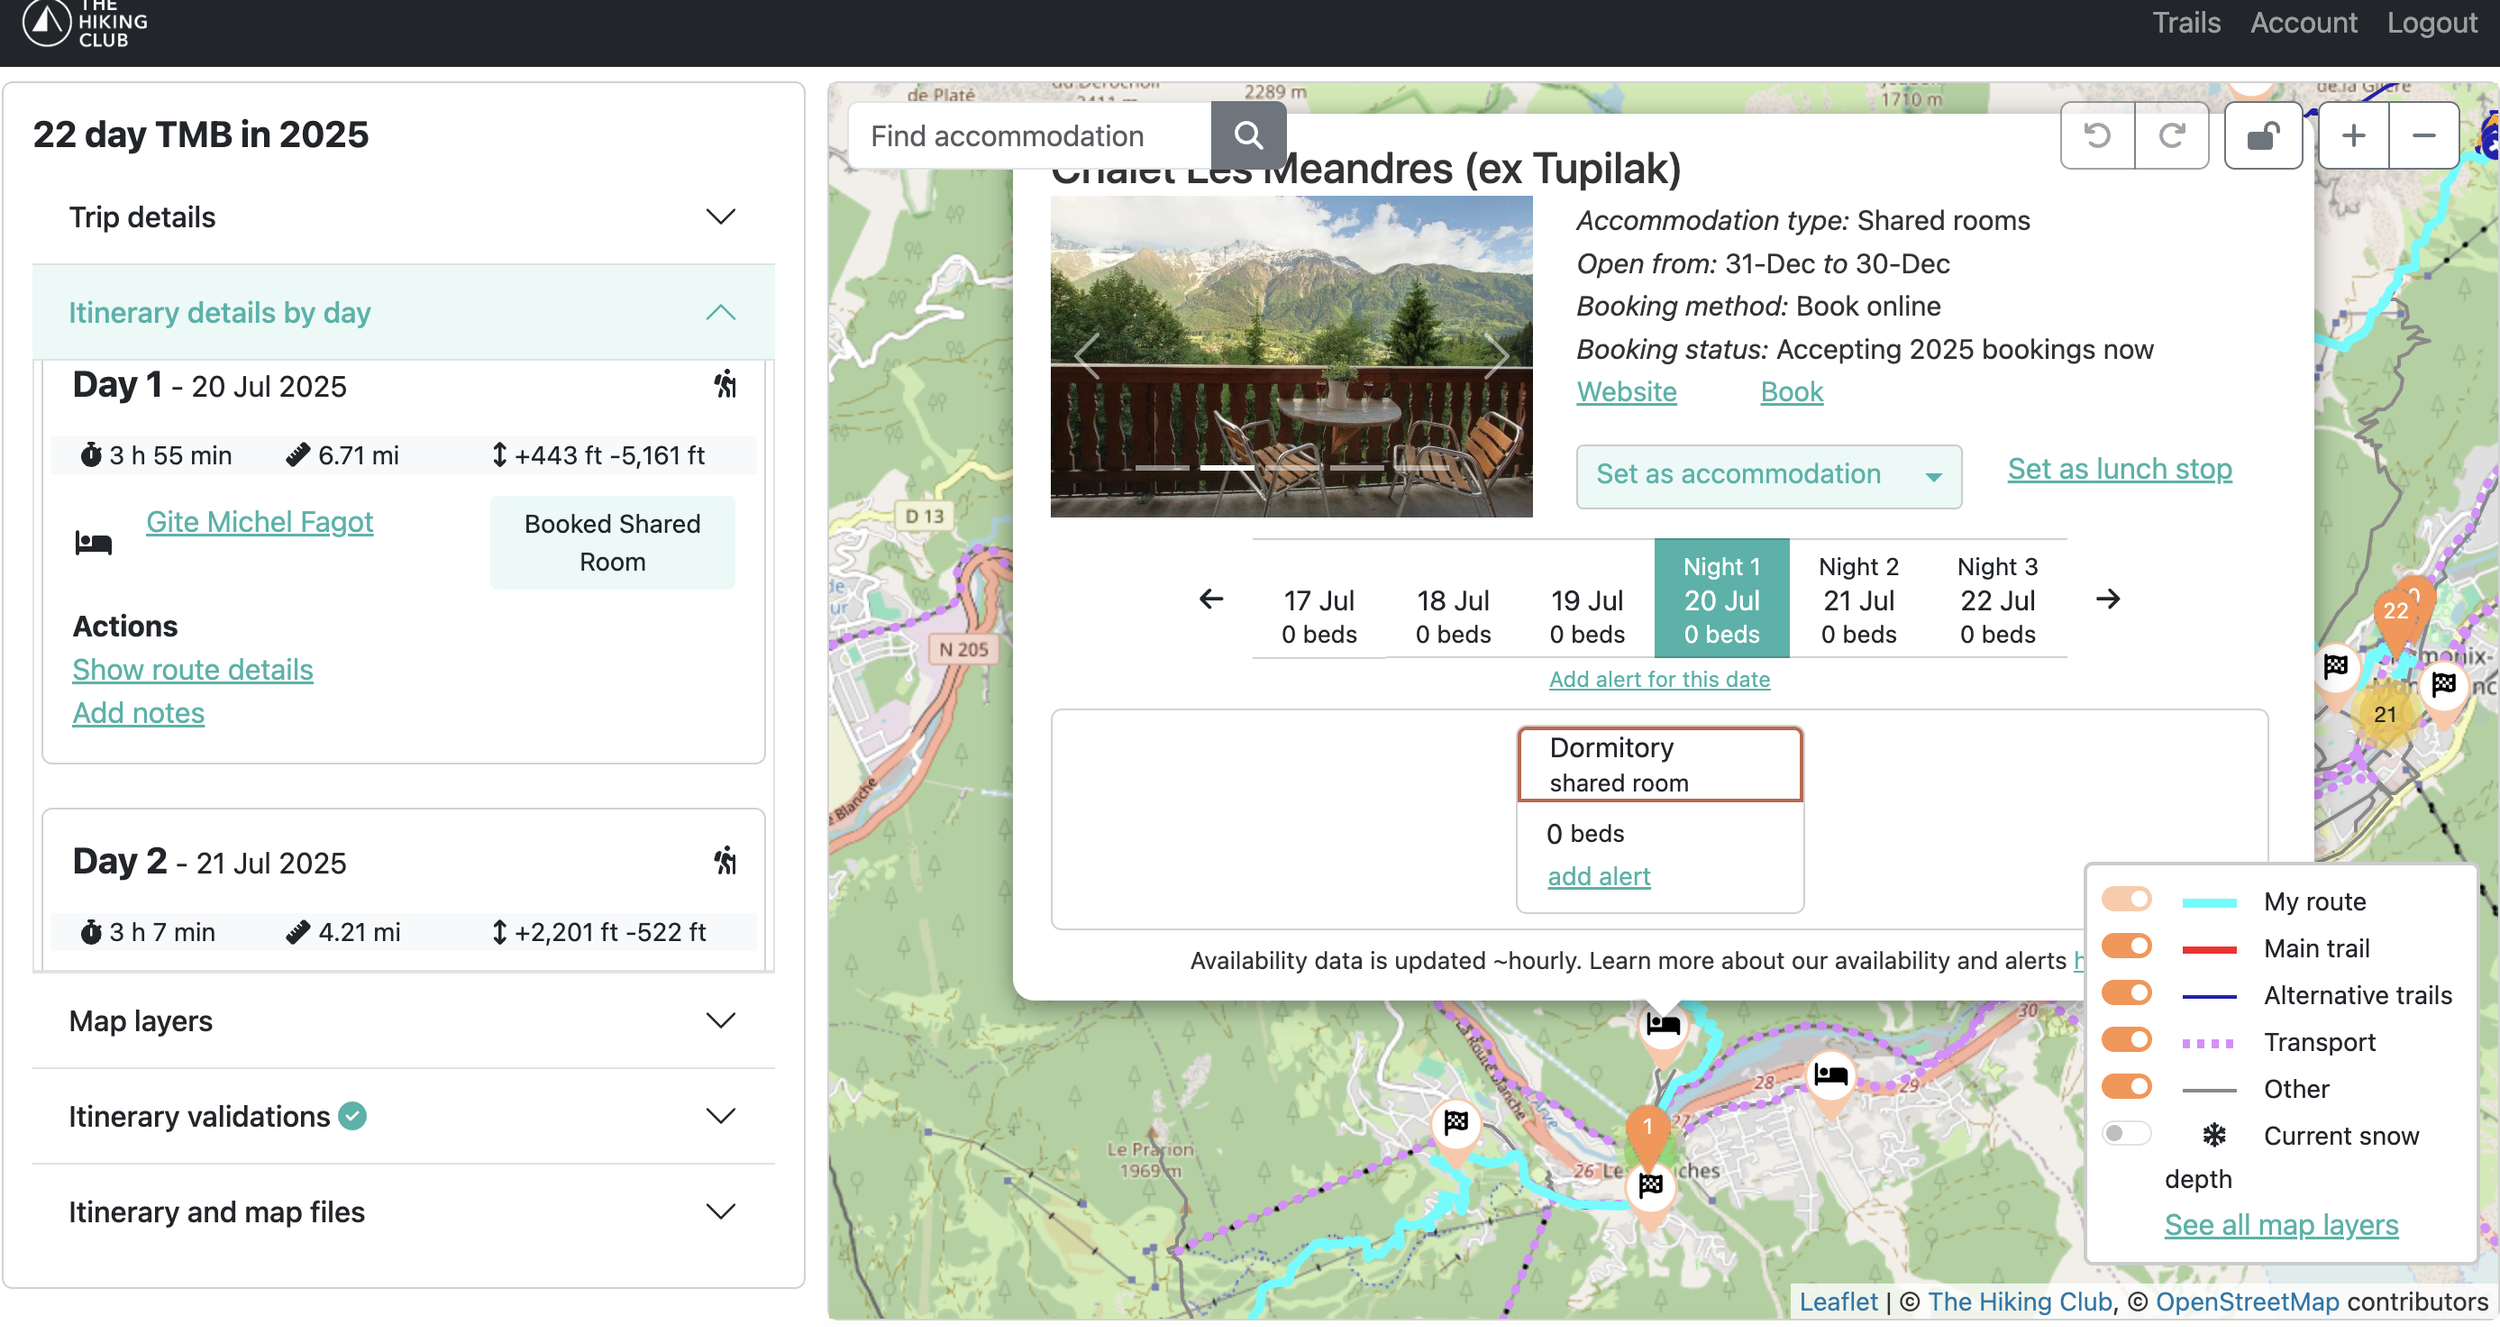
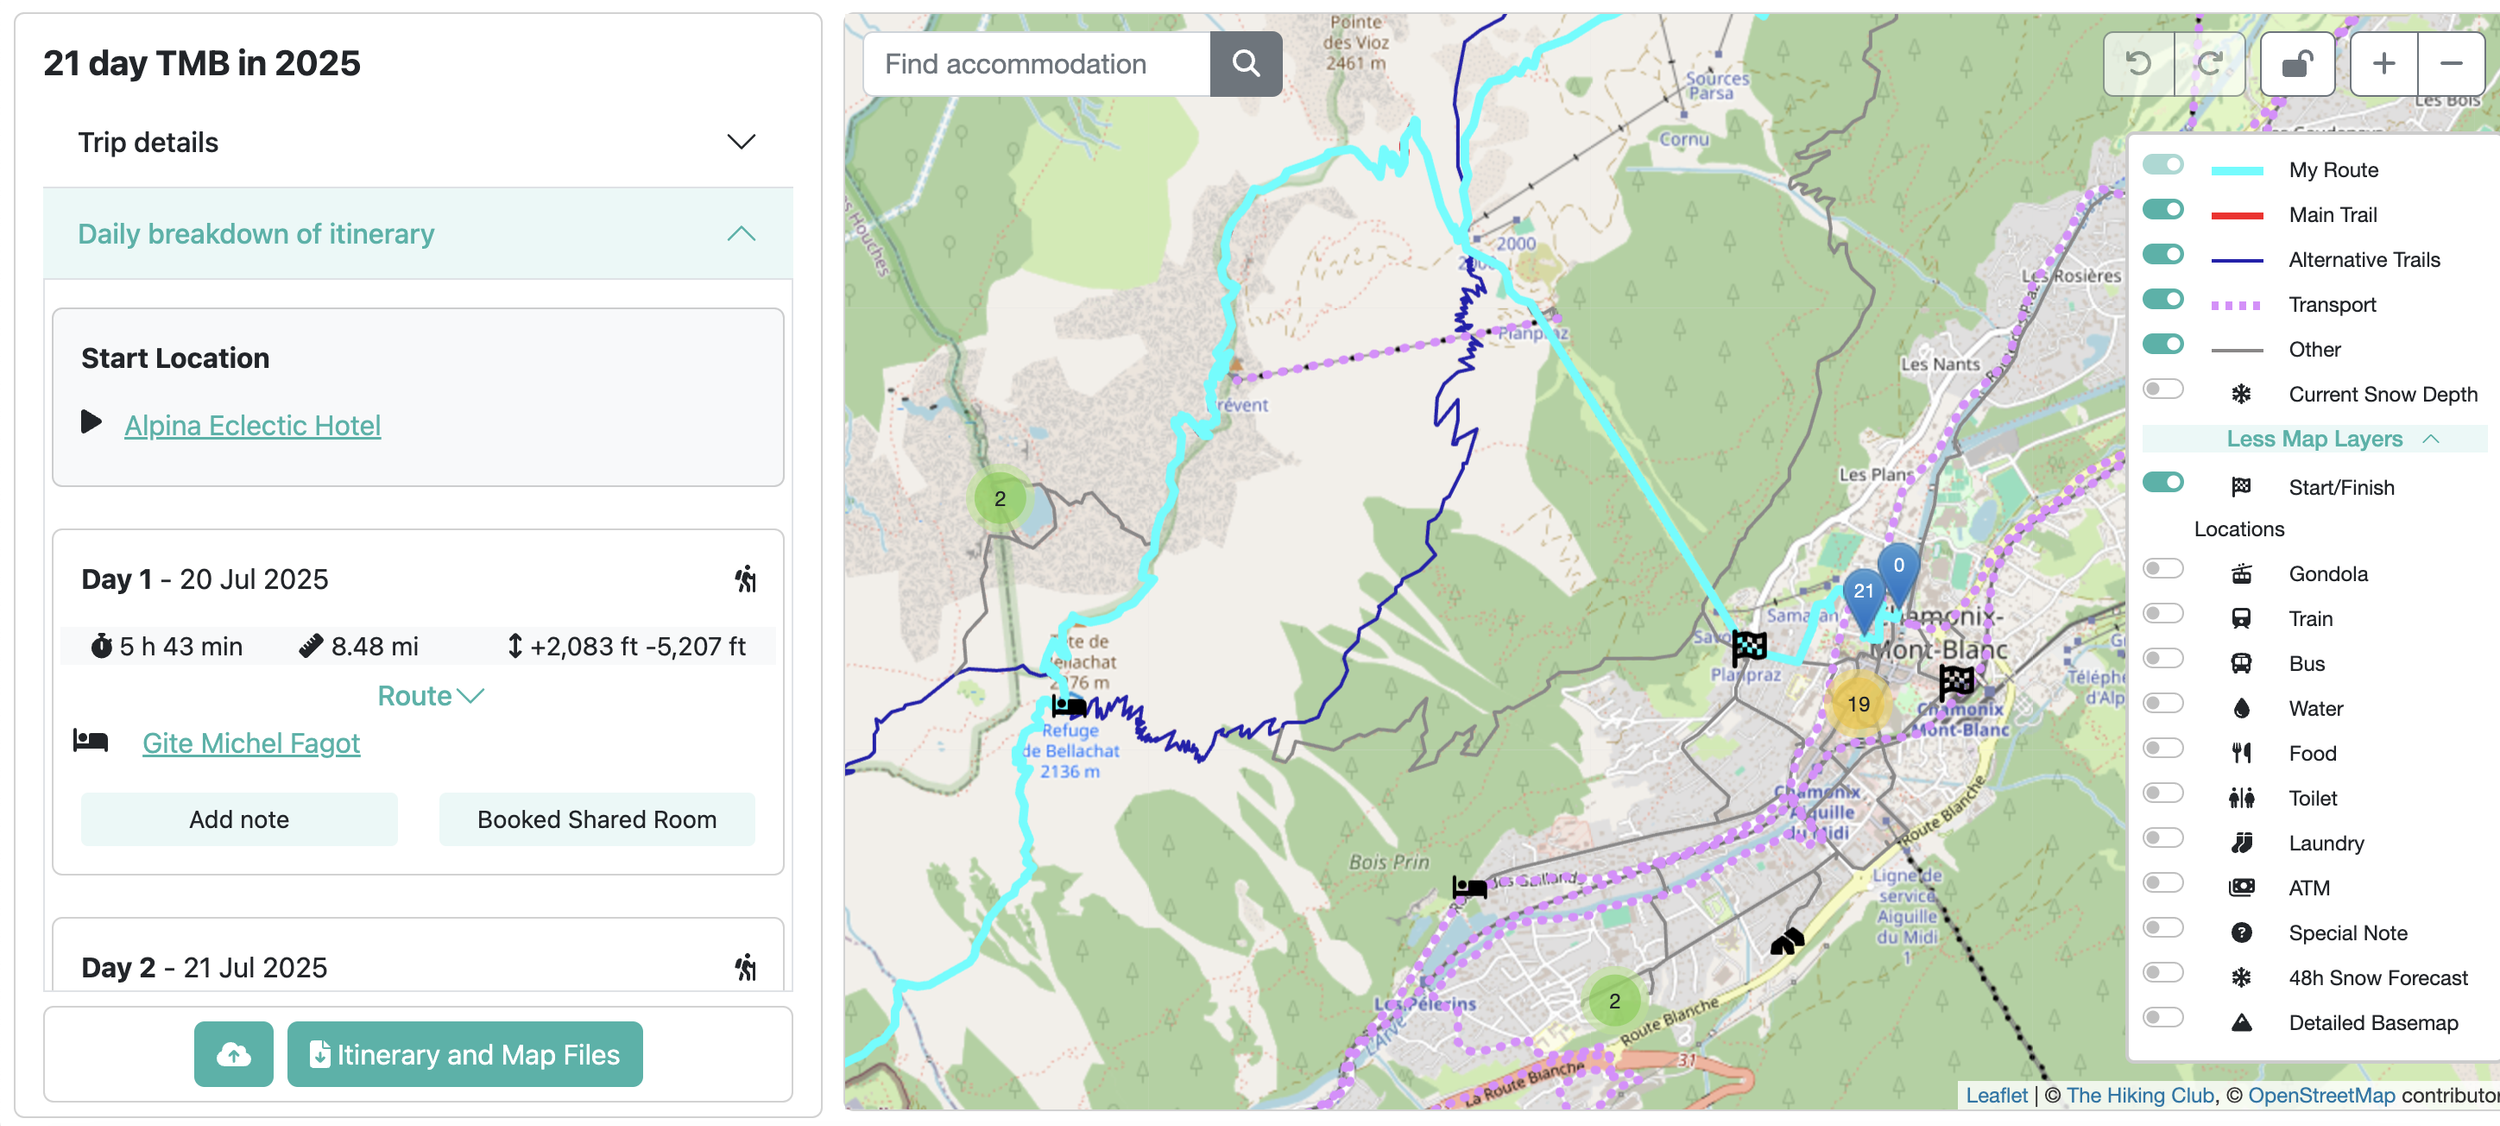
The Planning App allowed us to enter each of our planned hiking days. It showed us, on a map, where all of the accommodations were in the area at the end of each of our days (and all along the trail and variants). Clicking on an accommodation would bring up details, such as the type of lodging (shared room/dormitory or private room), their dates of operation, how to book a room, when they start booking for the season, and a link to their website. And the app is adding new features all the time, such as up-to-date availability and setting an alert when a bed opens up (such as due to a cancellation).
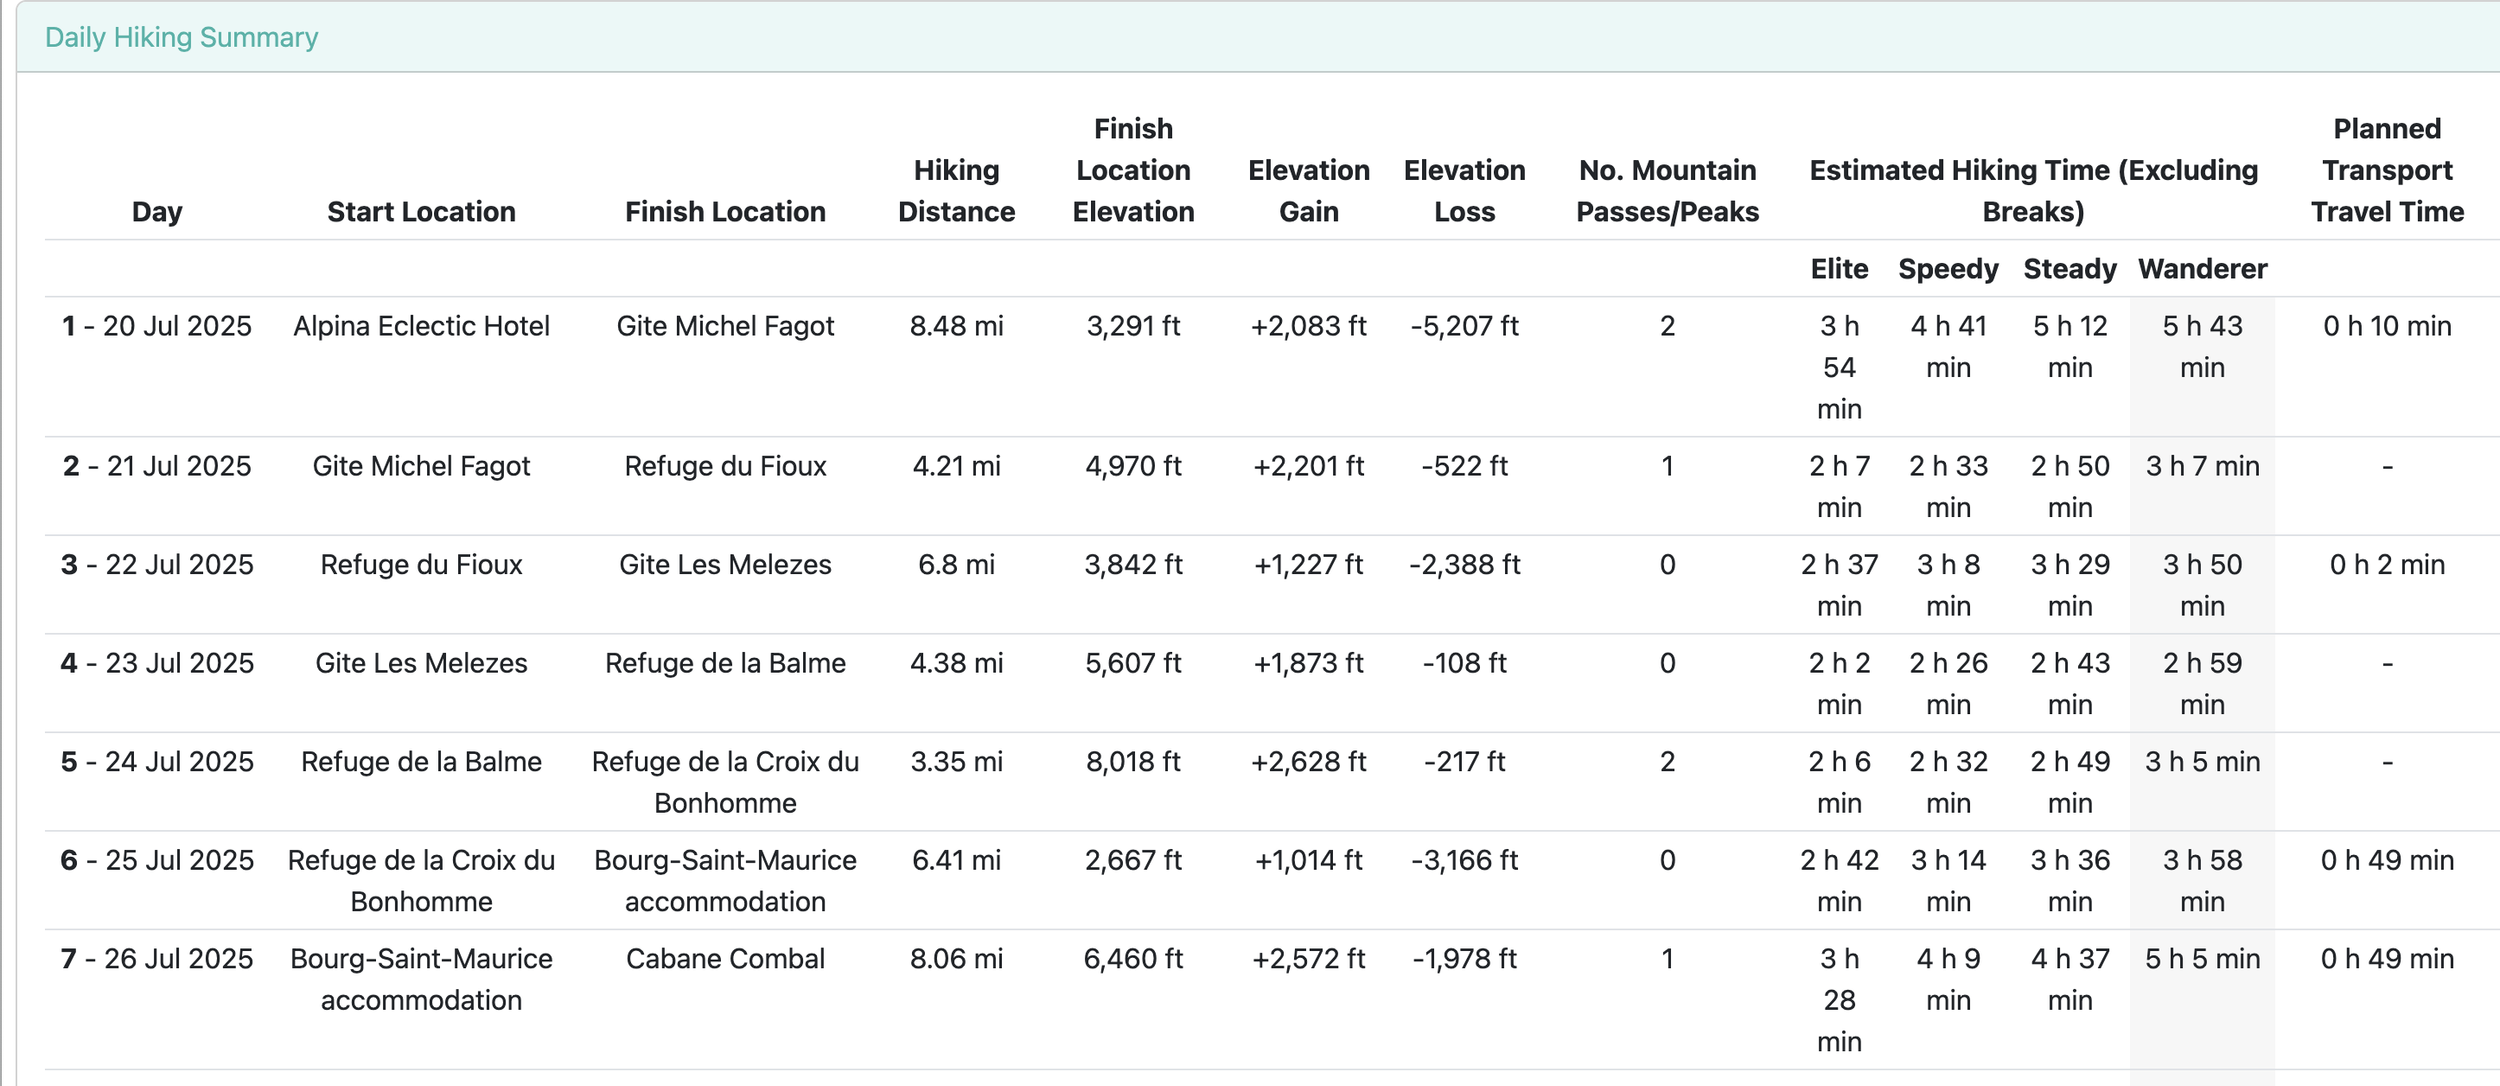
After selecting the lodging for a planned day, the app automatically updates the distance, elevation gain and loss, along with an approximate hiking time (based on one of four hiker types that you selected for your trip: Elite, Speedy, Steady, or Wanderer). The hiking route numbers for the day include going from your previous day’s lodging to the current day’s lodging. You can select whether you want the distances displayed in miles or kilometers.
Unfortunately, the Planning App only allows a maximum of 15 days for a TMB trip. We wanted to plan 21 days, so we broke it up into two trips in the app. That was a little cumbersome, but manageable. However, Brendan at the Hiking Club was able to make a change on the admin side of the Planning App to allow us to have all 21 days in the same trip. Thank you, Brendan!
Step 4: Reserve Lodging
This step was the messiest and most time-consuming. Some of the lodging opens up for reservations as early as October for the following summer season. However, others open up as late as January or February. And sometimes it is hard to determine when they are going to start accepting reservations. And exact dates are not given. Some posted dates come and go and they still are not yet accepting reservations. Keep in mind that many of the mountain huts are small operations, so this uncertainty is well justified. But that doesn’t make it easy on the hikers trying to make reservations.
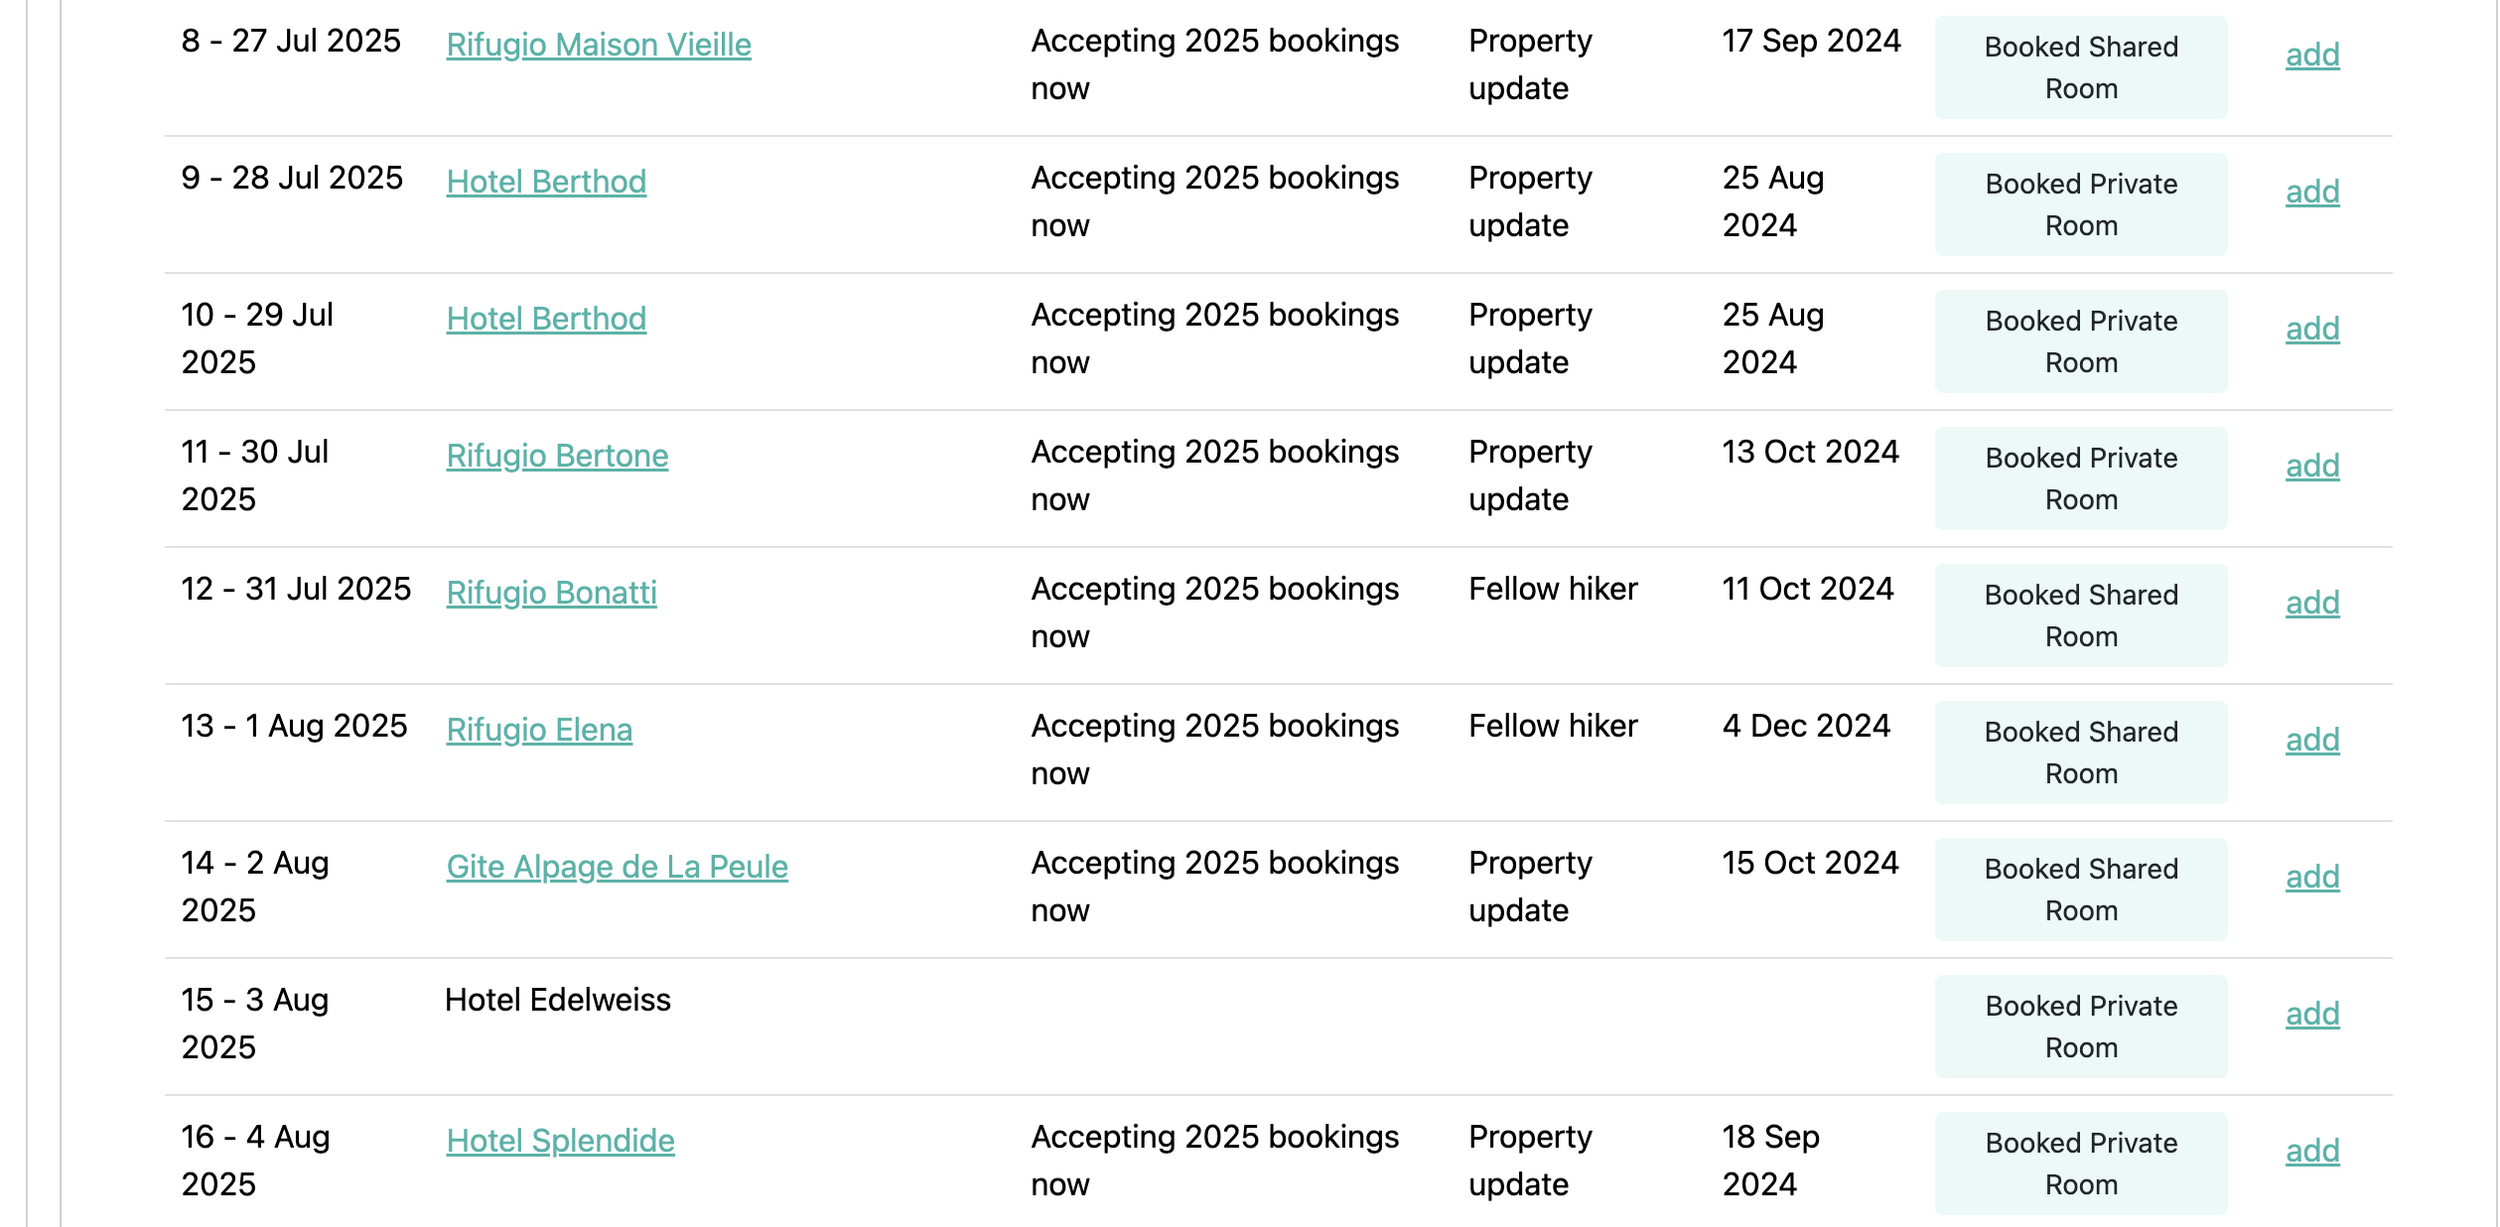
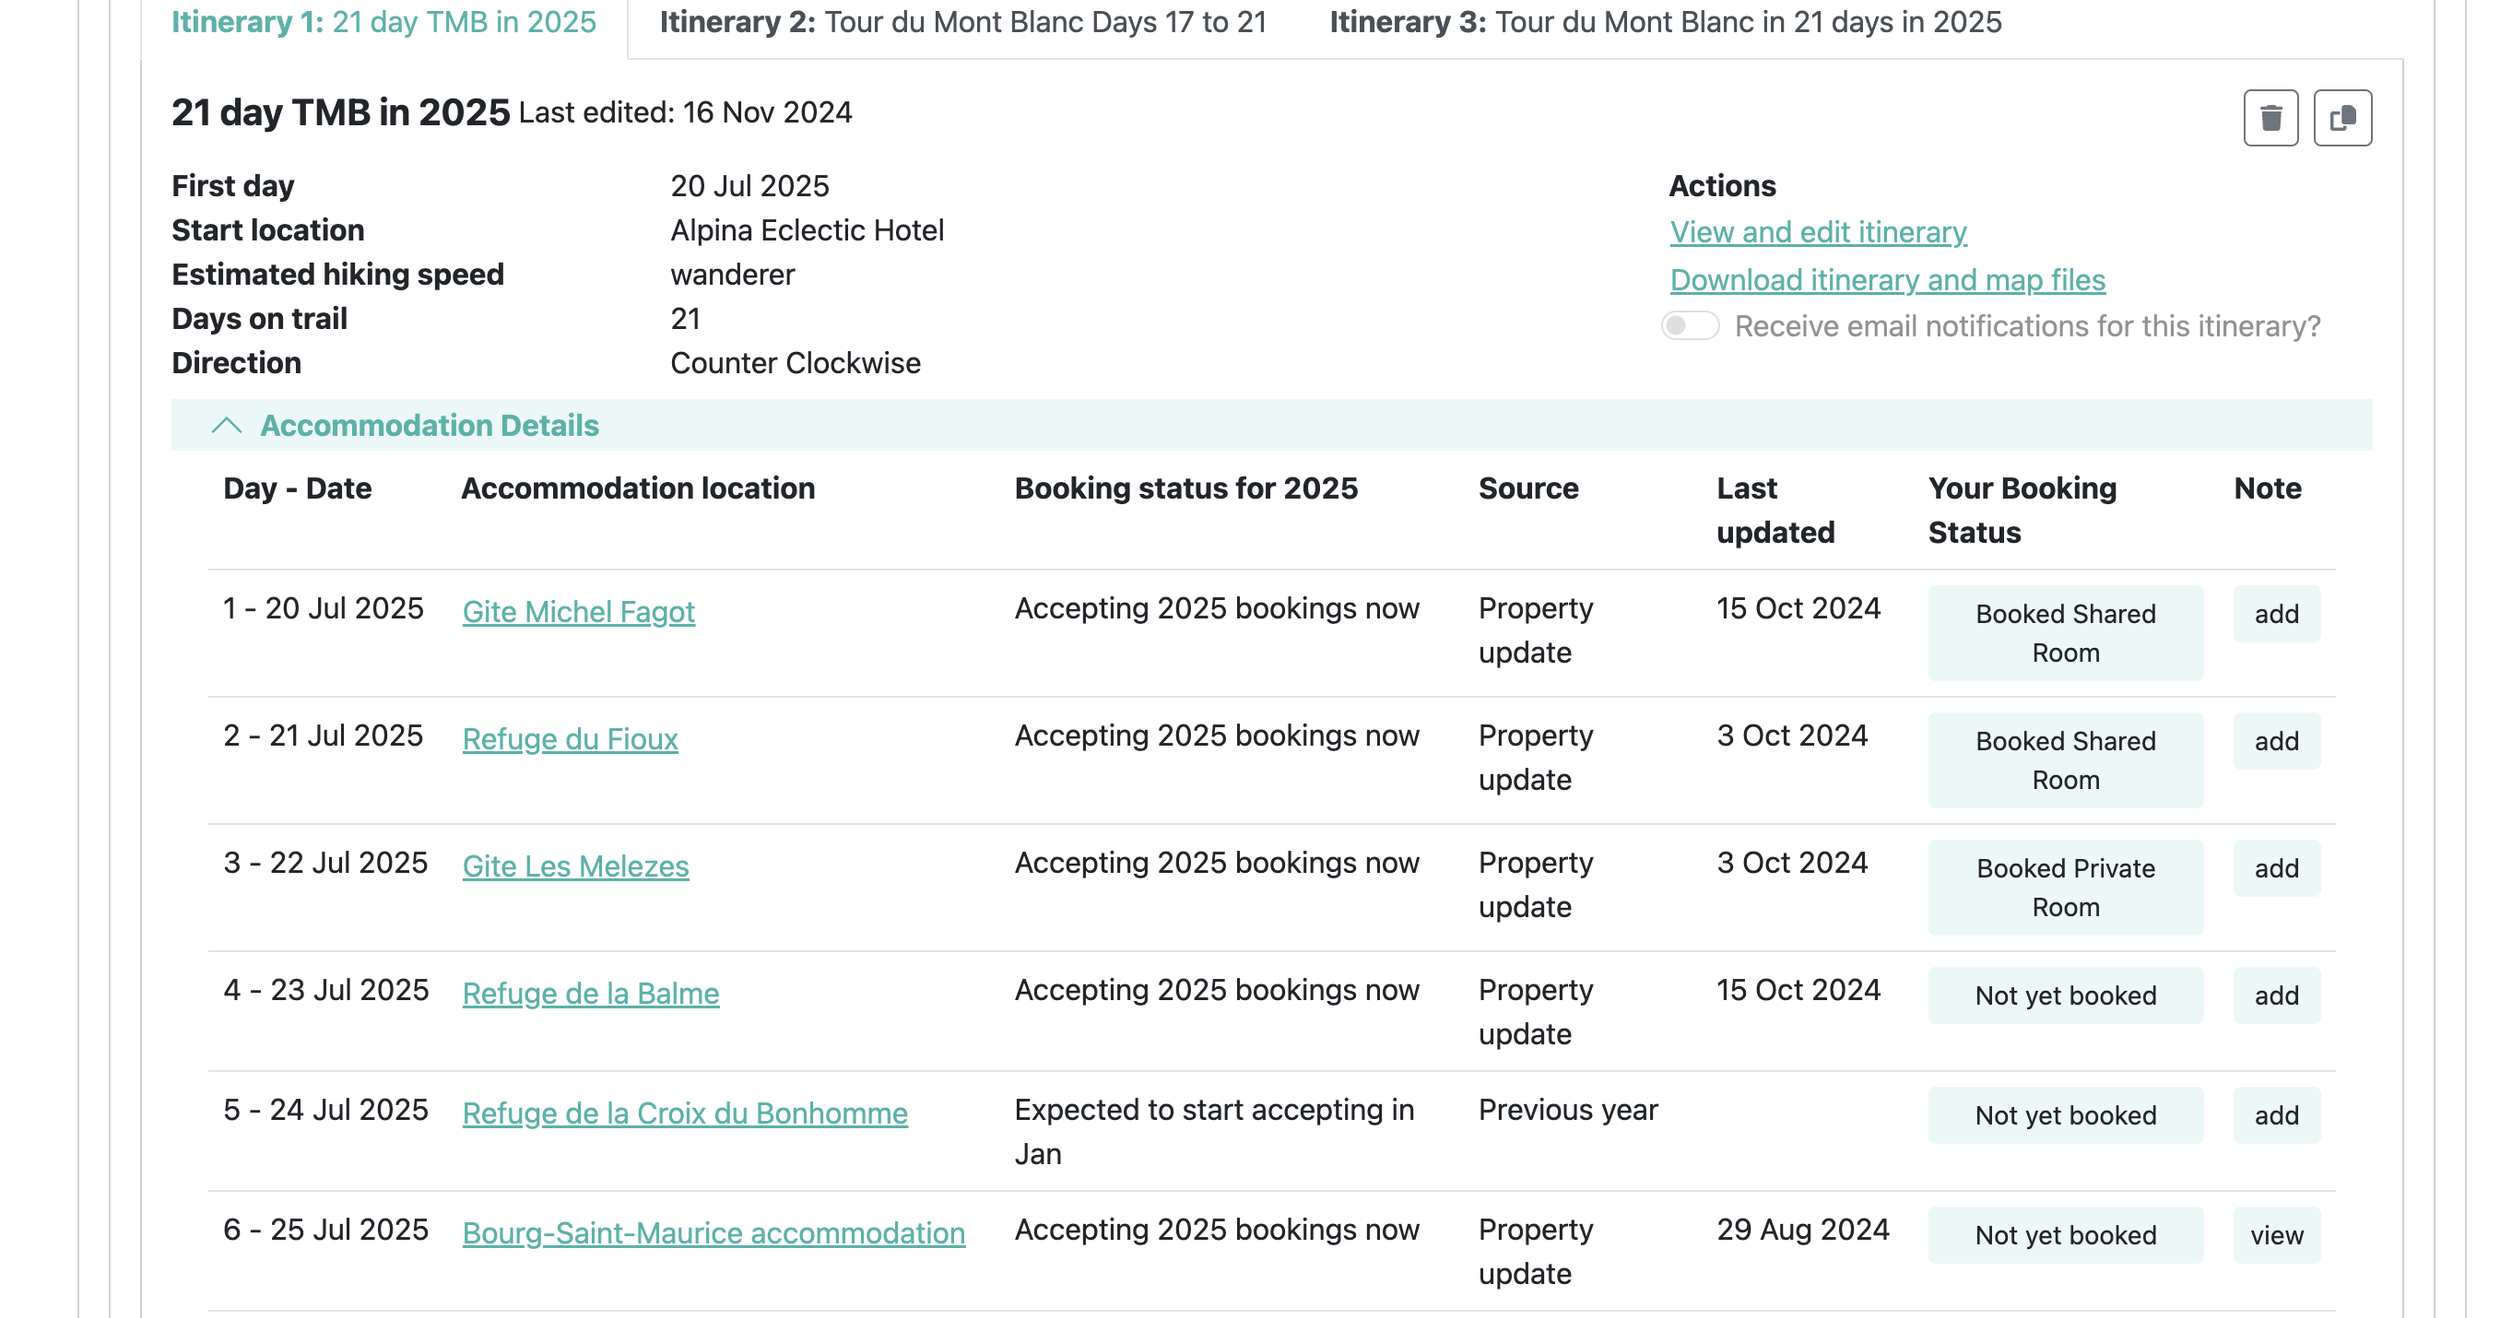
Again, the Hiking Club planning app came in handy for this step. The app allows you to set alerts for when a particular accommodation starts accepting reservations. Or you can set up an alert for a particular date at a place that is currently booked full, in case a cancellation opens up a bed. As you make reservations, you can set your booking status in the app to make it easy to see which days are left that you need to reserve. The itinerary view in the app shows each day in a table, with a column indicating the booking status for that day along with the type of room reserved.
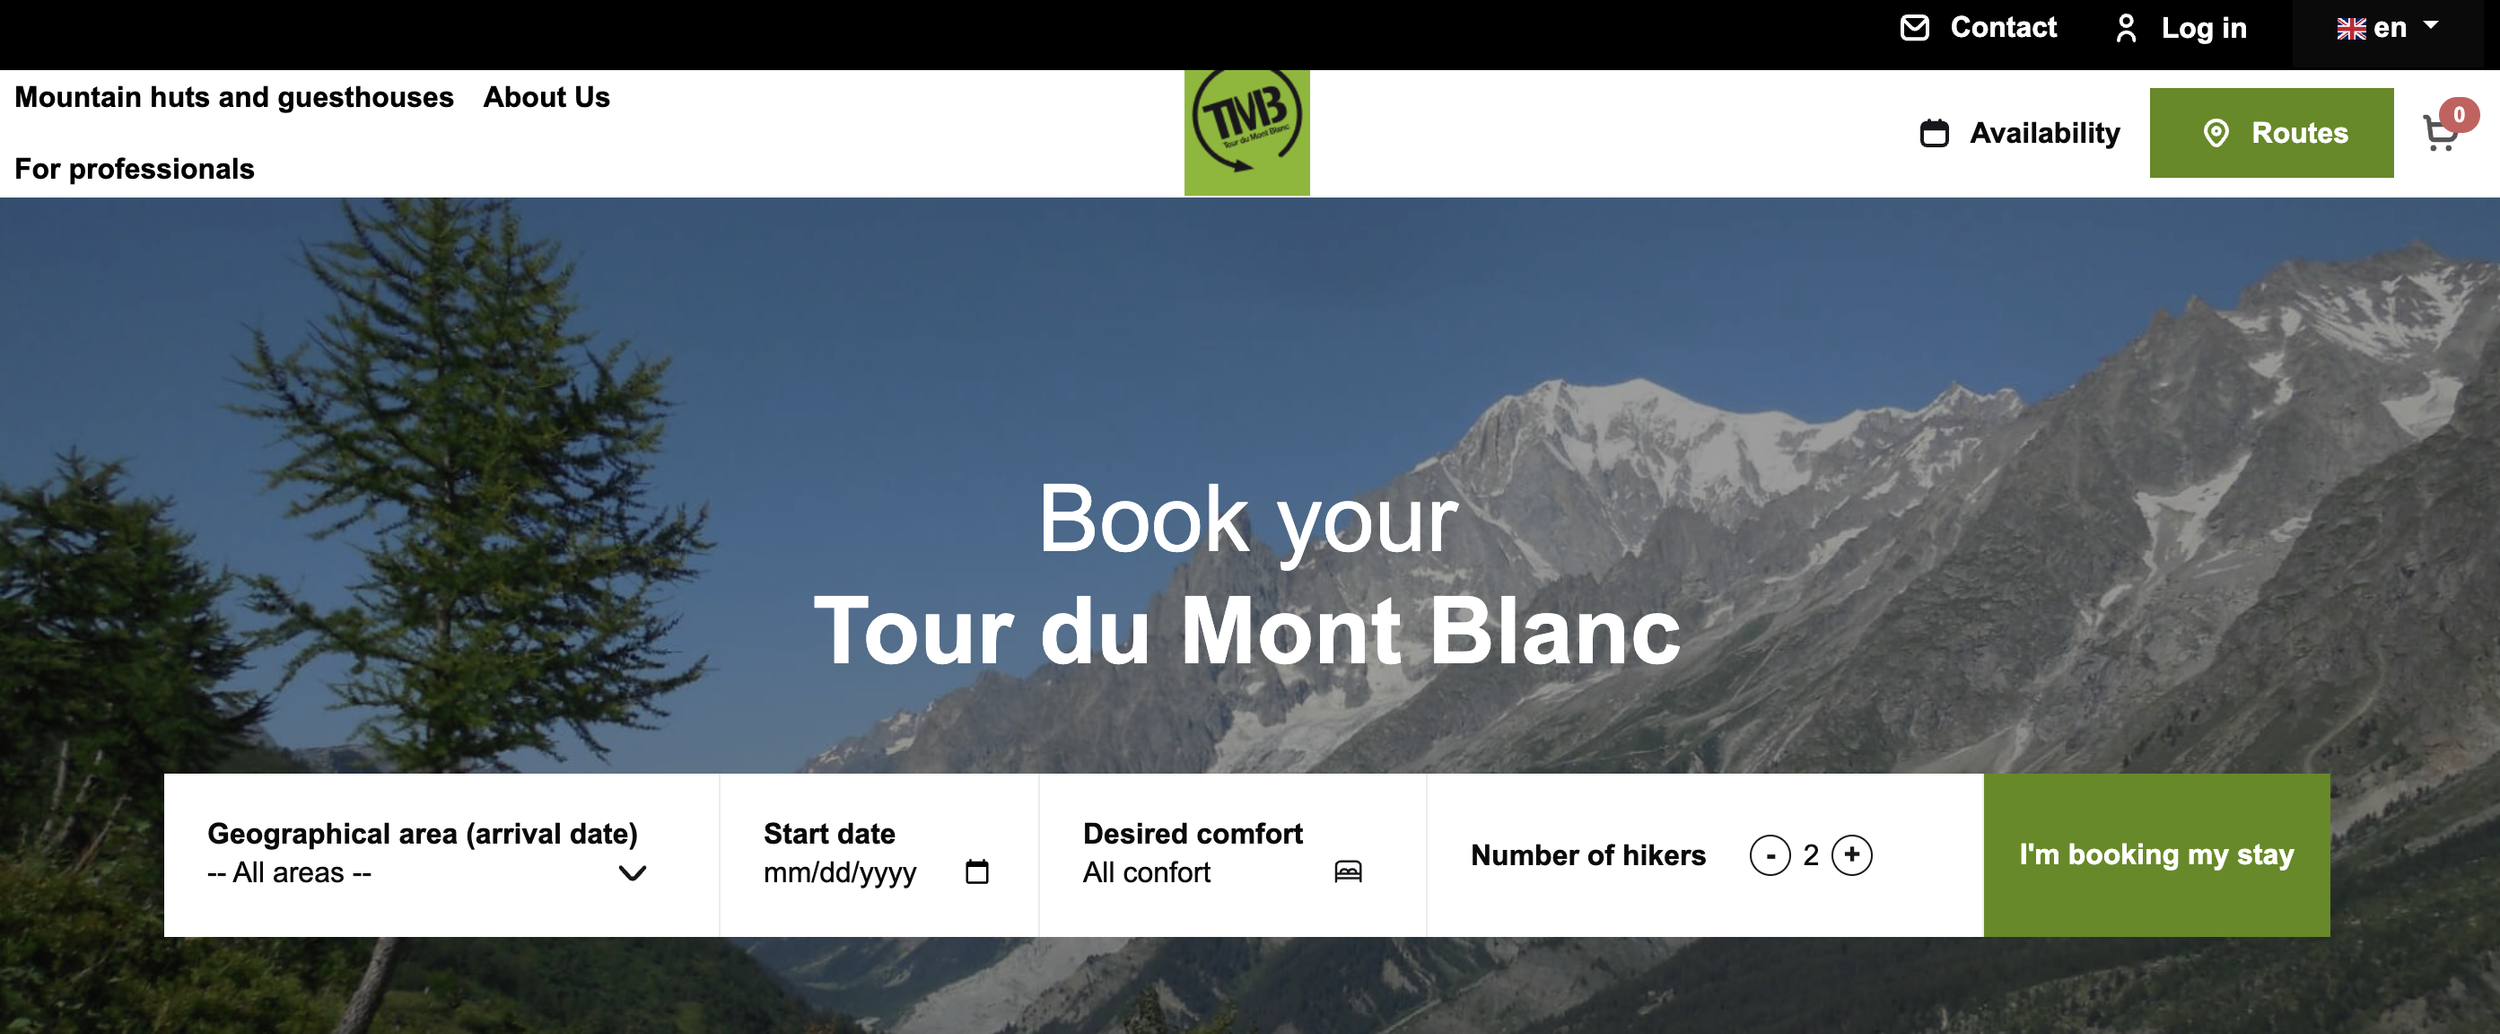
Many of the mountain huts can be reserved through www.montourdumontblanc.com, but not all of them. Some go through other third party sites while others require filling out an online form on their website or sending them an email. Some of the places required a deposit, some full payment ahead of time, and others required no deposit at all. Most would accept a credit card payment, but be sure to use a credit card that does not incur international fees to avoid those extra bank charges. However, we had an issue at one point where our card started refusing the charges and we had to use another card that incurred fees so we wouldn’t lose the reservation. That was even after being on the phone with the credit card company trying to get the charges to go through. This emphasizes the importance of having more than one credit card or some other type of backup plan.
The mountain huts book up fast. We did not always get into our first choice. We could have tried to wait and see if cancellations opened up, but we wanted all of our reservations in place before we left for Europe in March, as we didn’t want to deal with the hassle while we were traveling. So when we saw the lodging we wanted was fully booked, we looked around for an alternative. Sometimes that meant changing where we stopped. Since our planned hiking days were a comfortable distance, we were able to move where we stopped for the day, making that day’s hike shorter or longer than originally planned, and the following day’s hike longer or shorter accordingly.
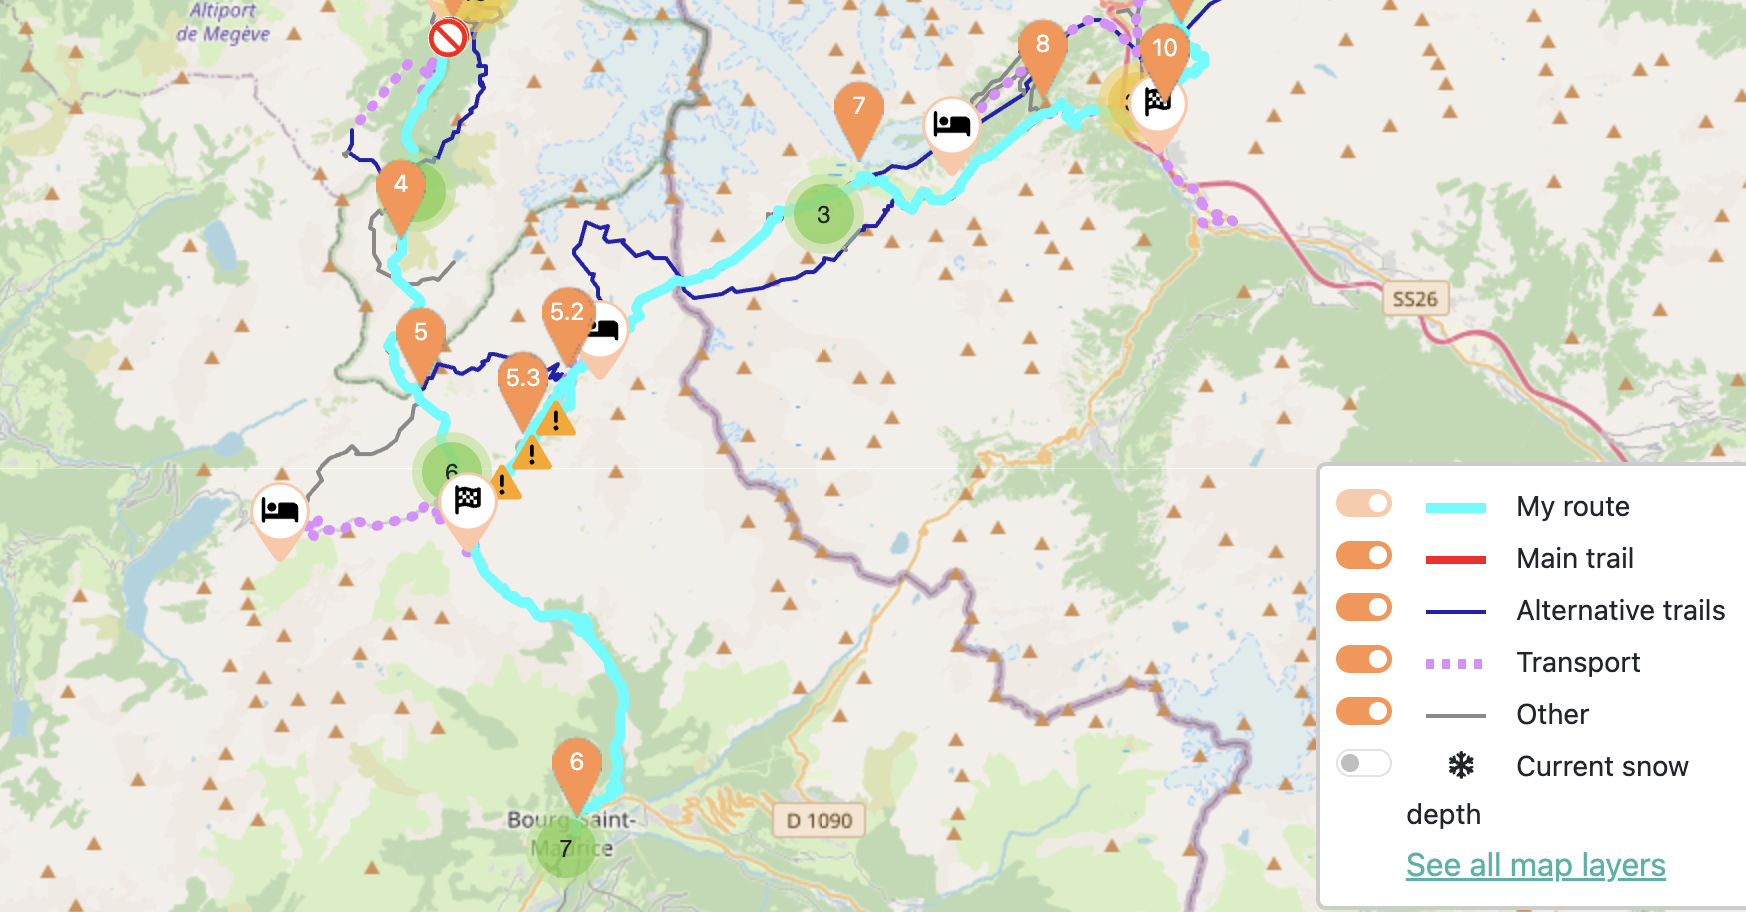
The area we had the most problems with lodging was between Refuge de la Croix du Bonhomme and Rifugio Maison Vieille, around the southern tip of the TMB. We were hoping to get into Refuge des Mottets and Rifugio Elisabetta, but we couldn’t get into either one. Everything in Les Chapieux was also full (Refuge de la Nova and La Chambre du Soleil). Luckily, the Hiking Club App showed there was shuttle bus transportation from Les Chapieux to the town of Bourg-Saint Maurice which had plenty of hotels available. So we were able to book a hotel in Bourg-Saint Maurice and found space in Cabane Combal for the second night.
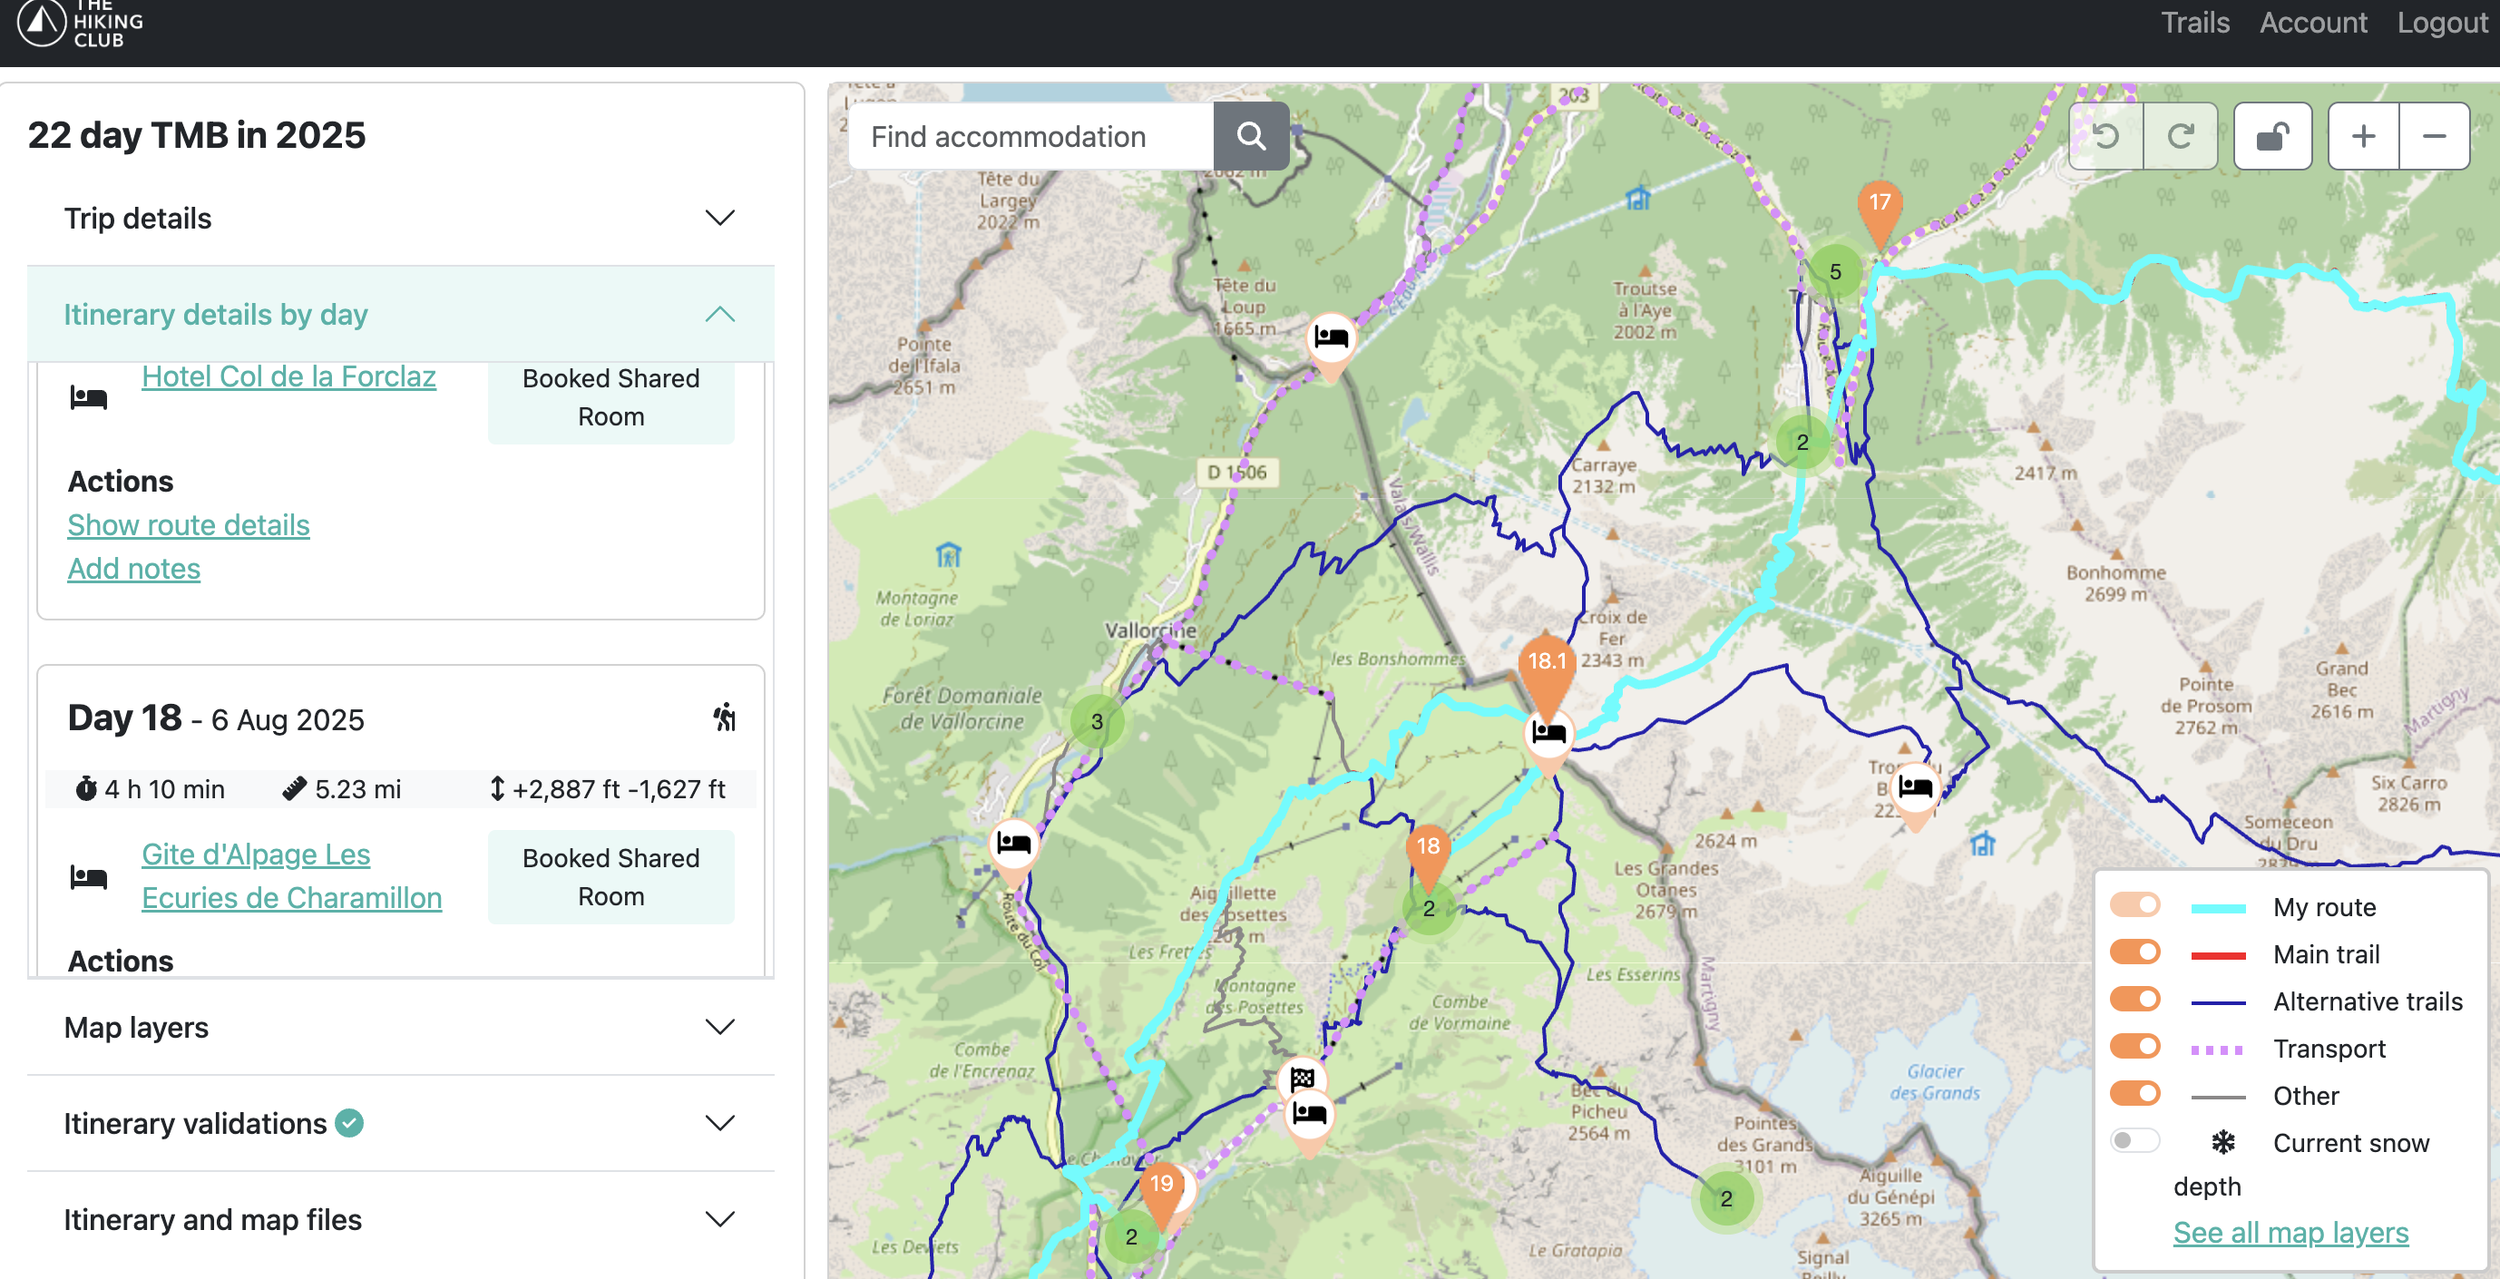
The only other time we had to alter our stopping location was Refuge du Col de Balme, on the north end of the loop. We couldn’t get a reservation there, but we did get into Gite d’Alpage Les Ecuries de Charamillon, which was less than 2 kilometers (a little more than a mile) off the trail, about 300 meters (1000 feet) below Col de Balme.
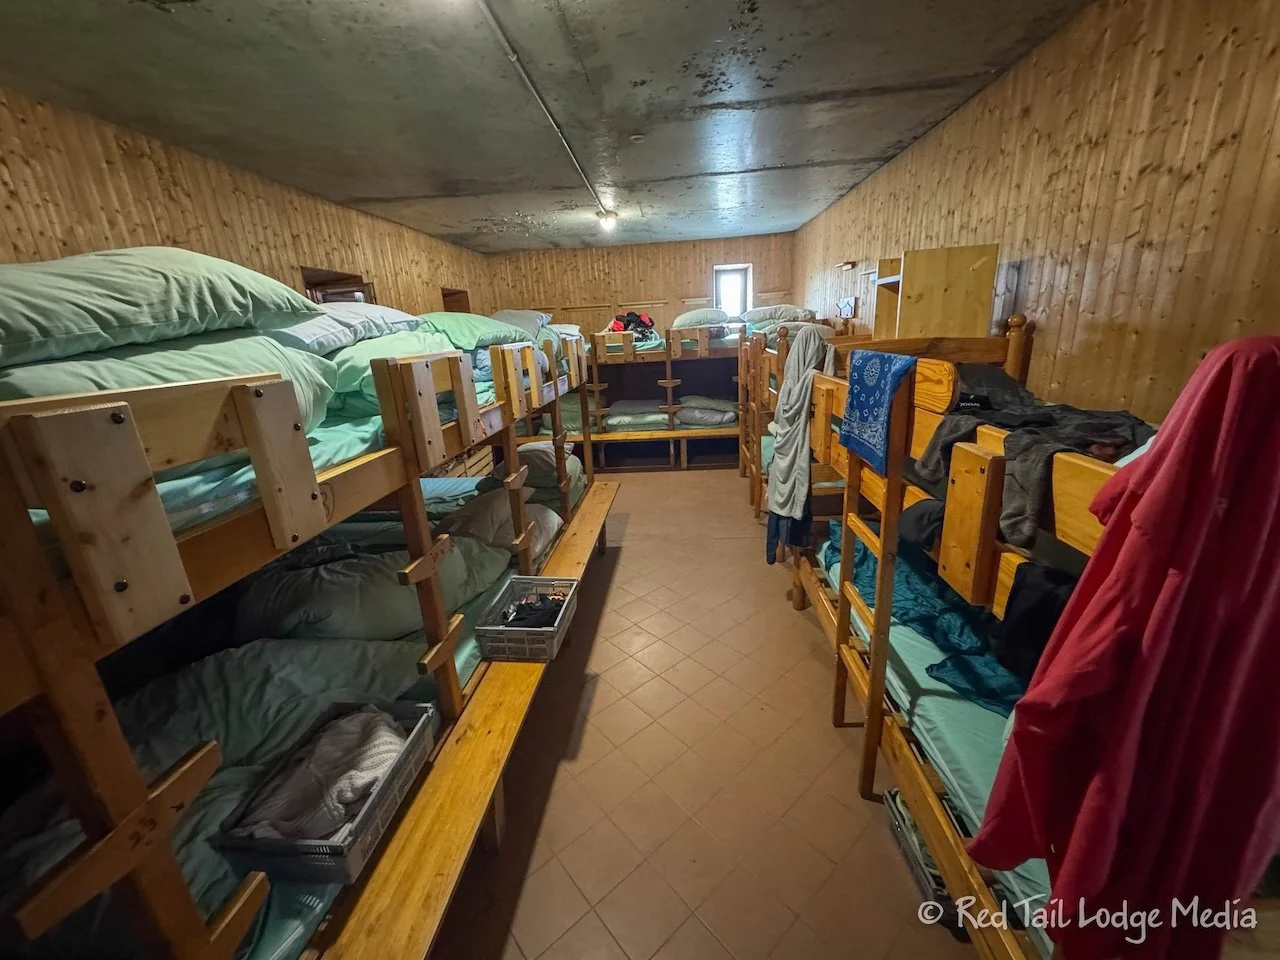
We booked private rooms where we could, followed by small shared rooms, and only booked dormitories when nothing else was available. Dormitories are usually the cheapest option, so look for those if you are on a tight budget. We traded money for more comfort. Even so, we still had seven nights reserved in dormitories.
We also booked half board (dinner and breakfast) whenever we could. We were able to secure half board for all of our reservations except for the hotels in Chamonix, Bourg-Saint Maurice, and Courmayeur (but they still had breakfast included with the room). That allowed us to not worry about where to get food most of the time, other than lunches and trail food for one day at a time.
Step 5: Plan ATM Stops
As the day approached for us to begin our hike, we planned out how much cash we needed. Some of the mountain huts required payments for lodging and/or food in cash. Others said they took credit cards, but may need to request cash if their internet connection was down due to weather conditions. We just planned on paying cash for all of the places that might request it. Then we also needed to have cash on hand for lunches, in case the places we stopped didn’t take credit cards.

We also needed to take into account that Switzerland uses Swiss francs instead of euros like France and Italy. However, we heard that most places along the TMB in Switzerland will accept euros, although not at a favorable exchange rate. So we tried to keep our Swiss francs to a minimum, favoring running out of francs and using euros to make up the difference over have francs leftover that we’d have to exchange back at some point.
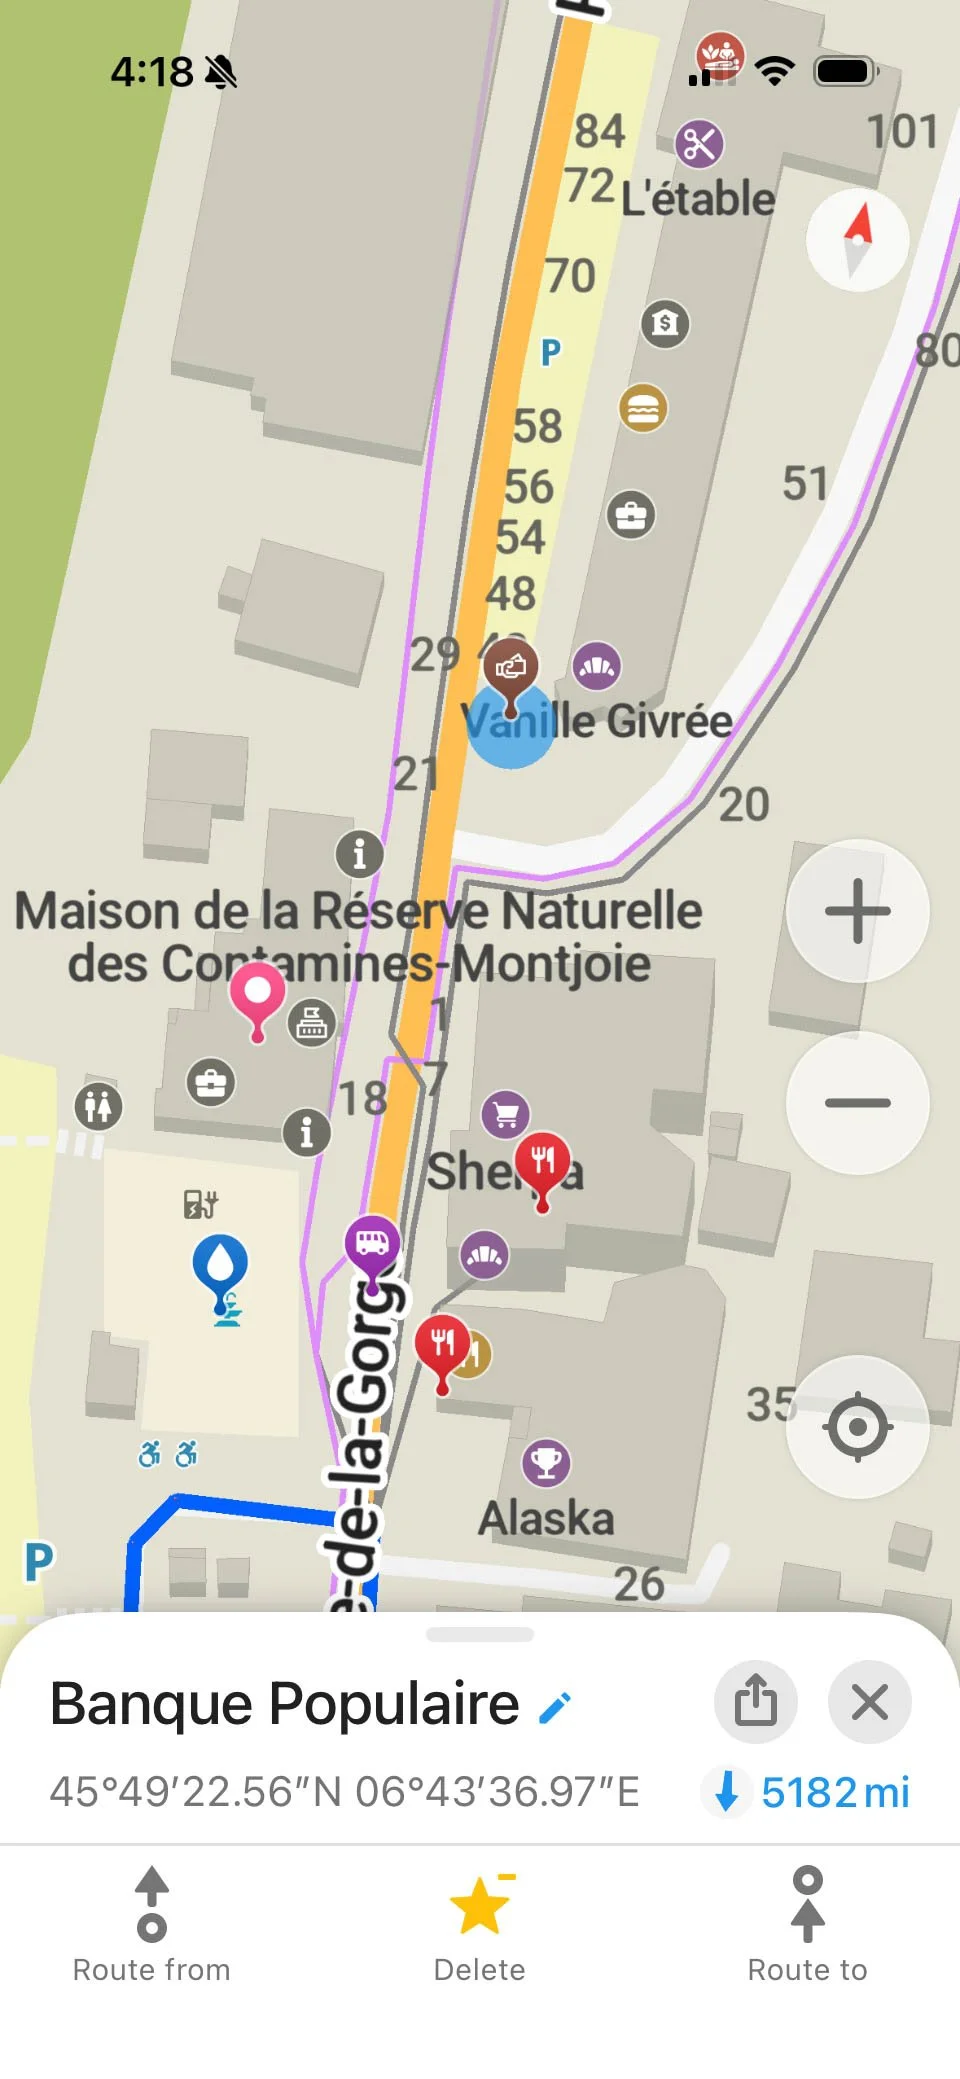
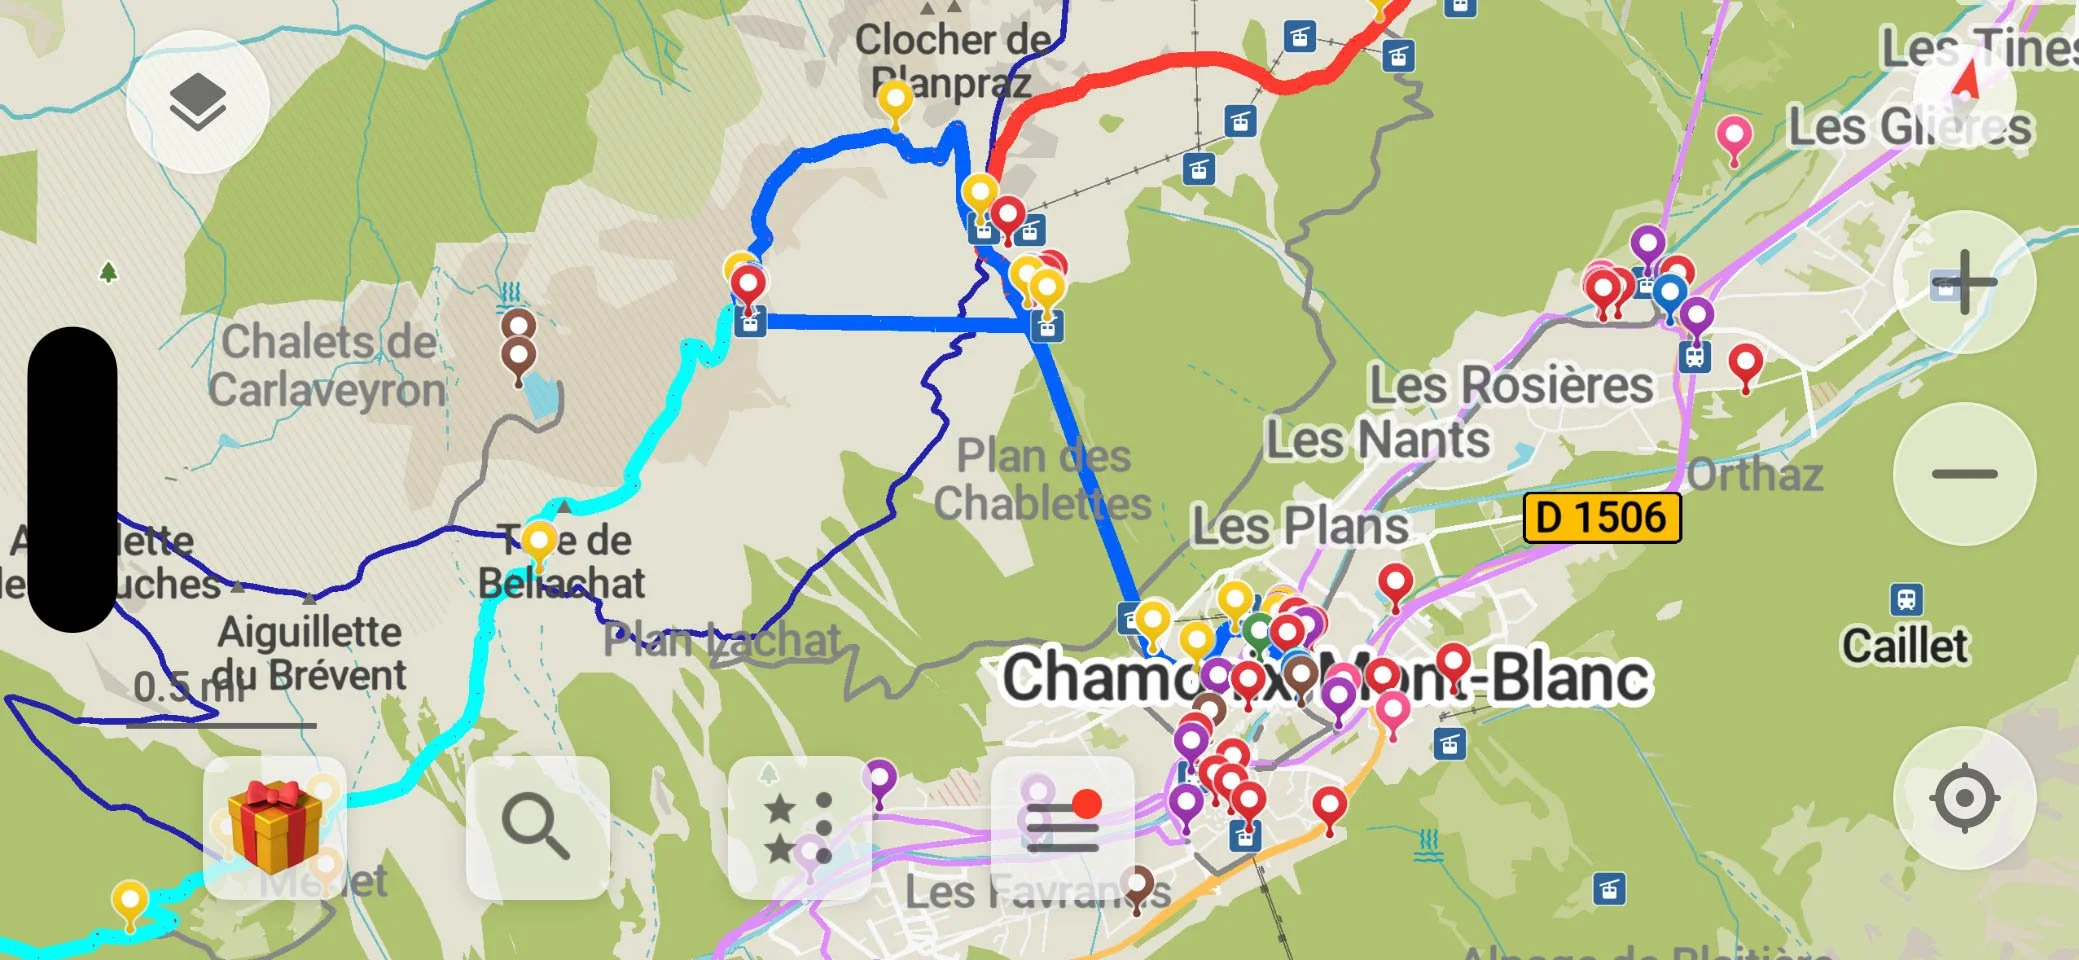
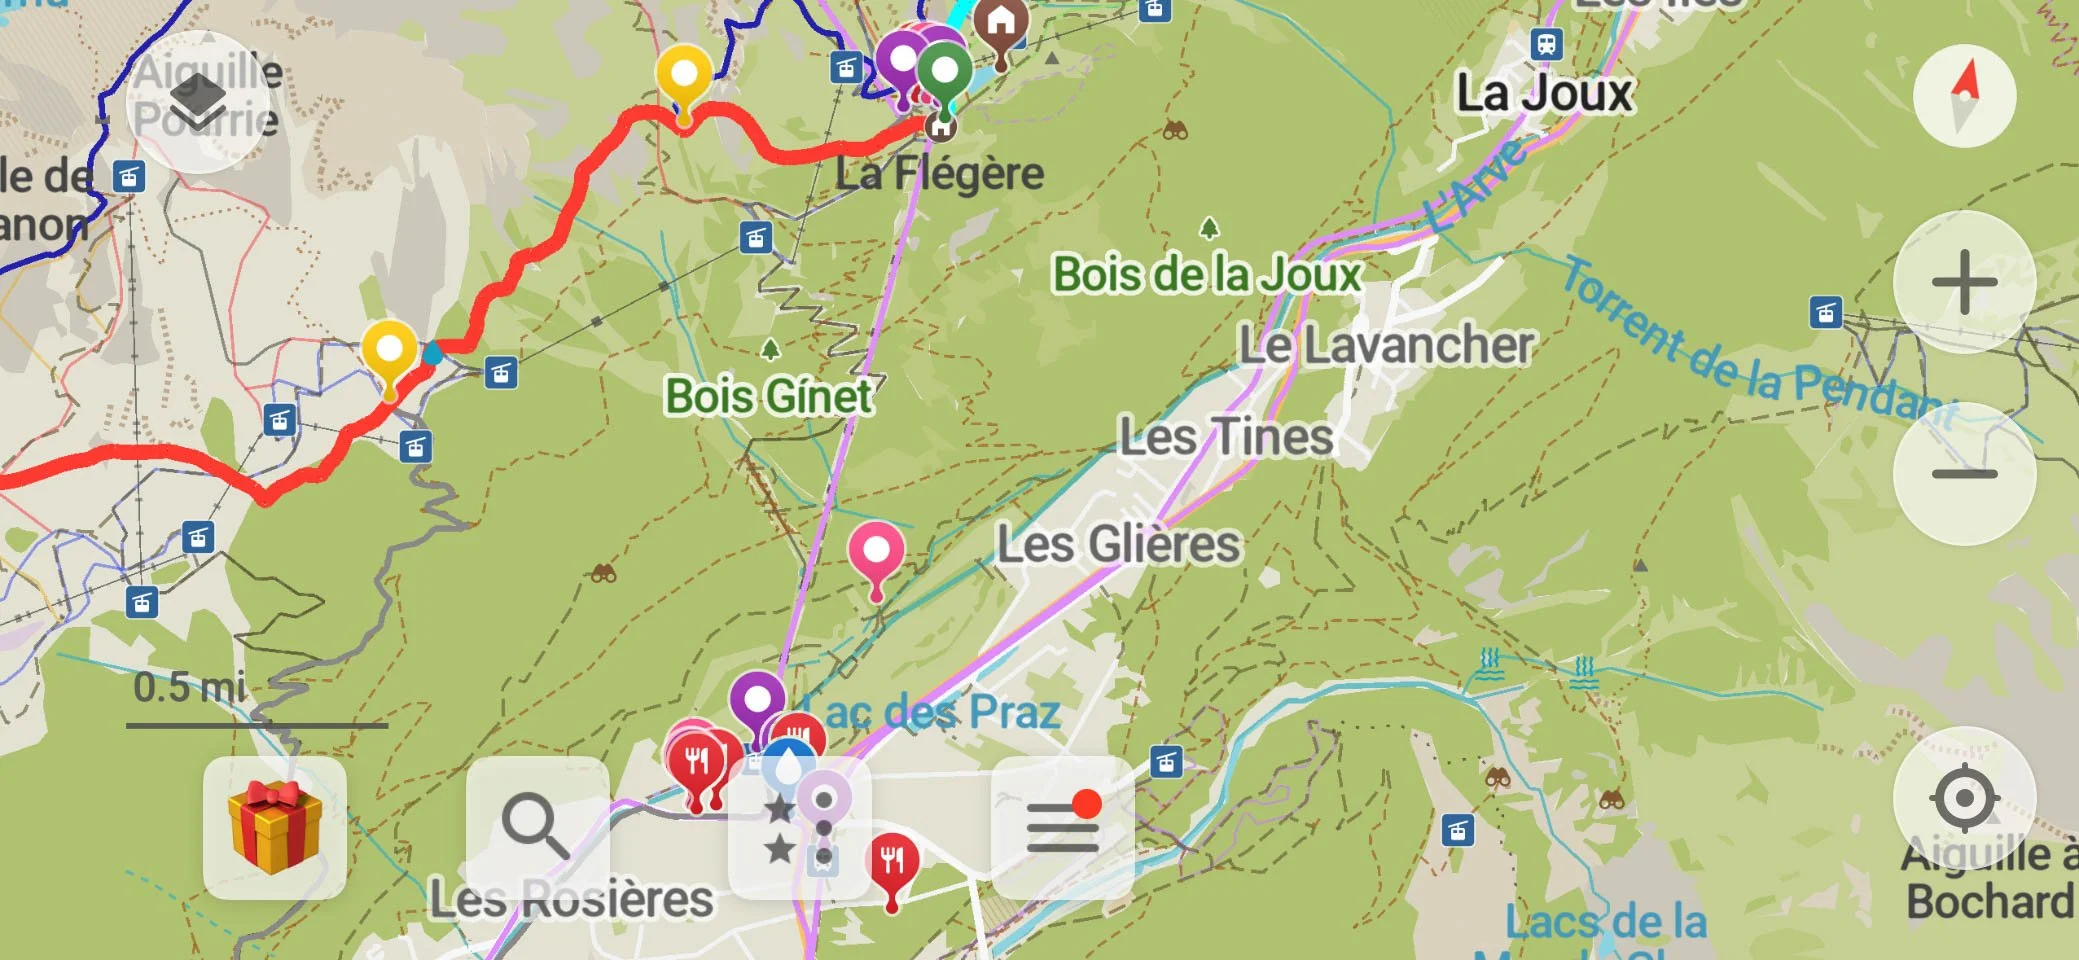
The amount of cash required turned out to be rather significant. In order not to carry a large amount of cash on us as we hiked, we planned where we could access ATM’s to replenish our supply. Thankfully, the Hiking Club Planning App came to the rescue yet again. We had downloaded the kml files (mapping files) for our planned TMB trip from the Hiking Club Planning App and loaded them into the Organic Maps app on our phones. The maps included the locations of ATM’s along our routes. There are not a lot of ATM’s along the trail. They are mostly in the towns, such as Courmayeur, La Fouly, and Champex Lac. We prefer the ATM’s associated with a bank, as opposed to a stand-alone ATM, as the exchange rates and fees are usually better at a bank.
Step 6: Plan Water and Lunch Stops

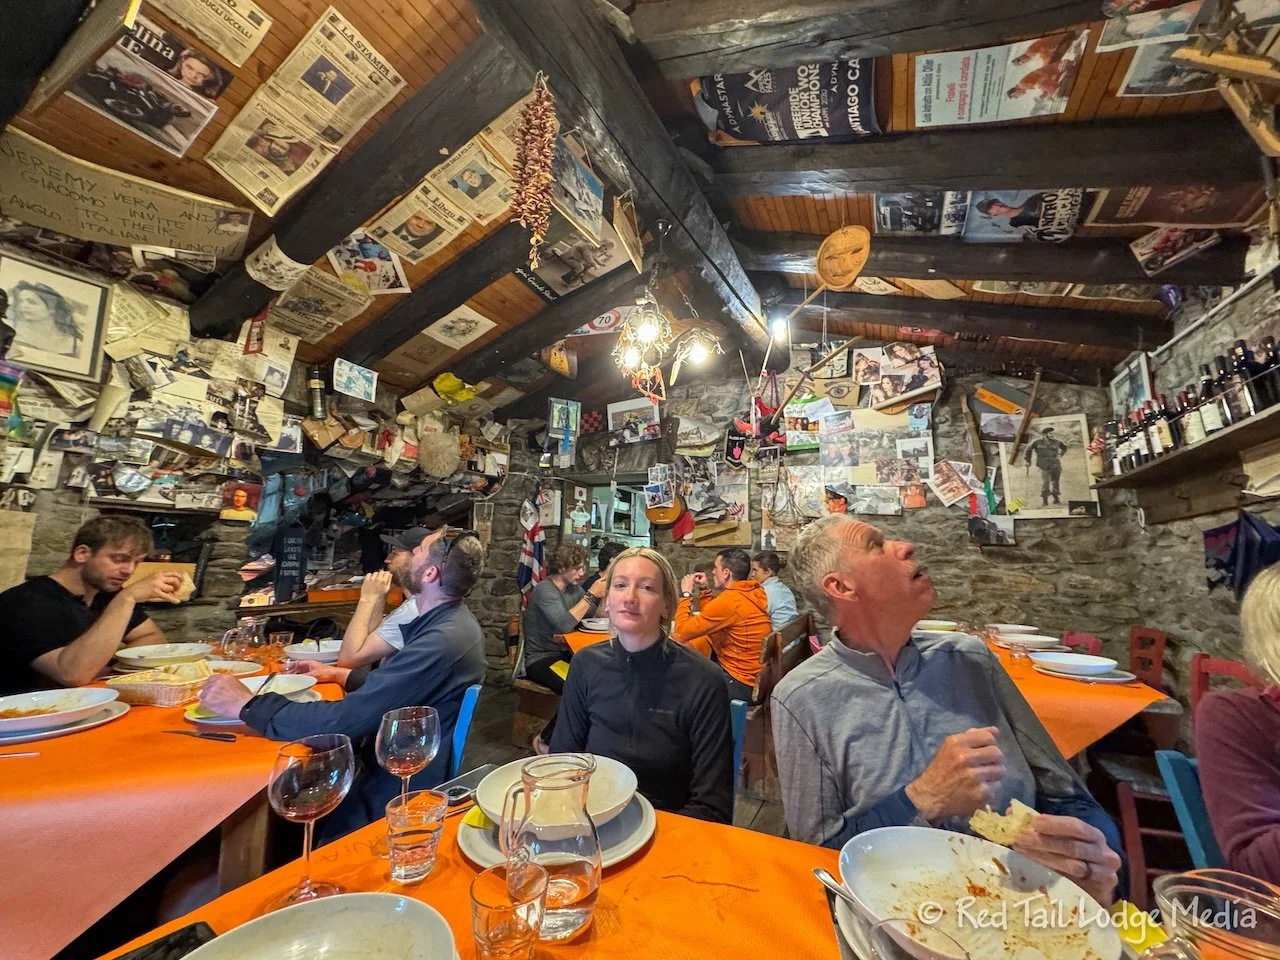
Each evening, we planned out our water and food stops for the next day or two. A couple of times, we bought the boxed lunch from our lodging stop to carry with us the following day. Most of the time, we planned out a lunch stop at a restaurant or mountain hut. As a back up, we always had trail food in our packs, such as granola bars, nuts, and Landjaeger (semi-dried sausage). It was a little tricky since most of the mountain huts and some of the restaurants had short lunch hours, such as noon to 2 pm. If you missed the time window when they were open, you were out-of-luck, as usually there were not many other options available. Even with some days, when we were hiking slower than planned, we managed to hit most of the lunch places when they were open, although sometimes just by a couple of minutes. There was one time we were caught by a mountain hut that was not open for lunch every day of the week and we happened to be there on a day it was closed. That’s when our trail food came in handy.
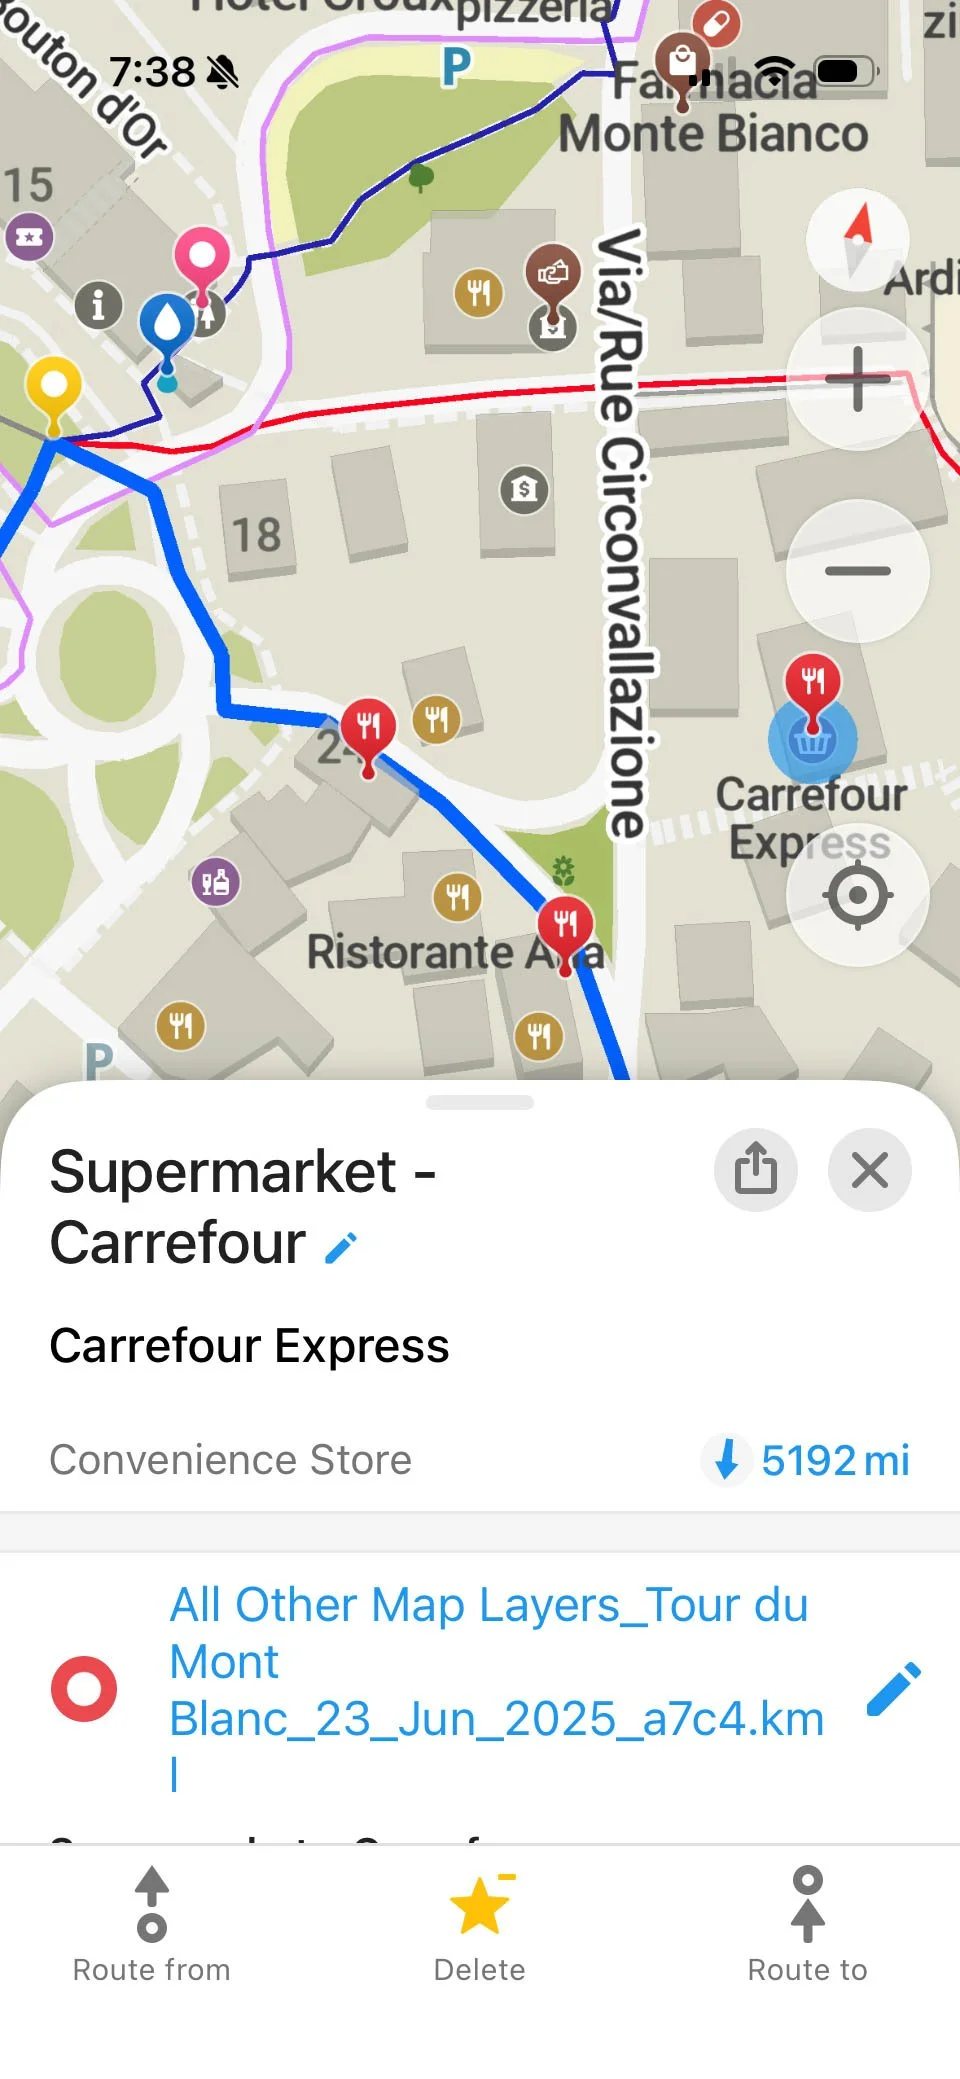
Again, our route in Organic Maps was very useful. It showed all of the restaurants, huts with food, grocery stores, bathrooms, and potable water sources. Sometimes the map would even have details like the open hours of a hut or restaurant. We stopped at grocery stores to replenish our trail food as needed.
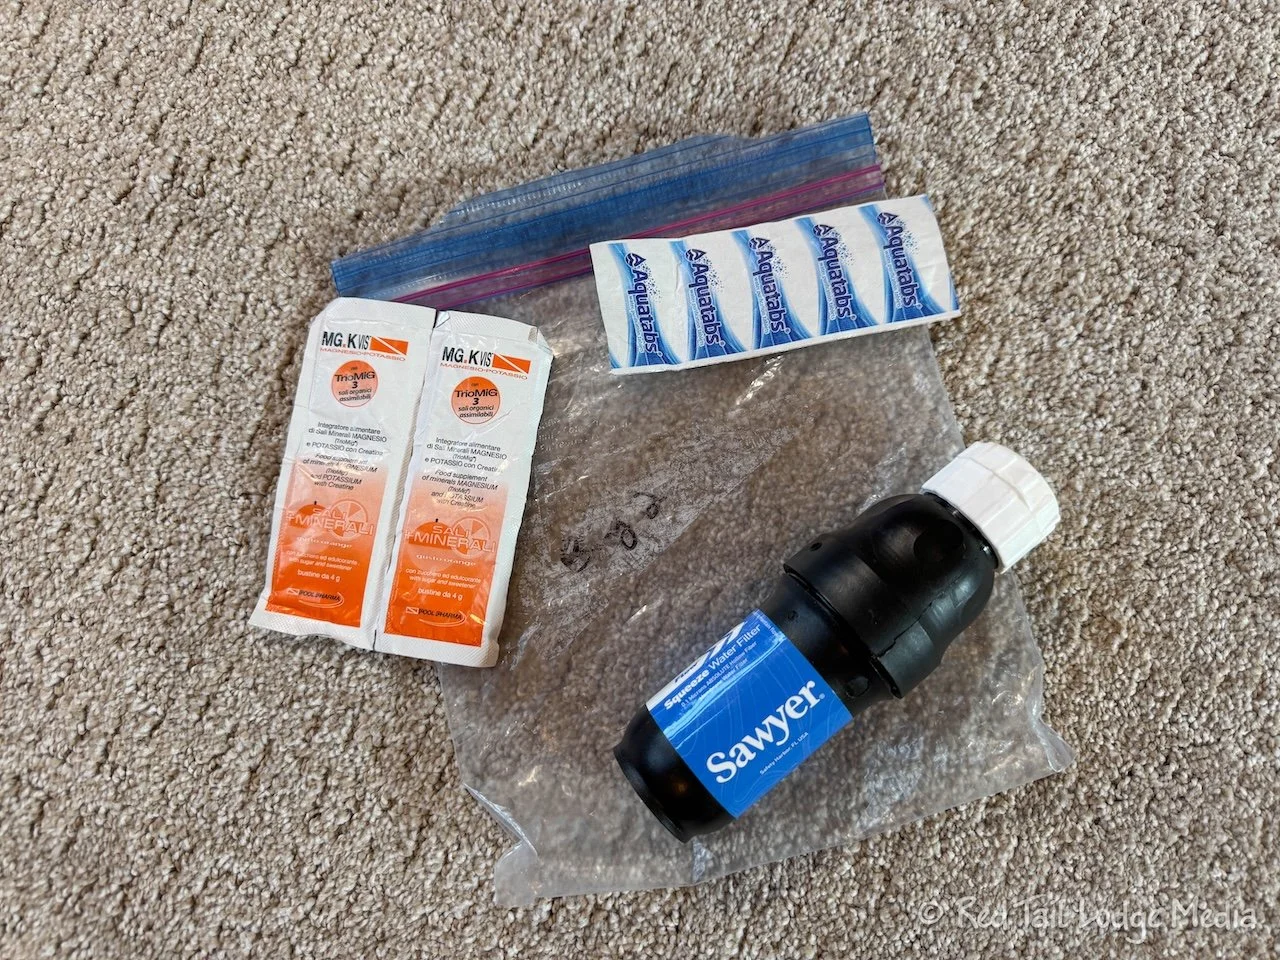
Even though we were carrying a water filter and water purification tablets, we never used them. We always stopped at the potable water sources and topped off our water bottles. But we still liked carrying the filter and tablets in case of an emergency. You never know when you may find yourself out on a trail longer than you expected, like in the case of an injury or getting lost.
Step 7: Change the Plan When Necessary

The TMB is a long trail. Things happen. People in your group may get sick or injured. The weather can make a route dangerous or impassable. Be prepared to change your plan.
We decided to make a change even before we started hiking. About a week or so before the start of the TMB, Ann came down with a bad cold. Even though she felt she was getting over it by the time we started, we decided two days before our start to alter our first day’s hike to give her more time to recover.
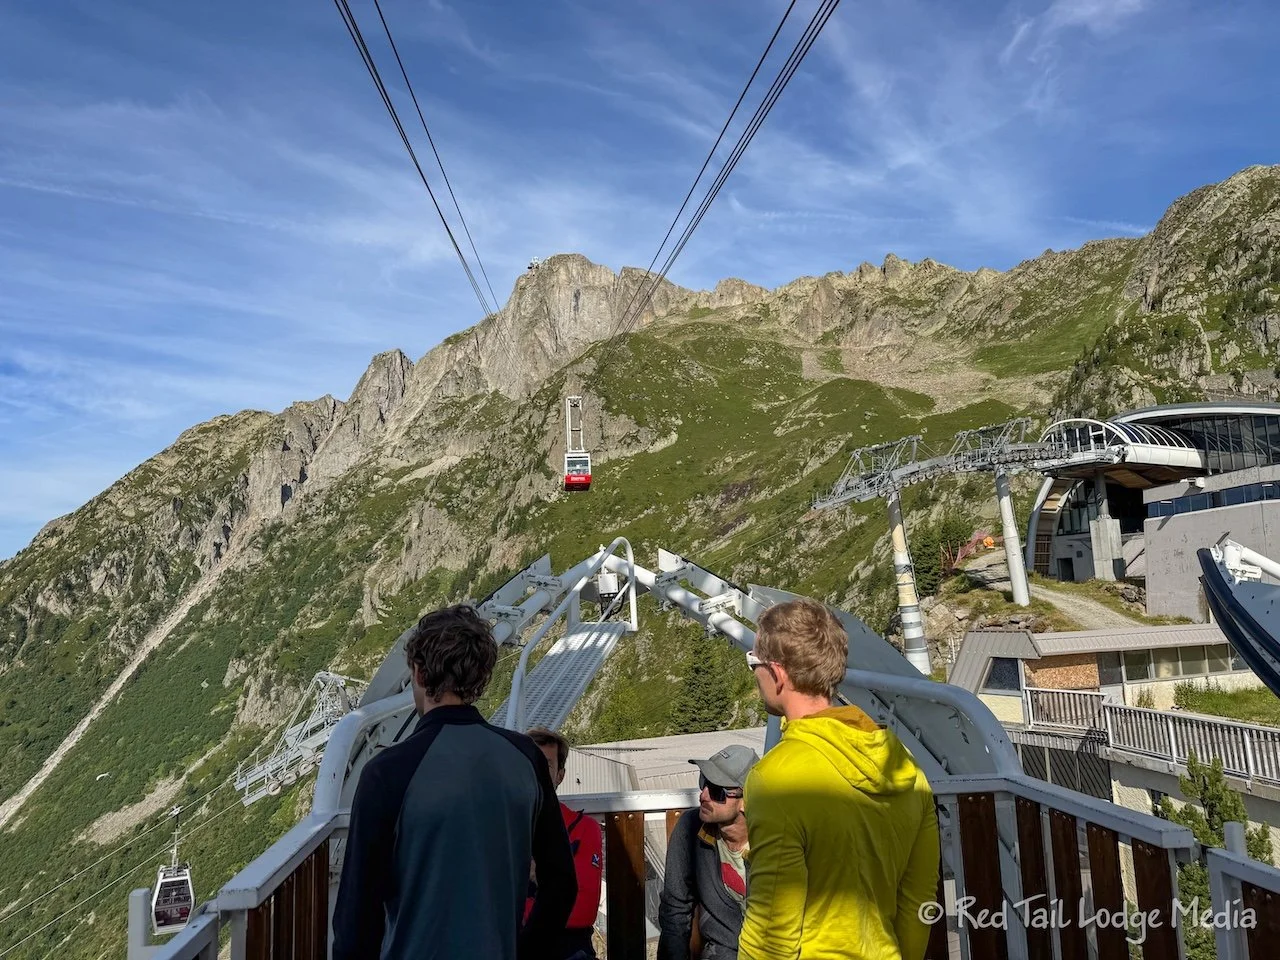
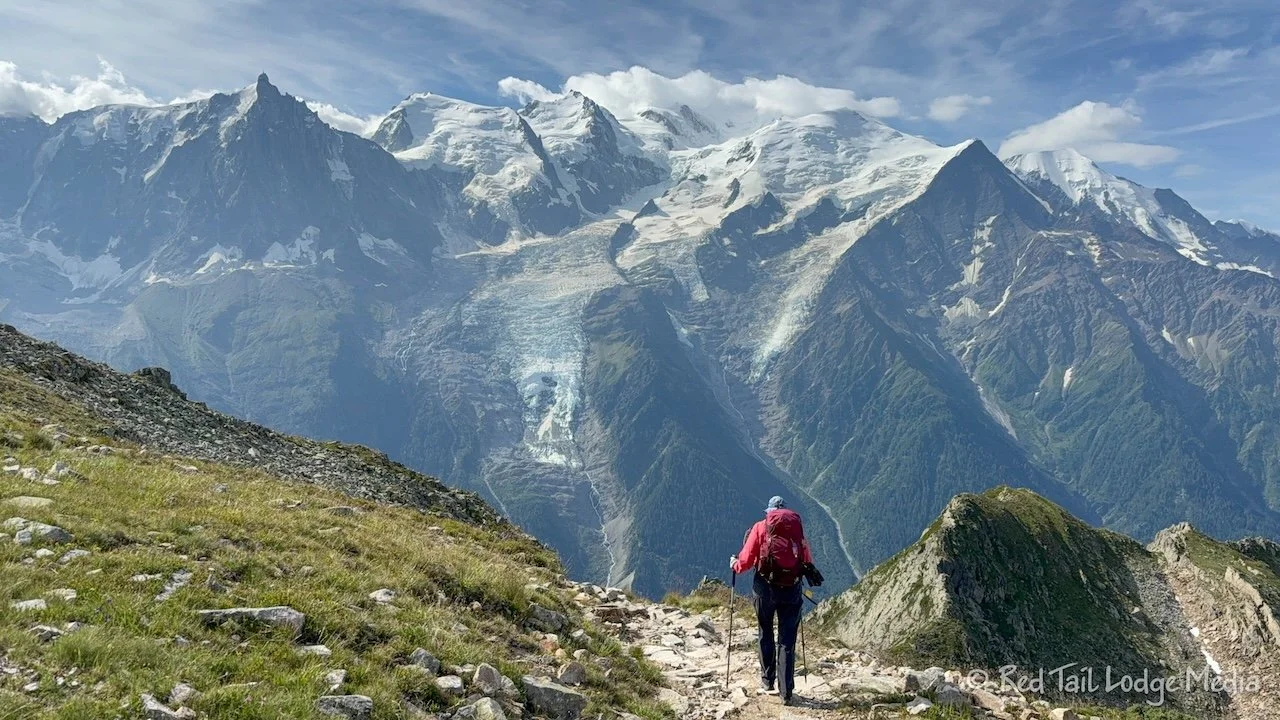
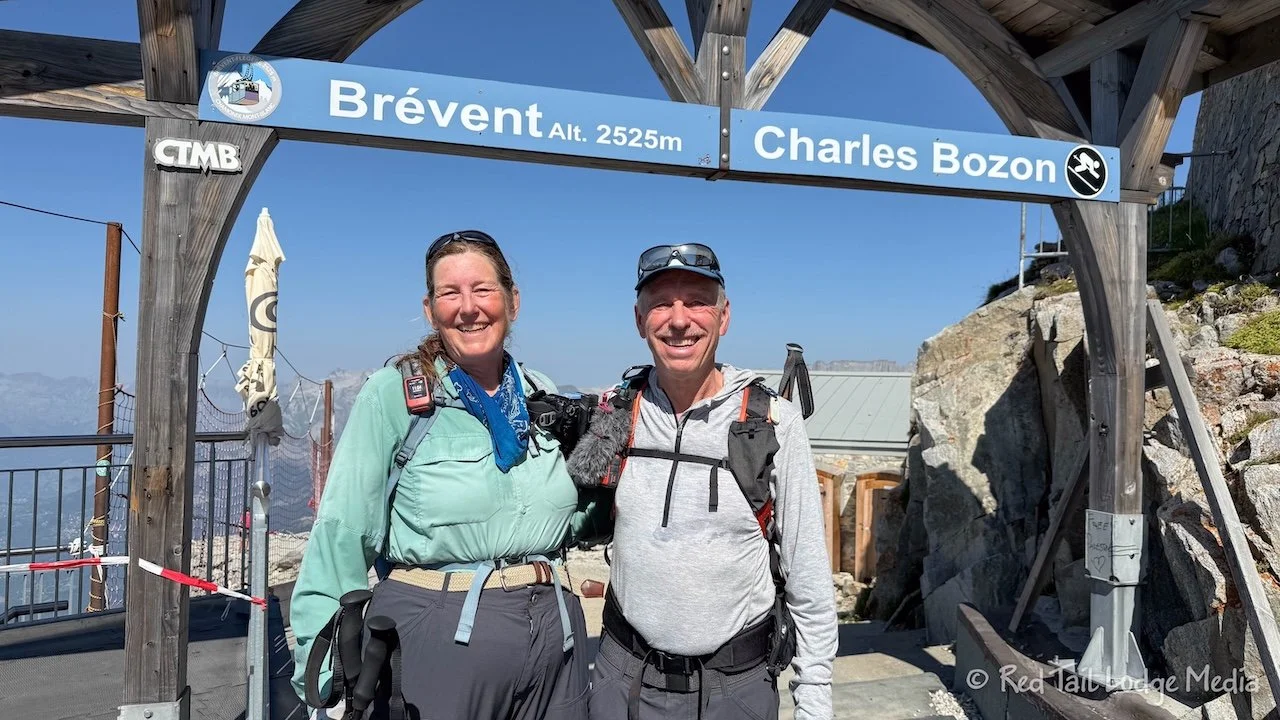
Our original plan was to hike from Plan Praz, at the top of the gondola from Chamonix, to Les Houches. It was about 14 kilometers (8.5 miles) with an elevation gain of around 600 meters (2000 feet) and an elevation loss of about 1500 meters (5000 feet). It was probably the hardest day of hiking we planned for the whole TMB. But there is another gondola that will take you from Plan Praz to Brévant. That cuts off about 3 kilometers (2 miles) and almost all of the elevation gain. Since we were staying a few days in Chamonix both before starting the TMB and after ending the TMB, we could skip that small section and hike it at the end, extending our hike from 21 days to 22 days. That sounded like a better plan.
But since the Hiking Club had made a change on their end to allow us to have 21 days instead of the normal 15 day limit in the Planning App, we couldn’t add another day in the app on our own. At 9 pm on a Friday, Ann sent an email to the Hiking Club. They responded 6 hours later at 3 am (1 pm on Saturday in Sydney, Australia). Not only did they make us a new itinerary with 22 days, but they already made the adjustments to our route and sent us the new kml map files. We were impressed. We know the Hiking Club is a small organization, so getting such a quick and thorough response was amazing. We want to give a big shout out to Brendan and anyone else at the Hiking Club that made that happen so quickly!
Unfortunately, the trail did not let Ann fully recover. Later on, we had to alter our hiking route a couple of days to an easier route because Ann was not physically able to safely tackle the official trail those days. Again, the other trail and transportation options were easy to find in the Planning App and the map files we had in the Organic Maps phone app.
It was hard not to feel like a failure. Here we were, taking the trail slower than anyone else we had ever heard of and we still couldn’t complete the main trail in the days planned. But we had to remind ourselves why we were hiking the trail. We still enjoyed the scenery and the wildlife. We still encircled Mont Blanc. We still met wonderful other hikers at the mountain huts. We still felt like we were challenging ourselves. We still had a wonderful adventure. We still felt like we experienced the TMB. Life rarely goes perfectly according to our plans. Try to be mentally prepared for changes while you are on the TMB.
Conclusion

A phrase that we’ve heard many hikers say before is “Hike your own hike”. That advice is what we want to pass along to you. It doesn’t matter how fast or slow someone else hikes the TMB. What matters is what you want from the trail and plan accordingly, to your priorities. We hope that this post will help you plan your TMB adventure. Happy trails!
Check out our related video: Planning for the Tour du Mont Blanc
(Ann)